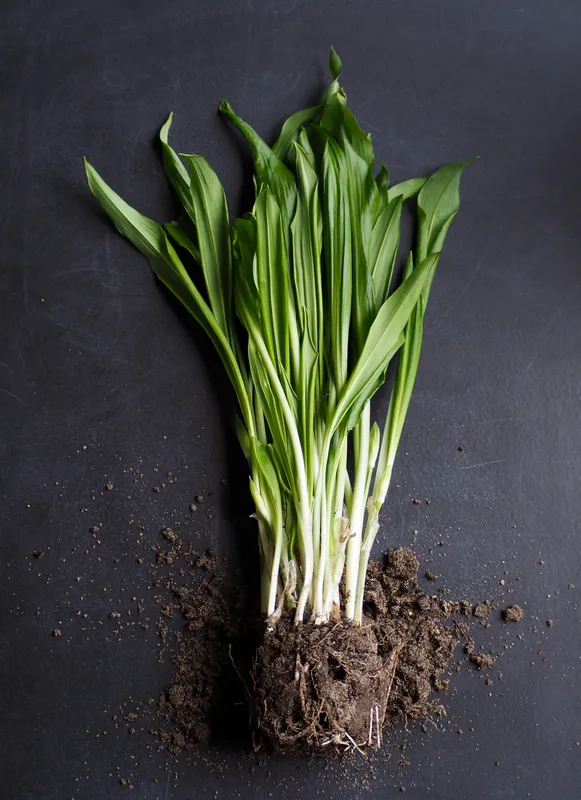
A lemongrass stalk is not a stem cutting in the usual houseplant sense. New roots and shoots must come from living tissue at its broadened base. If that basal plate was trimmed away before the stalk reached a grocery shelf, no amount of fresh water will turn it into a plant. Understanding that one piece of anatomy prevents the most common failed start.
Once rooted, lemongrass behaves as a clump-forming tropical grass. New shoots arise around the crown, gradually turning one slip into a wide, heavy plant. Container growing works because that clump can be moved away from frost, not because lemongrass naturally thrives as a small windowsill herb. Most of the useful growth still happens outdoors in warm, bright weather.
Start with the part that can make a new plant
The clearest starting material is a nursery plant or rooted division sold under a culinary name. The University of Wisconsin–Madison Division of Extension identifies West Indian lemongrass, Cymbopogon citratus, as the species more commonly used in cooking and East Indian lemongrass, C. flexuosus, as another culinary species. It distinguishes citronella grass, C. nardus, which is grown for citronella oil.
A citrus scent and a grassy leaf do not establish edibility. Look for the botanical name on a nursery label or seed packet, especially when “citronella” or “mosquito plant” appears in the display. Do not harvest an unidentified ornamental grass.
A rooted division offers both known identity and a head start. It should have live roots, firm pale basal tissue, and no soft decay or sour odor. University of Guam Land Grant describes division as the main propagation method: a rooted slip is separated from a clump and established in moist potting soil. Seed is possible when the packet identifies a culinary species, but a seedling takes longer to build the thick base expected for cooking.
Make a grocery stalk prove that it is viable
Wisconsin Extension notes that grocery-store stalks may root if enough of the root plate remains. Treat them as an experiment, not as guaranteed planting stock. Select several firm stalks whose bases are intact, slightly broadened, and neither hollow nor deeply dried. Reject slimy or moldy pieces.
Remove loose damaged tissue without cutting into the basal plate. Stand only the bottom of each stalk in a shallow level of clean water, leaving most of the stalk exposed to air. Rinse the container and replace cloudy water. Discard any base that softens, darkens internally, or develops an unpleasant smell.
Roots commonly appear within two or three weeks when a viable stalk responds, according to Wisconsin Extension. Pot only the pieces that produce healthy roots and active growth from the center. A stalk that remains unchanged beyond that observation period is not helped by fertilizer in the water. Even a successful grocery start has an unknown cultivar and production history, so a labeled plant remains the better choice when identity and timing matter.
A clump needs width as much as depth
The container must accommodate outward expansion and tall foliage. Begin with a pot somewhat wider than the existing roots, with enough depth for stability and unobstructed drainage holes. Do not put one newly rooted stalk into an enormous volume of wet mix. Increase the space as the plant develops, or begin with several established rooted slips when a fuller clump is the goal.
Fresh commercial container mix provides a more predictable balance of moisture and air than dense yard soil. University of Illinois Extension recommends prepared mix, ample drainage, and moist soil while warning against the overwatering that can lead to root rot. Set each rooted base at roughly its former depth rather than burying a long length of green tissue.
After planting, water slowly over the entire surface and let the excess leave the holes. Empty the saucer. Keeping some open space below the rim makes a full watering possible without washing mix over the edge.
A mature clump may push upward, shed water down the pot wall, or become difficult to lift. Those signs justify checking the roots. Guam’s guidance recommends division or root pruning for a root-bound container plant. A single root appearing at a drainage hole does not require immediate work; a dense circling mass and a pot that no longer wets evenly are stronger evidence.
Warm-season growth does the productive work
Utah State University Extension describes lemongrass as a tender perennial that prefers warm conditions, full sun, and ample moisture. Where frost occurs, gardeners commonly grow it as an annual or save a plant indoors. That seasonal description is more useful than treating indoor and outdoor care as equivalent.
Wait until frost danger has passed and local nights are reliably warm before setting the plant outside. A plant raised indoors needs a gradual introduction to sun and wind. Begin in a protected bright position, increase direct exposure over several days, and watch the existing blades for bleaching. Established growth may tolerate full sun even when older indoor leaves were damaged by an abrupt move.
Choose the final location for both light and access. A sunny pot that is awkward to water will become difficult once a large clump begins using moisture quickly. Prevent repeated tipping in strong wind, and remember that paving or a wall can increase heat around the container. Slow growth during cool weather and rapid expansion during summer heat are normal expressions of a tropical grass.
Fertilizer supports that active phase but does not create it. Check whether the mix contains starter nutrients, then follow the measured directions on a product labeled for edible container crops. Reduce or stop feeding when cool temperatures or weak indoor light have slowed growth.
Water the root mass, not the visible stalks
An established lemongrass clump can use substantial water in summer, yet its roots still need air. Feel below the surface or use a wooden skewer to judge the upper root zone. When it has begun to dry, water the entire pot until drainage appears. Do not leave the base standing in runoff.
The interval is controlled by conditions. Heat, moving air, leaf area, pot material, and crowded roots all accelerate drying. The University of Guam guide notes that outdoor containers can need frequent water during hot, windy weather. The same pot indoors during a cloudy winter week may stay moist for much longer.
This is why the appearance of a brown tip is not enough to diagnose thirst. Root stress from prolonged saturation, a dry pocket inside a crowded root ball, cold exposure, salt accumulation, and physical leaf damage can overlap. Check how deeply water penetrates and how long the pot remains wet before changing the routine.
Decide the winter outcome while there is still a crop
Frost can destroy the foliage, so do not wait for a freeze warning to discover that the container is too large to move. Choose one of three outcomes in advance:
- Move the whole pot indoors and preserve the established clump.
- Divide off a healthy rooted section for winter and harvest the remainder.
- Treat the crop as an annual, harvest before frost, and start again next year.
Whichever option fits, inspect both sides of the leaf blades and the tight spaces around the bases before anything enters the house. Utah State notes that spider mites can become troublesome indoors. Pale stippling and fine webbing call for close identification, not an automatic spray. Remove dead blades and keep the newcomer separate from other houseplants during observation.
Indoors, place the saved plant in the strongest suitable light without pressing leaves against cold glass. University of Illinois Extension’s indoor herb guidance identifies limited light and low humidity as important winter constraints and warns that growth is slower than it is outdoors. A correctly positioned grow light can help; the houseplant grow-light guide explains why fixture output and placement must be considered together.
As leaf production slows, let the pot approach watering more gradually and pause routine feeding. The winter objective is a living crown and sound roots. Expecting thick new stalks through the darkest months encourages exactly the extra water and fertilizer the plant is least able to use.
Harvest from the outside toward the active center
Wait until the clump is established and has firm outer stalks worth using. Older shoots on the perimeter are the first candidates. Grasp one near the base and pull it away from the clump, or cut it close to soil level with a clean knife. Keep the central growing points intact so younger shoots can continue developing.
Lemongrass blades can have sharp margins, so gloves and sleeves may make a dense clump easier to handle. Peel away dry or damaged outer layers after cutting. The pale, tender lower section is the principal cooking portion. Clean leaves and tougher stalk sections can flavor a simmered dish or infusion and then be removed rather than chewed.
Harvesting from the outside preserves the architecture of the plant. Cutting straight through the crown is faster, but it sacrifices developing shoots and makes the remaining clump harder to manage. Division is the better operation when the aim is to reduce the whole plant rather than collect dinner.
The crop stays edible only if its care does
Use fertilizers and pest controls whose labels allow the crop, growing location, and intended harvest interval. “Natural” describes a source, not a complete food-safety assessment. When an unknown product has been applied or the grass’s identity is uncertain, do not eat it.
Keep harvested stalks away from potting mix, pet waste, raw meat, and dirty tools. Following U.S. Food and Drug Administration produce guidance, wash your hands, trim damaged tissue, and rinse each stalk thoroughly beneath running water. Do not use soap, detergent, or commercial produce wash.
The useful mental picture is a crown that expands during summer, not a decorative stalk that happens to sit in water. Protect the living base when propagating, give the clump horizontal room, take mature stalks from the outside, and choose its winter fate before frost. Container ginger stores growth underground in a different way, while the indoor herb garden guide covers smaller crops that are more naturally matched to an indoor shelf.
Sources
- Lemongrass, Cymbopogon spp. (University of Wisconsin–Madison Division of Extension). Accessed August 25, 2026.
- How to Grow Lemongrass in Your Garden (Utah State University Extension). Accessed August 25, 2026.
- Lemon Grass (University of Illinois Extension). Accessed August 25, 2026.
- Lemongrass (University of Guam Land Grant). Accessed August 25, 2026.
- Keep growing with herbs indoors this fall, winter (University of Illinois Extension). Accessed August 25, 2026.
- Selecting and Serving Produce Safely (U.S. Food and Drug Administration). Accessed August 25, 2026.