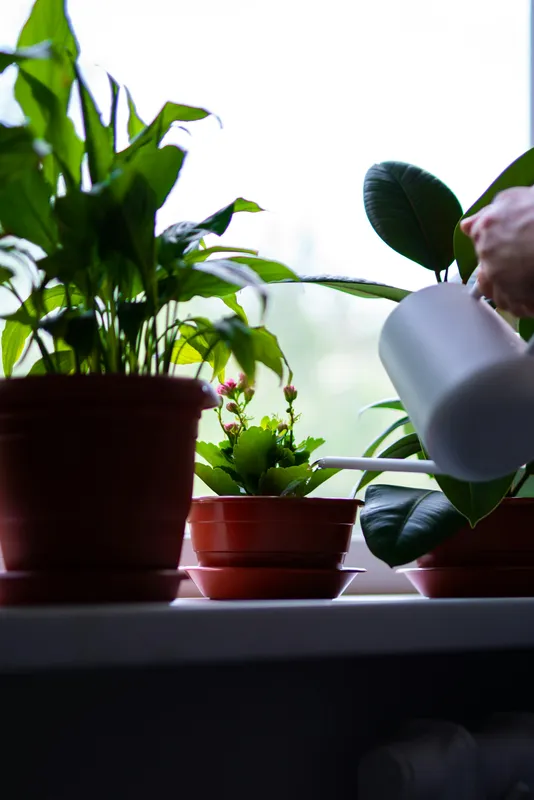
Bottom watering is a delivery method: a pot with drainage holes stands briefly in shallow water while its potting mix absorbs moisture from below. The pot is then removed and allowed to drain. It can be useful when dry mix resists water poured onto the surface, when foliage should remain dry, or when a small pot is easy to move and monitor.
It is not a separate watering schedule, a cure for poor drainage, or proof that a plant cannot be overwatered. The decision to water still begins with the plant and its root-zone moisture. A bottom-watered pot can remain saturated for too long just as a top-watered pot can.
With this soak-and-drain method, you remove the pot from the water after the mix has absorbed enough moisture. If your planter uses a reservoir or wick, follow the self-watering pot guide instead.
Check whether the plant needs water
Do not place every plant in a basin because a calendar reminder appeared. First check the mix below the surface, the pot’s weight, recent light and temperature, and the species’ moisture needs. University of California Agriculture and Natural Resources recommends assessing moisture and watering according to each plant rather than using one universal interval.
Bottom watering is reasonable when all of these conditions are true:
- The inner pot has open drainage holes in direct contact with the basin water.
- The potting mix can wick water and has not collapsed into a dense, airless mass.
- The plant actually needs water at root depth.
- The container can be lifted, monitored, drained, and returned safely.
Choose another approach when the pot has no drainage, is too heavy to move safely, contains a bark-heavy medium that does not wick evenly, or already feels wet deep in the root zone. A plant in a sealed decorative container needs a draining nursery pot inside it; standing water hidden in the outer pot is not bottom watering.
What the method can and cannot do
Water moves into connected pores in the mix, so a shallow basin can rewet material from below. This can help when top watering runs down a gap between a shrunken root ball and the pot wall.
The method does not let a plant “drink only what it needs.” Potting mix can retain more water than stressed roots can use. Duration, pore structure, container size, and starting dryness all influence the result.
Bottom watering also does not guarantee:
- prevention of overwatering or root rot;
- stronger or deeper roots;
- complete wetting through the center of every root ball;
- removal of fertilizer or water-source salts;
- prevention or treatment of fungus gnats; or
- suitability for every plant or potting medium.
If gnats are already present, treat moisture management as one part of identification and control rather than assigning the watering direction magical properties. The fungus gnat guide covers their life cycle and evidence-based controls.
Prepare the pot and basin
Use a clean basin, tray, or sink large enough to hold the pot without tipping. Confirm that the pot’s holes are unobstructed. If it sits inside a cachepot, remove the inner pot first and check the outer container for old runoff.
Use plain water appropriate for the plant. Do not add fertilizer, pesticide, soap, hydrogen peroxide, or a household remedy to a communal soak unless a product label explicitly directs that application. Medication-by-basin can expose multiple plants to the wrong concentration and spread contaminated debris.
Place only enough water in the basin to reach the lower portion of the pot. Virginia Cooperative Extension describes standing pots in roughly two to three inches of water and checking them after about 15 to 30 minutes. Treat those figures as a monitored starting point, not a promise: a small porous pot and a large glazed pot will not wet at the same rate.
Bottom-water step by step
- Confirm the need. Probe the mix at an appropriate depth or compare the pot’s weight with its known freshly watered weight. If it is still moist enough for that plant, stop.
- Fill a clean basin shallowly. The water must contact the drainage openings without submerging the crown, leaf bases, or most of the pot.
- Set in one compatible pot. If several pots share water, inspect them for pests, decay, algae, and spilled mix first. Separate questionable plants.
- Watch the level. Add a little water only if the basin empties while the mix is still dry. Do not leave the setup unattended.
- Check progress. Feel the mix below the surface, use a wooden skewer where appropriate, and watch for the pot to become heavier. The top does not need to become swampy.
- Remove promptly. Lift the pot when the root zone is adequately moistened. A rigid time limit cannot replace checking the actual pot.
- Drain completely. Hold or set the pot over a sink, rack, or empty tray until active dripping stops.
- Empty all runoff. Return the plant only after its saucer or cachepot is dry.
University of Missouri Extension describes bottom watering as one way to moisten the root ball but also emphasizes thorough drainage and avoiding prolonged standing water. The essential sequence is soak, assess, remove, and drain. Do not soak and forget.
If the top stays dry
A slightly dry surface does not automatically mean the root zone failed to wet. Check deeper. If the entire upper portion remains dusty while the pot is much heavier, the lower mix may be saturated and the upper profile poorly connected.
Repeated failure to wick upward can indicate:
- potting mix that has pulled away from the container wall;
- a dense or heavily root-bound core;
- large bark pieces or other media with weak capillary continuity;
- blocked or poorly positioned drainage holes; or
- a decorative saucer that prevents water from reaching the holes.
One careful top watering may rewet the profile more evenly. If water still bypasses the center, inspect the root ball and consider whether fresh mix or repotting is needed. Repeatedly lengthening the soak can waterlog the bottom before the center is corrected.
Alternate with top watering to manage salts
Bottom watering does not rinse dissolved salts down and out. Water evaporates or is used by the plant, while some minerals from fertilizer and source water remain behind. Over time, deposits may appear as pale crust on the medium or pot rim.
Washington State University Extension advises applying enough water that some drains from the bottom and periodically leaching accumulated salts. That requires top watering: move the pot to a sink or protected area, pour water evenly across the mix, and let the drainage carry dissolved salts away.
Colorado State University Extension explains that effective leaching depends on water moving through the potting mix and out of the container. Discard the runoff rather than allowing the pot to reabsorb it. Do not attempt to leach a container with no outlet.
There is no universal “every fourth watering” rule. Deposit rate changes with water chemistry, fertilizer use, evaporation, and the plant. Inspect the surface and rim, follow fertilizer labels, and include periodic thorough top watering before a severe crust forms.
Visible deposits are a reason to investigate, not to diagnose from appearance alone. University of Maryland Extension notes that mineral and fertilizer salts can collect on containers and media and recommends reducing the source and leaching when appropriate. The houseplant water-quality guide explains how to interpret source-water reports and salt accumulation without turning every brown tip into a water diagnosis.
Hygiene when several plants share a basin
A shared basin can move debris and potentially pests or pathogens between pots. Keep plants with pests, decay, or unexplained decline separate, and handle new plants, propagation trays, and edible crops in separate batches. Remove each healthy pot when its own root zone is moist, refresh dirty water between batches, and clean the basin afterward.
Troubleshoot the result
| Observation | Likely issue to check | Next step |
|---|---|---|
| Pot remains very light | Water is not contacting holes or mix does not wick | Reposition the pot; test one careful top watering |
| Bottom is soaked but center is dry | Disconnected, compacted, or root-bound mix | Inspect the root ball rather than extending every soak |
| Pot stays heavy for many days | Too much retained water, low use, or poor aeration | Pause watering; assess light, temperature, mix, and roots |
| White crust returns quickly | Fertilizer or source-water salts are accumulating | Review inputs and leach from the top when appropriate |
| Leaves decline despite correct moisture | Water delivery may not be the cause | Check roots, light, temperature, pests, and species needs |
Persistent saturation, soft leaf bases, or collapsing roots calls for diagnosis, not another watering-method experiment. Use the root-rot guide if the root zone stays wet and the plant is losing firmness.
Season also matters because indoor light, temperature, and plant water use change. The winter watering guide explains how to reassess cadence without prescribing a fixed seasonal schedule.
A safe routine
- Check the root zone before choosing to water.
- Use only a pot with working drainage holes.
- Keep the basin shallow and the soak supervised.
- Remove each pot according to its own moisture, not a universal timer.
- Let runoff escape fully and empty the cachepot.
- Top-water periodically so drainage can carry salts out.
- Keep unhealthy or newly isolated plants out of shared water.
- Reassess the mix if it will not wick or remains wet too long.
Bottom watering is useful when it solves a specific delivery problem and the pot can drain afterward. Used alongside periodic top watering and direct moisture checks, it becomes one option in a flexible routine. It is not a guarantee against overwatering, pests, or root disease.
Sources
- Watering Indoor Plants (Virginia Cooperative Extension). Accessed August 25, 2026.
- PNW Gardeners Handbook: Houseplants (Washington State University Extension). Accessed August 25, 2026.
- Caring for Houseplants (University of Missouri Extension). Accessed August 25, 2026.
- Leaching Salts from Potting Mixes (Colorado State University Extension). Accessed August 25, 2026.
- Watering Your Houseplants (University of California Agriculture and Natural Resources). Accessed August 25, 2026.
- Mineral and Fertilizer Salt Deposits on Indoor Plants (University of Maryland Extension). Accessed August 25, 2026.