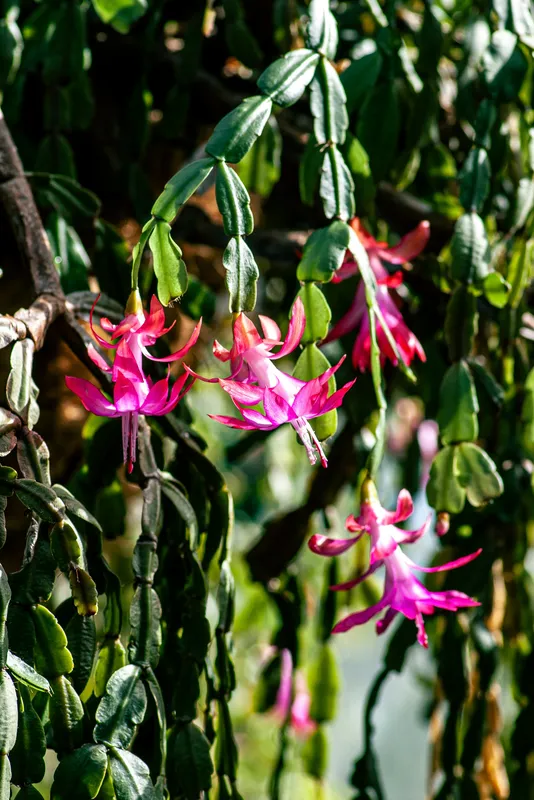
Christmas cactus is propagated from its flattened green stem segments rather than from true leaves. A short section can form adventitious roots and become an independent plant when the cutting is mature, correctly oriented, and kept in a clean medium with enough air and moisture. The method is simple, but exact drying and rooting times vary enough that the cutting’s condition matters more than a countdown.
Plant identity is useful before making the cut. Plants of the World Online records true Christmas cactus, Schlumbergera × buckleyi, as an artificial hybrid of S. russelliana and S. truncata. Thanksgiving cactus (S. truncata) has more pointed projections along its stem segments and is also widely sold as a holiday cactus. The plants share a practical stem-cutting method, so a mislabeled Thanksgiving cactus does not invalidate the steps below. Record the parent’s label and visible traits rather than promising an exact cultivar from flower color alone.
Decide whether the parent is ready
Use a vigorous parent with firm green segments. Pause if the plant has soft or blackened joints, spreading spots, fine webbing, sticky residue, cottony insects, or unexplained collapse. A cutting can carry pests or pathogens into a new pot, and removing material from a severely stressed plant does not correct the original problem.
Late spring through summer is a useful window because vegetative growth is commonly active. University of Wisconsin–Madison Extension notes that cuttings can be started at any time but may root better from late spring through summer. That is a preference, not a guarantee. Indoor light, temperature, parent condition, segment maturity, and moisture can speed or delay establishment.
If the parent is flowering, leave enough sound growth to support it. Propagation is not a reason to strip many branch tips from a small plant. One or two trial cuttings provide more useful information than filling a tray before the method has been tested in the available conditions.
Select and orient the cutting
The flat structures are photosynthetic stem segments, sometimes called joints or phylloclades. Each segment has a top that grew away from the parent and a base that was attached below it. Mark or maintain that orientation as cuttings are collected; an upside-down cutting is unlikely to root normally.
Iowa State University Extension recommends sections with two to five segments, removed at a joint. Wisconsin Extension uses two to three joints as a common home method. Both ranges are workable. A compact cutting is easier to keep upright and loses less water than a long, top-heavy branch.
- Choose firm terminal growth without flowers, visible pests, or damaged joints.
- Hold the lower segment steady and pinch or twist the selected section apart at a natural joint. If a tool is needed, use a sharp blade cleaned before and after the cut.
- Keep the basal end identifiable. Set cuttings in one direction on a clean tray or label them.
- Reject any section that becomes translucent, soft, or discolored before planting.
University of Massachusetts Amherst Extension describes commercial propagation from mature segments collected from vegetative stock plants into clean containers. A home setup does not need commercial equipment, but the same principles apply: start with mature healthy tissue, keep it off dirty surfaces, and avoid reusing a contaminated medium.
Treat the drying period as a range
Extension instructions do not prescribe one universal callusing interval. Iowa State advises drying the cut end overnight. Wisconsin Extension suggests two to three days in shade. University of Florida IFAS Extension describes placing two- or three-jointed cuttings in a well-drained sterile medium without making a long drying period the center of the method.
A practical synthesis is to let the fresh break dry in a shaded, clean place until its surface is no longer wet, commonly overnight and sometimes longer in cool or humid conditions. Do not leave cuttings for a fixed number of days if they are shriveling, and do not place them on damp paper or in a sealed container. “Callus for exactly three days” and “plant immediately or it will fail” are both more absolute than the evidence supports.
Prepare a clean, airy rooting setup
Use a small container with an open drainage hole. Large pots hold a greater volume of wet medium around a rootless cutting and make moisture harder to control. Wash a reused pot and do not reuse mix from a plant with root disease or an unidentified pest.
Suitable rooting media include:
- moist perlite or coarse sand, as in the Iowa State method;
- moist vermiculite or perlite, as described by the University of Connecticut Home & Garden Education Center; or
- a fresh, well-drained propagation or potting mix, as used by Wisconsin and Florida Extension.
The medium should be clean, evenly damp, and airy. It should not release water when squeezed or remain glossy-wet on the surface. Pre-moisten it, fill the container without hard compaction, and let excess water leave before inserting the cutting. Garden soil, old decomposed mix, and a sealed decorative container add avoidable uncertainty.
Root the cutting in medium
- Make a narrow planting hole so the basal end is not scraped while being inserted.
- Place the bottom of the cutting about one inch into the medium, following the Iowa State and Connecticut methods. Bury only enough to hold it upright; do not submerge multiple segments.
- Firm the medium gently around the base. Add a clean support beside the cutting if needed instead of planting it deeper.
- Set the pot in bright light without hot direct sun. A cutting without roots cannot replace water as readily as an established plant.
- Check the medium with a finger or clean wooden pick. Add water when it begins to dry, then drain the pot. Do not keep it saturated.
- Inspect the buried joint and exposed segments regularly for softness, spreading discoloration, or severe shriveling.
Connecticut Extension places the rooting container in a clear plastic bag to retain humidity. A cover is optional rather than a requirement for every home. If used, keep plastic from resting on the cutting, place the setup out of direct sun, and open it for inspection. Remove the cover if condensation continually wets the segments or the medium stays saturated. An uncovered cutting may need more frequent moisture checks, but it is easier to observe airflow and drying.
Let evidence confirm rooting
Published rooting estimates vary. Wisconsin Extension says roots may form in roughly two to three weeks under its conditions; Iowa State gives about six to eight weeks for its method. Those estimates describe different setups, plants, and environments. They are not a deadline after which a firm green cutting should be discarded.
Useful evidence of establishment includes:
- resistance to a very gentle sideways nudge;
- a new segment beginning at the tip or a joint;
- continued firmness while the medium cycles from moist toward dry; and
- roots visible at a clear pot edge or drainage opening.
Do not pull the cutting out each week to look for roots. Connecticut Extension suggests a gentle tug after several weeks; use only enough pressure to detect anchoring. Repeated uprooting can break the first new roots. New top growth is encouraging, but it does not justify changing every condition at once.
Iowa State and Connecticut advise moving cuttings once roots are about an inch long. If roots cannot be seen without disturbance, wait for clear anchoring and new growth. A cutting already rooted in a suitable potting mix may not need an immediate move at all.
Move an established cutting to its first pot
Choose a small draining pot and fresh, well-drained houseplant mix. Make a hole wide enough for the young roots. Lift the cutting by supporting the medium around its base rather than pulling the top, spread the roots without forcing them, and keep the lowest green segment above the final surface.
Water once to settle the mix, allow full drainage, and return the plant to bright indirect light. During the transition, keep the root zone from becoming completely dry but do not maintain constant saturation. Wait for continued growth before beginning any fertilizer program, and then follow the product label at a restrained rate appropriate to a small houseplant.
Several cuttings can eventually share a display pot, but rooting them separately first makes failures easier to diagnose and prevents one decaying cutting from remaining hidden among healthy ones. Combining plants is optional and should happen only after each has an established root system.
Diagnose failure by pattern
| Pattern | Likely issue to investigate | Response |
|---|---|---|
| Basal segment turns translucent or soft | Saturated medium, contaminated setup, or damaged tissue | Remove the failed cutting, discard affected mix, and clean the container before retrying |
| Segments become deeply wrinkled while mix is dry | Cutting is losing water faster than it can root | Re-moisten evenly, reduce heat or direct sun, and reassess the setup |
| Cutting leans or falls | Buried end is too shallow, top is too long, or medium is loose | Add a clean support; do not bury another full segment |
| No roots but cutting remains firm | Cool conditions, low light, immature tissue, or normal variation | Keep conditions stable and allow more time |
| Bleached or tan patch on exposed side | Excess direct light or window heat | Move to bright filtered light |
| Webbing, sticky residue, or cottony material | Pest carried from the parent or nearby plants | Isolate and identify before choosing a treatment |
A failed cutting does not prove that water rooting, rooting hormone, a humidity dome, or a larger pot is required. First check stock health, orientation, cleanliness, moisture, light, and temperature. Avoid applying an unlabeled pesticide or household disinfectant to a stressed cutting.
Recognize an established cutting
A cutting is established when it has a functioning root system and sustained new growth. Until then, concentrate on sound tissue, correct orientation, clean airy medium, moderate moisture, and appropriate light. Flower-bud timing and mature-plant care can wait until the young plant is growing steadily.
Sources
- Schlumbergera × buckleyi (T.Moore) Tjaden (Royal Botanic Gardens, Kew). Accessed August 25, 2026.
- How Can I Propagate a Christmas Cactus? (Iowa State University Extension and Outreach). Accessed August 25, 2026.
- Holiday Cactus (University of Wisconsin–Madison Extension). Accessed August 25, 2026.
- Holiday Cacti (University of Connecticut Home & Garden Education Center). Accessed August 25, 2026.
- Christmas Cactus (University of Florida IFAS Extension Gardening Solutions). Accessed August 25, 2026.
- Commercial Production of Holiday Cacti (University of Massachusetts Amherst Extension). Accessed August 25, 2026.