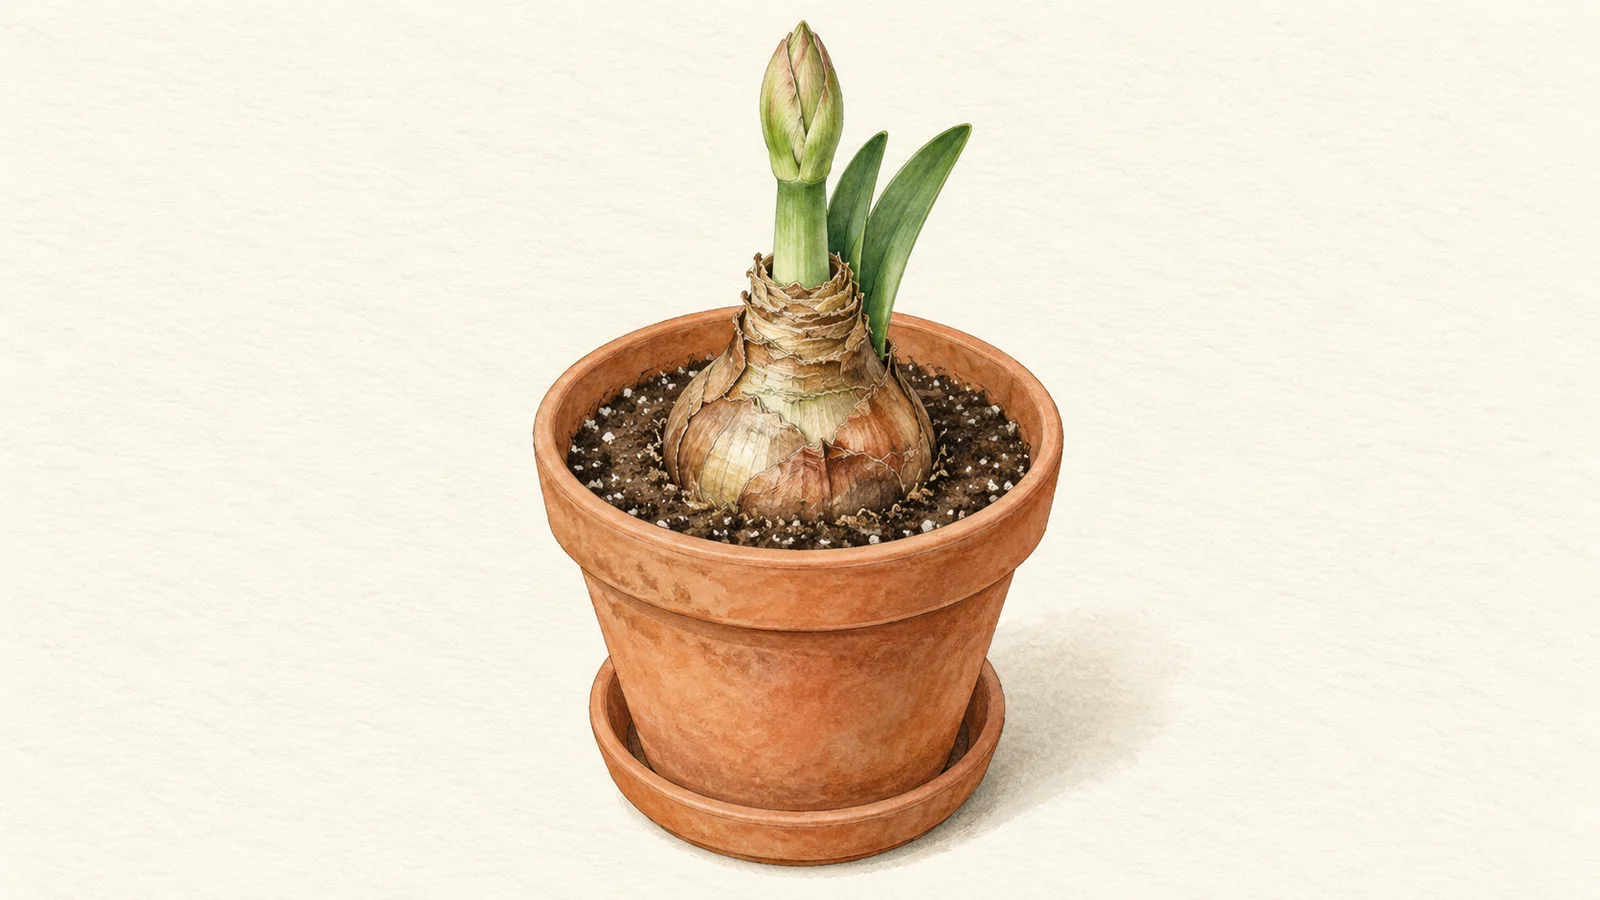
An amaryllis bulb should look partly unplanted when you finish potting it. Its brown shoulders and narrow neck stay above the mix, while the roots settle below. Resist the urge to cover the whole bulb as you might when planting a tulip in the garden.
The large flowering bulbs sold for indoor winter displays are usually Hippeastrum hybrids. They are different from the South African plants botanically named Amaryllis. NC State’s plant profile explains the shared common name. Check the label before applying outdoor planting advice to an indoor gift bulb.
This method is for an ordinary, unwaxed bulb planted in potting mix. A wax-coated display bulb has different watering instructions; do not put one into a pot and start watering it as though the coating were ordinary bulb skin.
Start with the bulb and measure the pot
Choose a bulb that feels firm and has no mold, soft decay or obvious damage. A green shoot already emerging is not a reason to reject it, provided the growth is sound. University of Minnesota Extension recommends checking both the bulb and any visible new growth. Handle that shoot gently while unpacking; it needs room above the pot, not pressure from a decorative cover.
Look for a container roughly 1–2 inches wider in diameter than the bulb, with enough depth for the roots. That is the difference across the whole pot, not a 2-inch gap on every side. Set the bulb beside a ruler and check the container before filling it. A large spare planter may be convenient to find but poorly matched to a single bulb.
The pot must have drainage holes. If a kit supplies only a closed decorative container, use a draining inner pot that you can lift out to water. Check where the runoff will go before setting everything on furniture. A saucer catches water; it should not become a reservoir beneath the roots.
Keep the shoulders in view
Use fresh, well-drained potting mix. Add some to the base of the pot, then set the bulb on it with the roots directed downward. Adjust this lower layer until the bulb sits at the right height. Fill around the roots and lower bulb, firming gently enough to steady it.
Leave roughly the upper third to half of the bulb exposed, with the neck clearly above the surface. Minnesota gives this range; Iowa State’s potting instructions leave the upper half showing. Keep about an inch of space below the pot rim for watering. Do not add more mix later simply because the visible bulb looks unusual.
If the kit contains a compressed coir disc, expand it before judging the amount. Iowa State notes that these discs sometimes supply too little material. Have extra suitable mix available so you can support the roots and establish the intended planting height without improvising a shallow mound.
Water the newly potted bulb thoroughly and let the container drain. Empty the saucer before returning it to its display spot. You should still be able to see and reach the mix around the bulb for the next moisture check.
Let growth change the watering routine
Put the pot in a bright, warm place. Around 70°F is a useful starting point in the RHS growing guide; a hot radiator is not a substitute for a suitable room. Give the emerging shoot light and enough clearance to grow upright.
Until new growth develops, water sparingly and keep the mix only barely moist. The initial thorough watering is not an instruction to soak the pot every day. Check the surface and the container’s weight before adding more. If the mix is still wet, wait and make sure the drainage path is open.
As leaves and the flower stalk develop, the plant will need more water. Continue checking rather than adopting a fixed weekly amount. Pour onto the mix, let excess water escape and empty what collects below. Wisconsin Extension warns that persistently wet conditions can rot the bulb.
Turn the pot regularly so the stalk does not lean persistently toward the window. A support can help a heavy flower stalk, particularly with large-flowered cultivars. Leave room for that support and for the opening flowers when choosing the display location.
Plan for a range of bloom dates
Six to eight weeks from potting is a common estimate, not a promise. Iowa State notes that some South African-grown bulbs flower sooner than Dutch-grown stock. The bulb’s preparation and the room conditions also make a calendar date less useful than the plant’s actual progress.
Keep the cultivar label and note the day you potted it. If flowers are needed for a specific occasion, use the supplier’s information for that bulb and allow flexibility. Extra water will not make an uncertain deadline reliable.
Once the flowers open, move the pot to a cooler bright position away from direct sun to help the display last. Wisconsin recommends removing fading flowers and waiting until the stalk yellows or browns before cutting it back. Preserve the green leaves: they replenish the bulb after flowering. Give them bright light, water as needed and houseplant fertilizer according to its label while actively growing. Do not immediately force the plant into darkness because the flowers have finished.
Keep the entire plant, loose bulbs and discarded pieces away from children and pets. NC State identifies the bulb as especially poisonous if eaten. Choose a different display if you cannot keep it inaccessible. Before leaving the new pot on its shelf, check those three things once more: exposed neck, empty saucer and a secure place to grow.
Sources
- Growing and caring for amaryllis (University of Minnesota Extension). Accessed October 1, 2026.
- All About Amaryllis (Iowa State University Extension and Outreach). Accessed October 1, 2026.
- Amaryllis, Hippeastrum (University of Wisconsin–Madison Extension). Accessed October 1, 2026.
- Hippeastrum (Royal Horticultural Society). Accessed October 1, 2026.
- Hippeastrum (North Carolina Extension Gardener Plant Toolbox). Accessed October 1, 2026.