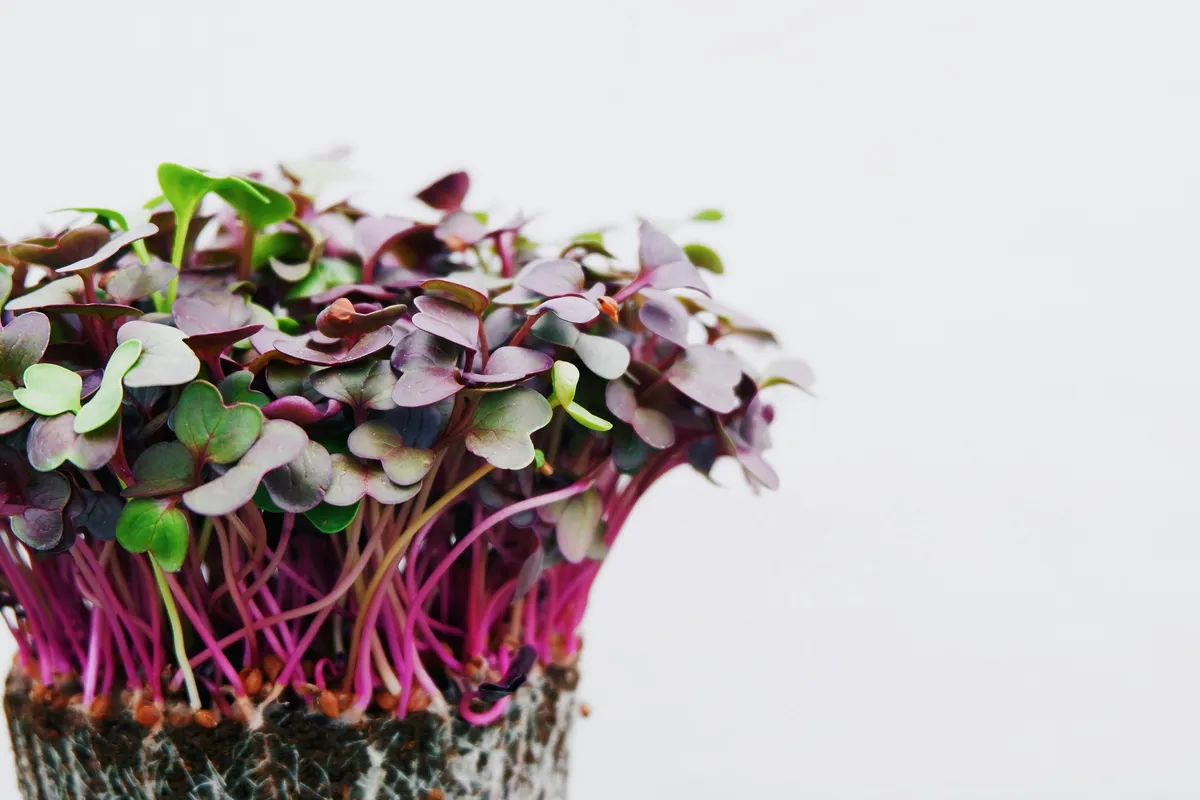
Microgreens can turn a small indoor shelf or bright window into a short-cycle food garden. The crop is harvested young, so it needs less space and time than a mature vegetable. That short cycle does not make it maintenance-free, however. Weak light produces stretched seedlings, excess moisture encourages decay, and poor sanitation matters because the harvested stems and leaves are often eaten raw.
A reliable method treats light, moisture, airflow, and cleanliness as parts of one system. The exact harvest day depends on crop, temperature, and light; “ready in ten days” is a possibility for some fast types, not a promise for every tray.
Microgreens are not the same as sprouts
Microgreens are young edible plants grown in a medium and harvested by cutting the stem above that medium. They are commonly cut when the cotyledons are expanded and the first true leaves are beginning to appear, often at roughly 1.5 to 3 inches tall. Penn State Extension lists many possible crops, including radish, mustard, kale, cabbage, arugula, cress, scallion, basil, cilantro, shiso, and tatsoi.
Sprouts are produced differently: the seed germinates in a warm, wet environment and the root, seed, and shoot may all be eaten. The distinction is important for both technique and food safety. The University of Minnesota Extension notes that sprouts carry a higher foodborne-illness risk, but microgreens are still raw produce and are not risk-free.
Do not grow an unidentified seed as food. Choose a species known to be edible at the microgreen stage and seed sold for edible crop production. Ornamental seed may be treated with products not intended for this use. A packet or supplier instruction should also guide sowing density, because large sunflower or pea seed occupies far more space than tiny mustard seed.
A simple two-tray setup
The basic equipment is modest:
- A shallow food-safe growing tray with drainage holes
- A matching solid tray beneath it for bottom watering
- Fresh seed-starting or microgreen medium from a reliable supplier
- Seed intended for the chosen edible crop
- A bright window or suitable grow light
- A small fan only if the room has stagnant air; it should not blast the seedlings
- Clean scissors or a knife reserved for harvest
- Clean storage containers or paper towels for the harvested crop
A standard nursery flat works, but a smaller tray is easier for a first crop. The inner tray must drain. The outer tray catches water and allows bottom watering after germination. Avoid a container previously used for chemicals or nonfood materials.
Use fresh, lightweight medium rather than garden soil. Garden soil can compact in a shallow tray and may introduce contamination. Penn State’s food-safety guidance recommends reputable substrates and avoiding media containing raw manure or other untreated animal-origin amendments.
Light: evaluate the window before sowing
A bright window can work, especially for a small warm-season trial, but “windowsill” does not describe a measurable light level. Direction, season, latitude, glass coatings, nearby buildings, and distance from the pane all change the result.
Use the brightest practical location. Rotate a window-grown tray if seedlings lean strongly toward one side. If seedlings become long, pale, and unable to support themselves, light is insufficient; move them closer to an appropriate source or use a horticultural grow light. Follow the light manufacturer’s coverage, distance, and electrical-safety directions. A timer creates a consistent day-and-night cycle, but the correct height and duration depend on the fixture and crop.
Keep water away from electrical connections. A grow light should be securely mounted, rated for the setting in which it is used, and positioned so heat does not injure leaves.
Tray-to-harvest method
1. Clean first
Wash hands. Clean trays, tools, the work surface, and any reusable harvest container before starting. Cleaning removes soil and debris; a sanitizer, when used, works only after cleaning and must be suitable for food-contact surfaces and mixed exactly according to its label. Never combine cleaning chemicals.
Use potable water. Municipal drinking water is the simplest household source. Water of uncertain microbial quality is not appropriate for a crop likely to be eaten raw.
2. Prepare the medium
Add a shallow, even layer of fresh medium to the perforated tray and moisten it uniformly. It should feel damp without releasing water when lightly pressed. A waterlogged tray has little root-zone air and creates favorable conditions for decay.
Level the surface gently without compressing it into a hard mat. Place the perforated tray inside the solid tray so drainage is contained.
3. Sow one crop per tray
Spread seed as evenly as possible. Crowding creates a humid canopy and makes inspection difficult; sowing too sparsely wastes space but is not a safety problem. Use the packet or supplier rate rather than a universal number of tablespoons.
Different crops germinate and grow at different speeds. Penn State Extension recommends keeping one crop type per tray for that reason. Mixed seed can be successful when the blend was designed for synchronized growth, but an improvised mix may contain fast radish towering over slow parsley.
Press the seed into contact with the moist surface. Cover only as directed for that crop. Some growers stack or cover trays briefly to retain moisture during germination; if that method is used, inspect at least daily and uncover once emergence calls for light. A sealed, forgotten tray can overheat or develop decay.
4. Move emerging seedlings into light
Once seedlings emerge, provide light promptly. Keep temperatures within the normal indoor range recommended for the crop and avoid a cold draft against wet trays. The aim is compact, upright growth rather than maximum heat.
After roots establish, add water to the lower solid tray and let the medium draw it upward. Empty water that remains after the medium is evenly moist. Bottom watering can keep foliage drier, but it does not make standing water safe.
Check at least daily. Small trays can change quickly. Water when the medium is beginning to lose moisture, not on a fixed calendar. Improve gentle air movement if condensation persists or leaves remain wet, while avoiding airflow strong enough to dry or flatten seedlings.
5. Inspect before harvest
Healthy seedlings should smell fresh and look appropriate for the crop. Discard the whole tray if it develops a foul or sour odor, widespread slime, unexplained collapse, or obvious mold across stems and leaves. Do not taste a questionable batch or assume rinsing will make it safe.
Fine white root hairs are often confused with mold. Root hairs are concentrated around roots and become less visible when wet. Mold is more likely to spread in irregular patches across seed coats, medium, or stems and may accompany odor or tissue breakdown. When the distinction is uncertain, disposal is safer than serving the crop.
6. Harvest cleanly
Harvest when the crop has reached the stage and size desired, commonly after cotyledons open and around the arrival of the first true leaves. Timing can range substantially by species.
Wash hands and use a clean, sharp tool. Cut above the medium so roots and particles remain in the tray. Keep harvested leaves away from dirty tray edges and the work surface. Do not harvest while ill or after touching pets, raw meat, trash, or soil without washing again.
The safest crop comes from preventing contamination rather than trying to wash it away later. Penn State cautions commercial growers that postharvest washing can spread contamination when poorly controlled. For household handling, use potable running water if rinsing is needed, drain and dry the greens well, refrigerate promptly in a clean container, and discard any batch that becomes slimy or smells abnormal. Follow FDA produce-handling guidance, including keeping produce separate from raw meat, poultry, and seafood.
Troubleshooting by symptom
| Symptom | Likely causes | Next check |
|---|---|---|
| Tall, pale, leaning seedlings | Light is too weak or too far away; sowing may be too dense | Increase usable light safely and thin the next sowing |
| Uneven bare patches | Uneven seed distribution, poor seed-to-medium contact, old seed, or uneven moisture | Check seed lot, level the medium, and sow a smaller test |
| Seed coats remain on leaves | Crop characteristic, low humidity during emergence, or dense sowing | Follow crop-specific covering guidance; do not scrape tender leaves aggressively |
| Seedlings collapse at the base | Excess moisture, contaminated equipment/media, dense canopy, or disease | Discard affected tray, clean equipment, and restart with better airflow and water control |
| Dry edges while the center stays wet | Uneven medium depth or watering | Level the next tray and add measured water evenly from below |
| Green film or algae on the surface | Persistent light plus excess surface moisture | Reduce standing water and improve dry-down; restart if crop health declines |
Reset between crops
Most microgreens are treated as a single harvest. Compost or discard the spent roots and medium according to local practice rather than immediately sowing into the depleted mat. Remove all debris, clean the trays, sanitize food-contact surfaces when appropriate, rinse as the product label directs, and let equipment dry before the next crop.
Keep brief notes on crop, seed source, sowing amount, emergence date, light position, watering, and harvest date. Those records are more useful than a universal “ten-day” schedule. After two or three small trials, the pattern for a particular room and season becomes much easier to repeat.
The dependable formula is straightforward: known edible seed, clean equipment, potable water, fresh medium, adequate light, controlled moisture, daily inspection, and a clean harvest. Speed is a benefit of microgreens, but sanitation and observation are what make the crop worth eating.
Sources
- Growing Microgreens (Penn State Extension). Accessed August 5, 2026.
- Ensuring Food Safety in Microgreens Production (Penn State Extension). Accessed August 5, 2026.
- Mini Greens, Mega Benefits: Growing Microgreens at Home (University of Minnesota Extension). Accessed August 5, 2026.
- Growing Sprouts and Microgreens at Home (Colorado State University Extension, Pueblo County). Accessed August 5, 2026.
- Selecting and Serving Produce Safely (U.S. Food and Drug Administration). Accessed August 5, 2026.