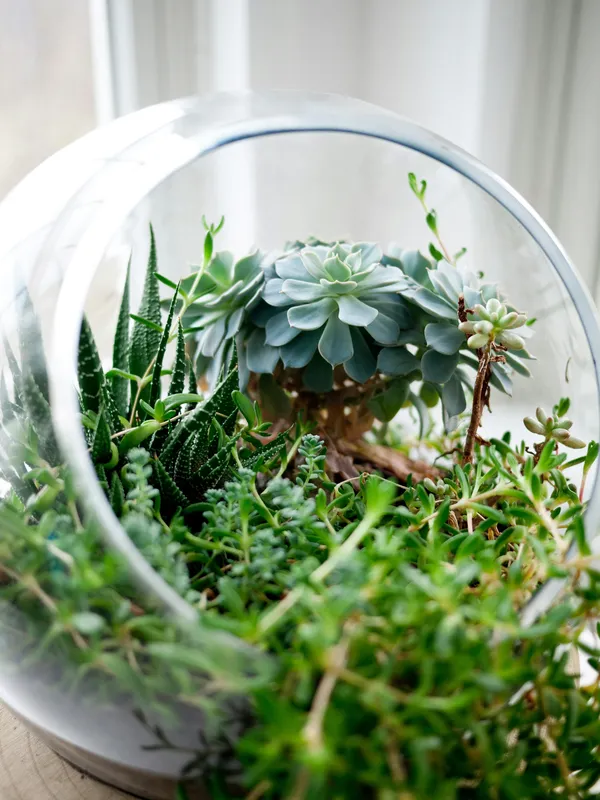
A closed terrarium is a transparent container that holds plants, growing medium, air, and water behind a lid. Water moves from the medium through plants, returns to the air through transpiration and evaporation, and may condense on the glass before returning to the medium. Iowa State University Extension and Outreach describes this small water cycle, but a terrarium is not permanently self-sustaining. Plants still need suitable light, occasional pruning, moisture corrections, and removal of unhealthy material.
This guide covers a closed, humid terrarium planted with compact tropical foliage. An open succulent display has different plant, medium, airflow, and watering requirements and should not be managed by the same instructions.
Confirm that a closed terrarium fits the plants
The lid raises humidity and slows water loss. That environment favors small plants that tolerate moist air and moderate root-zone moisture. It does not suit cacti and most succulents, which are adapted to drier conditions and are more appropriate for open displays. University of Missouri Extension also warns against combining desert plants with moisture-loving tropicals and notes that disease pressure is greater in a closed, humid system.
Choose plants only after confirming their identity and mature size. Good candidates may include compact fittonia, small peperomia, miniature ferns, pilea, and legally obtained live moss. Iowa State’s terrarium guidance recommends plants with slow growth, small leaves, and compatible light and moisture requirements. Check the needs of each species before combining them.
A workable group has:
- similar moisture and light requirements;
- healthy leaves, stems, and roots with no visible pests;
- slow or compact growth that leaves clearance from the lid and glass; and
- a conventional soilless medium requirement rather than a specialized bog, orchid, or carnivorous-plant setup.
Do not combine plants merely because they are sold in small pots. A miniature succulent, an air plant, and a moisture-loving fern remain incompatible even when they fit the same jar. Compact size does not override incompatible root-zone moisture, humidity, or airflow requirements.
Choose the site and container first
Select the display site before buying the container. It should receive medium to bright indirect light without a period of direct sun. Sunlight can heat an enclosed container rapidly even when the surrounding room feels comfortable. Mississippi State University Extension Service advises keeping a closed terrarium away from direct solar exposure and leaving space between foliage and the glass.
Use a stable, clear glass or plastic container with a lid. Tinted or cloudy walls reduce available light. A wide opening makes planting, cleaning, and pruning safer than a narrow bottle neck. Check glass for chips and cracks, place it where it cannot be knocked over, and protect the supporting surface from condensation or accidental spills. A large planted glass vessel can be heavy; lift it from the base rather than the rim or lid.
Wash the empty container with hot, soapy water, rinse it thoroughly, and let it dry. Clean tools and nonporous decorations before they enter the enclosure. University of Illinois Extension recommends transparent containers, long tools when needed, and keeping foliage away from the sides. Avoid valuable objects, painted items of uncertain composition, and porous wood that may decay in persistent humidity.
Assemble only the materials that have a job
The essential materials are straightforward:
- a clean transparent container and lid;
- fresh, low-fertility soilless potting medium appropriate for every selected plant;
- small, healthy plants;
- clean water and a narrow-spout bottle, syringe, or mister for measured application;
- a spoon, long tweezers, soft brush, and small scissors as needed; and
- optional clean stone or other inert decoration.
Garden soil is generally too dense and may bring weeds, insects, or pathogens indoors. Use a commercial container medium, then adjust it only when a reliable species source supports the change. The principles in the potting-medium guide explain why water-holding capacity and air-filled pore space matter more than a decorative recipe.
Traditional diagrams often show gravel beneath the medium. Gravel may create a visible reservoir or a design line, but it does not make a drainage hole or pull excess water safely away from roots. Penn State Extension states that a rock layer is no longer considered a way to improve drainage. The practical protection is to add very little water and keep the root zone aerated. If decorative gravel is used, do not treat its depth as permission to overwater.
Charcoal is optional. Some Extension designs mix or layer a small amount to adsorb odors or compounds, but charcoal does not sterilize a terrarium, cure root rot, or compensate for contaminated materials and excess water. It should never be presented as a required bacterial filter.
Build the planting in a controlled sequence
- Moisten the medium separately. Add water gradually until the medium is evenly damp but not dripping when squeezed. Starting with known moisture is easier than trying to correct a saturated jar.
- Add enough medium for the roots. Create a layer at least as deep as the largest root ball. Shape a slight slope only if it leaves every plant adequately rooted and the container stable.
- Test the layout. Arrange the still-potted plants outside the container. Leave room for growth and tools. Put taller plants toward the center for an all-sided view or toward the back for a one-sided view.
- Inspect each plant. Remove dead or damaged foliage and check leaf undersides, crowns, and root balls for pests or decay. Do not install an unhealthy plant and hope the enclosure will repair it.
- Plant without burying crowns. Remove only loose excess nursery medium, position each plant at its previous depth, and firm the surrounding medium gently. Keep leaves away from the glass and from neighboring plants where practical.
- Finish sparingly. Add clean moss or inert decoration without sealing the entire medium surface. Brush debris from foliage and the inside wall.
- Add water only if needed. If the medium was pre-moistened, a small rinse around the root balls may be enough. There should be no standing water above a decorative bottom layer.
Close the lid after wet foliage has dried. Do not apply fertilizer during assembly; many commercial mixes already contain a starter charge, and rapid growth shortens the useful life of a small enclosure.
Calibrate moisture from evidence
Condensation is an indicator, not a timer. Its amount changes with room temperature, container temperature, light, plant mass, and water content. A light film that appears and later clears can accompany a functioning water cycle. Glass that stays heavily fogged, visible water running continuously, yellowing plants, soft tissue, or a sour odor points toward excessive moisture or decay.
When the enclosure is too wet, remove the lid for a period, wipe excess water from the glass if necessary, and reassess before closing it again. Remove dead material promptly. Repeat ventilation in short, observed intervals rather than leaving the planting forgotten and open long enough to dry completely.
When the glass is clear, do not add water automatically. Look at the medium and plants. Add a small measured amount only when the root zone is becoming dry or plants show a water deficit that is not better explained by root damage. There is no defensible universal schedule such as every month or every six months; container seals and room conditions differ too much.
Maintain the terrarium as a planted container
Check the terrarium regularly enough to notice change. Prune a stem before it presses against the lid, remove yellow or fallen leaves, rotate the container if growth leans strongly toward the light, and clean the outside glass. The houseplant humidity guide explains why enclosure humidity should not be converted into a universal percentage target.
Small amounts of fungal growth can appear on decaying material, but mold should not be declared harmless from color alone. Remove the affected debris and correct persistent excess moisture. If growth spreads across living tissue, plants collapse, roots smell foul, or insects multiply, open the enclosure and isolate or discard affected plants as appropriate. A badly compromised planting may need to be dismantled rather than treated inside a living-room container.
Fertilize only when plant condition and the medium history support a nutrient need. If fertilizer is justified, use a product labeled for the plants and apply a conservative dilution; excess salts cannot be flushed easily from a container with no outlet. Never add household cleaners, essential oils, cinnamon, or pesticides as routine terrarium ingredients. Any pesticide must be labeled for the identified pest, plant, and indoor site, and the enclosure may increase exposure to residues.
Keep potentially irritating or toxic plants and loose decorations away from children and pets. Wash hands after handling plants and medium. A closed terrarium is a managed ornamental planting. It is not a sterile vessel, a food-growing container, or a permanently sealed ecosystem.
Sources
- How to Create and Care for a Terrarium (Iowa State University Extension and Outreach). Accessed August 25, 2026.
- Creating a Closed Terrarium (Penn State Extension). Accessed August 25, 2026.
- Terrariums (University of Missouri Extension). Accessed August 25, 2026.
- How to Design a Closed-System Terrarium (Mississippi State University Extension Service). Accessed August 25, 2026.
- DIY bottle terrariums make great projects, gifts (University of Illinois Extension). Accessed August 25, 2026.