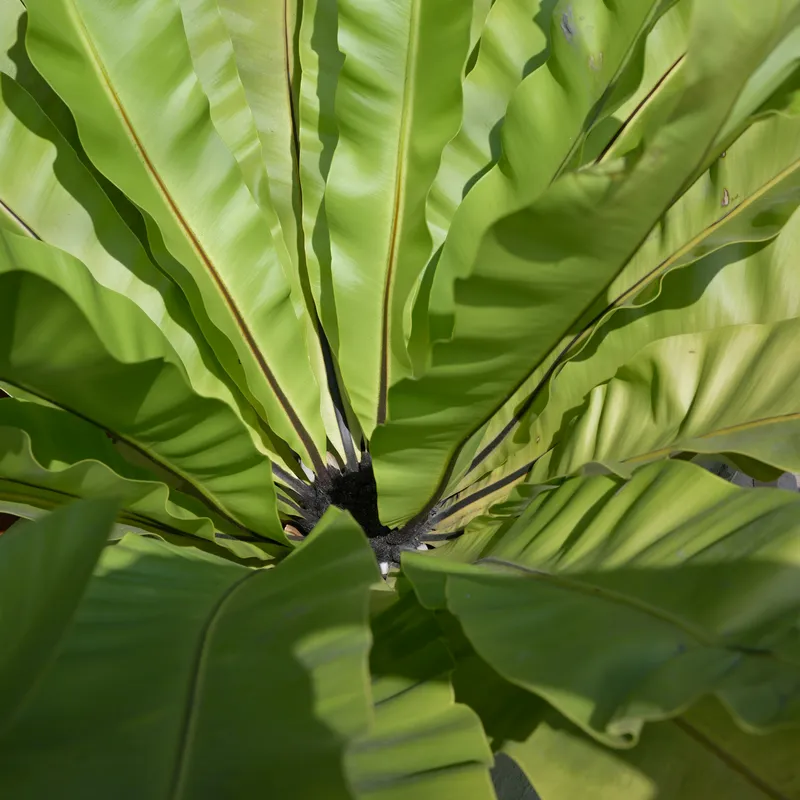
Start with the growing point
Look into the middle of a bird’s nest fern before choosing its spot. New fronds emerge from that tight center, then spread into the broad green bowl that makes the plant so striking. Give it enough room that you can lift the pot, check the mix and water without pushing through the young growth.
The familiar bird’s nest fern, Asplenium nidus, has undivided strap-shaped fronds rather than the fine leaflets of a Boston fern. Its dark midrib is normal. Ruffled edges and forked tips may be part of a cultivated form, too. The University of Florida cautions that cultivar names are applied inconsistently, so keep the nursery label but avoid diagnosing every unusual outline as damage.
Choose a plant with a firm center and mostly sound foliage. Turn the pot gently to inspect both sides of the fronds. A crowded display can hide an old damaged leaf, pests or a pot standing in water; seeing those before purchase is easier than sorting them out at home.
A bright room with protection from sun
Start near a window with bright, indirect light. A north-facing window can work, while a sunnier exposure may need a sheer curtain or more distance from the glass. Watch where the sun actually lands during the day. A bright room and a beam of hot afternoon sun on the fronds are different conditions.
NC State Extension lists 60 to 70°F as an ideal range and warns against direct heat and drafts. Keep the plant away from a radiator, air-conditioning outlet and a cold window that opens regularly. It is a tropical fern, not a hardy outdoor fern to leave through frost.
A bathroom is useful only if it also has adequate light and space. Shower steam cannot replace a window or suitable grow light. If the brightest practical place is another room, use that location and assess its humidity separately. Leave room for the fronds to expand rather than wedging the pot behind other plants.
Keep moisture moving through the pot
For this species, aim for a lightly moist root ball with air spaces, not a swamp and not a bone-dry core. The RHS species profile specifically recommends moist but unsoggy compost. That is a better starting point than applying succulent-style drying to every plant that grows on trees.
Feel the mix near the pot’s edge, away from new fronds. When its surface begins to lose moisture, check below it before deciding: a wet, heavy pot can wait, while mix beginning to dry needs water. Over several checks, notice how the pot feels just after draining and as it gets lighter. Use that comparison instead of a fixed weekly appointment.
Pour slowly onto the mix around the plant, working around the pot so one patch does not receive everything. Let water escape through the drainage holes, then empty the saucer or decorative outer pot. Do not leave the nursery pot sitting in that runoff. Clemson’s indoor fern guidance emphasizes both avoiding complete drying and preventing standing water from damaging roots.
If water runs down a gap at the pot’s edge, check whether the middle actually became moist. A quick splash over the top may leave a dry root ball largely unchanged. Conversely, another watering will not help a pot that has remained wet for days. Check drainage, light and the condition of the mix before adding more.
Humidity belongs in the air
Moist potting mix and humid air solve different problems. Adding water to already-wet roots does not correct dry air around the fronds. A small hygrometer near the plant can help you compare rooms and notice what happens when heating starts.
Minnesota Extension suggests a room humidifier for moisture-loving houseplants. Follow the appliance’s cleaning directions, and avoid placing it where moisture wets walls or furniture. Our indoor humidity guide helps you choose a manageable approach for the room.
Handle the foliage gently while moving the pot. Do not pull apart tightly curled new fronds to make them open faster, or use a heavy spray to clean the center. The broad leaves look sturdy, but NC State describes the foliage as fragile. Support a mature frond when inspecting its underside rather than sharply folding it back.
Repot for roots, not for the size of the leaves
Large fronds do not automatically mean the plant needs a large new pot. Look for densely crowded roots and a root ball that has filled its container. The RHS epiphytic fern guide recommends moving up only slightly when repotting is needed; an oversized container can hold excess wet mix around the roots.
Repot in spring as new growth begins, using a fresh, porous, moisture-retentive potting mix and a pot with drainage holes. Support the root ball as you remove it. Keep the central crown at its existing level rather than burying it under fresh mix, following the crown-care advice in Georgia Extension’s fern guide. Water afterward and drain thoroughly. The repotting guide covers the container and workspace decisions in more detail.
Feed modestly during active growth. The RHS species guidance uses a half-strength general liquid fertilizer monthly from May through August. Follow the product’s dilution instructions and account for fertilizer already in fresh mix. Extra fertilizer is not a repair for browned fronds or a persistently wet pot.
Read brown marks before reaching for a spray
Orderly brown lines underneath a mature frond are usually spore-bearing structures. Those regular rows are part of fern reproduction, not a reason to scrub or spray the leaf. Compare their arrangement with UF/IFAS’s photographs in the species guide above.
Dry tips, irregular dead patches, sticky residue and a collapsing center deserve a different inspection. Check the mix first, then recent sun exposure, drafts and any actual insects. Brown foliage alone cannot tell you whether the roots are too wet or too dry. Photograph changing patches and seek local extension advice if damage spreads without a clear cause.
If you find pests, separate the plant and identify them before choosing treatment. Fern foliage can be sensitive to insecticides; use only a product labeled for the plant and pest, following every direction. The houseplant inspection checklist helps distinguish insects from other marks. Remove dead fronds carefully, leaving the sound green growth and emerging center intact. At the next watering check, look for a new frond opening normally: that is more useful than expecting an old brown patch to turn green again.
Sources
- Bird’s Nest Fern (University of Florida IFAS Gardening Solutions). Accessed October 5, 2026.
- Asplenium nidus (North Carolina Extension Gardener Plant Toolbox). Accessed October 5, 2026.
- Indoor Ferns (Clemson Cooperative Extension). Accessed October 5, 2026.
- Asplenium nidus: cultivation (Royal Horticultural Society). Accessed October 5, 2026.
- How to grow epiphytic ferns (Royal Horticultural Society). Accessed October 5, 2026.
- Growing Ferns (University of Georgia Cooperative Extension). Accessed October 5, 2026.
- January garden checklist (University of Minnesota Extension). Accessed October 5, 2026.