How to Propagate Rex Begonia from Leaf Cuttings: The Closest Thing to Plant Magic
I have propagated a lot of plants. Pothos in jars on the kitchen windowsill. Spider plant babies dangling like little green parachuters. Monstera cuttings that took four months to root and made me question everything I thought I knew about patience.
But none of those compare to the moment I watched a brand new tiny plant emerge from a vein on a rex begonia leaf that was just sitting on top of some damp soil. No stem. No node. Just a leaf, some moisture, and what I can only describe as botanical witchcraft.
Rex begonia leaf propagation is one of the most fascinating techniques in the houseplant world, and it is way more accessible than it sounds. If you already have a rex begonia - or can get your hands on a single healthy leaf - you can turn it into five, ten, or even more baby plants. For free. My daughter calls it “making plant babies from puzzle pieces,” and honestly that is a pretty accurate description.
Here is everything I have learned from doing this about a dozen times, including the mistakes that taught me the most.
Why Rex Begonias Are Special for Propagation
Most houseplants need a node - that little bump on the stem where roots and new growth emerge - to propagate successfully. Cut below a node, stick it in water or soil, and wait. It is straightforward.
Rex begonias (Begonia rex-cultorum) break all those rules. These plants can generate entirely new plantlets from the veins of a single leaf. The major veins contain meristematic tissue, which is basically a cluster of cells that can differentiate into roots, shoots, and everything else a new plant needs. Cut through a vein, give it the right conditions, and it will produce a whole new plant at the wound site.
This means one large, healthy rex begonia leaf can potentially give you a dozen new plants. That is an incredible return on investment, especially considering that some of the fancier rex begonia cultivars can cost twenty to thirty dollars at a nursery.
When to Do It
Spring and early summer are the best times to propagate rex begonias. The plant is actively growing and the warmer temperatures help cuttings root faster. I have done it in winter too, but everything moves at about half speed and the failure rate goes up.
If your rex begonia has gotten leggy or you need to remove an older leaf to encourage new growth, that is a perfect opportunity. Do not waste that leaf - propagate it instead.
What You Will Need
Before you start, gather these supplies. Having everything ready prevents you from scrambling around with a cut leaf drying out on your counter.
- One healthy rex begonia leaf (choose one that is mature but not old and yellowing)
- A clean, sharp knife or razor blade (sterilize it with rubbing alcohol)
- A shallow tray or container with drainage holes
- A clear plastic dome or plastic wrap (to create humidity)
- Moist propagation mix (equal parts peat moss and perlite works great)
- T-pins, bobby pins, or small stones
- Optional: rooting hormone powder
- A spray bottle for misting
Method 1: The Pin Method (Whole Leaf)
This is the method I recommend for beginners because it is the most visual and intuitive. You are basically pinning a whole leaf face-up on soil and letting it do its thing.
Step 1: Select and cut the leaf. Choose a healthy, mature leaf with prominent veins. Cut it from the plant with about an inch of the petiole (the leaf stem) attached. A clean cut heals faster and reduces the risk of rot.
Step 2: Score the veins. Flip the leaf over so you are looking at the underside. Using your sterilized knife, make small cuts - about half an inch long - across five or six of the largest veins. These cuts are where the new plantlets will emerge. Do not cut all the way through the leaf, just through the vein itself.
Step 3: Prepare the tray. Fill your shallow tray with moist (not soggy) propagation mix. The surface should be level and the mix should feel like a wrung-out sponge when you squeeze it.
Step 4: Pin the leaf down. Place the leaf vein-side down on the soil surface, making sure the scored veins are in direct contact with the moist mix. Use T-pins or bobby pins to hold it flat. Push them through the leaf between the veins - avoid pinning directly through a major vein, as that can damage the tissue you need to root.
If you do not have pins, small clean pebbles work fine. The goal is just to keep the leaf flat against the soil so the cut veins stay in contact with moisture.
Step 5: Cover and wait. Place your clear dome over the tray or cover it loosely with plastic wrap. You want high humidity but also some air circulation to prevent fungal issues. If you use plastic wrap, poke a few small holes in it or lift it for a few minutes every day.
Set the tray somewhere with bright indirect light. No direct sun - those thin begonia leaves will cook under direct light, especially in a humid enclosure. A spot near a north-facing window or a few feet back from an east-facing window is ideal. Keep the temperature around 70 degrees Fahrenheit if you can.
Step 6: Maintain moisture. Mist the leaf and soil surface every day or two. The soil should stay consistently moist but never waterlogged. Standing water is the enemy here - it leads to rot faster than you can say “why did my leaf turn to mush.”
In about four to six weeks, you should start seeing tiny plantlets emerging at the points where you scored the veins. They will look like miniature rex begonia leaves poking up from the surface of the mother leaf. It is genuinely one of the coolest things in the plant world. The first time I saw it happen, I called my wife over to look and she said, “That is weird but also kind of amazing.” High praise.
Method 2: The Wedge Method (Leaf Sections)
The wedge method produces more individual plants from a single leaf, but each cutting is smaller and slightly more fragile. I like this method when I have a large leaf and want to maximize the number of babies.
Step 1: Cut the leaf into wedges. Think of it like cutting a pie. Each wedge should include at least one major vein running from the cut edge toward the outer edge of the piece. Depending on the size of the leaf, you can get anywhere from six to twelve wedges. Make sure each piece has a pointed end (where it was attached to the center) and a wider outer edge.
Step 2: Dust with rooting hormone (optional). Dip the pointed end of each wedge in rooting hormone powder. This is optional but I have noticed it speeds things up by about a week and improves the success rate, especially in cooler months.
Step 3: Insert the wedges. Stick each wedge into the moist propagation mix with the pointed end down, at about a 45-degree angle. Bury about a third of the wedge. Space them about two inches apart so they have room to develop without competing.
Step 4: Cover and maintain. Same drill as the pin method - cover with a dome or plastic wrap, keep the humidity high, provide bright indirect light, and mist regularly. The wedges are more susceptible to drying out since they have more exposed cut surface, so check on them daily.
New plantlets should emerge from the base of each wedge in about six to eight weeks. The wedge method tends to be a little slower than the pin method, but you get more individual plants.
Method 3: The Petiole Method (Simplest)
If you want to keep things really simple, just stick the entire leaf - petiole and all - into a pot of moist propagation mix. Bury the petiole about an inch deep and let the leaf rest on the soil surface. Cover for humidity.
This method is the least efficient in terms of plants produced (usually just one or two), but it is almost foolproof. I use this when I accidentally knock a leaf off while moving a plant and do not want to waste it.
Common Mistakes and How to Avoid Them
Too much water. This is the number one killer. The soil should be moist, not wet. If you squeeze a handful and water drips out, it is too wet. Rex begonia leaves are thin and rot quickly in soggy conditions. I lost my entire first batch to this mistake.
Not enough humidity. On the flip side, if you skip the dome or plastic cover, the leaf will dry out and the cut veins will callus over before they can root. You need that humid microclimate. If you see the leaf edges curling up and getting crispy, humidity is too low.
Direct sunlight. A covered tray in direct sun becomes a tiny greenhouse that will cook your cuttings. Bright indirect light only. Seriously, I cannot stress this enough.
Choosing an unhealthy leaf. Start with the best leaf you have. A leaf that is already yellowing, damaged, or showing signs of disease will not propagate well. Pick one that is mature, colorful, and firm.
Disturbing the cuttings too early. I know it is tempting to lift the leaf and check for roots. Resist the urge for at least three weeks. Every time you move the leaf, you risk breaking delicate new root connections. Just watch from above and wait for those tiny plantlets to appear.
Forgetting to ventilate. High humidity is great. Zero airflow is not. Fungal issues like powdery mildew and botrytis thrive in stagnant, humid conditions. Open the dome or lift the plastic wrap for a few minutes each day to let fresh air circulate.
Potting Up Your New Plants
Once the baby plantlets are about two to three inches tall with at least two or three leaves of their own, they are ready to be separated and potted individually. This usually takes about three to four months from the start of propagation.
Gently lift the mother leaf (which will likely be deteriorating by now - that is normal) and carefully separate the plantlets. Each one should have its own small root system. If some are still connected, use a clean knife to separate them.
Pot each baby into a small two to three inch pot with a well-draining mix. I use a blend of regular potting soil, perlite, and a little bit of peat moss. Keep them in a humid spot for the first couple of weeks while they adjust to life on their own.
These new plants are miniature versions of the parent. They will grow relatively quickly once established, and within six months to a year, they will look like proper rex begonias with those stunning painted leaves.
What to Expect Realistically
I want to be upfront - not every cutting will succeed. In my experience, the pin method gives me about a 70 to 80 percent success rate on the individual vein cuts, meaning if I score six veins, four or five will usually produce plantlets. The wedge method is a bit lower, maybe 60 to 70 percent, because the smaller pieces are more vulnerable to drying out or rotting.
Temperature matters a lot. At 70 to 75 degrees, things move along nicely. Below 65, the process slows dramatically and failure rates increase. If your home runs cool, consider placing the tray on a seedling heat mat set to 70 degrees. It makes a huge difference.
The whole process from cutting to potted baby plant takes about three to five months. It is not fast. But when you consider that you are creating multiple plants from a single leaf of a plant that might cost thirty dollars at a nursery, the math works out pretty well.
A Propagation Story
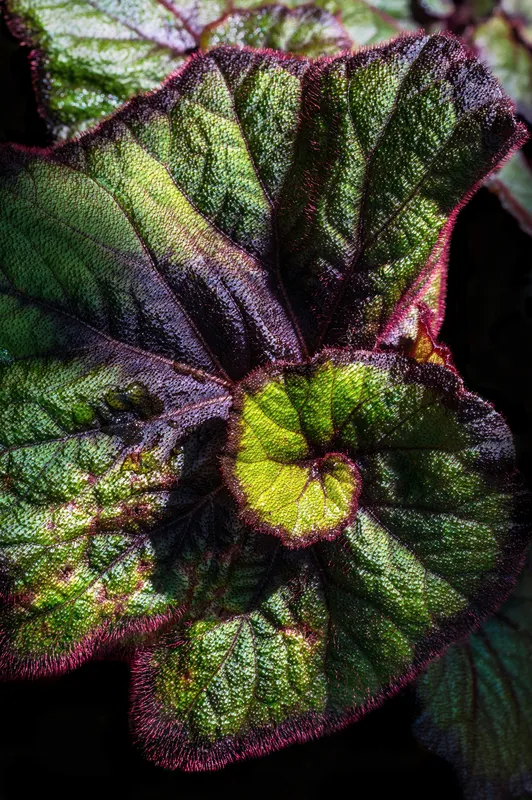
Last spring I was reorganizing my plant shelf and accidentally snapped off one of the best leaves on my Begonia rex Escargot - the one with the gorgeous silver spiral pattern. I was annoyed at myself for about thirty seconds, then realized it was a perfect propagation opportunity.
I scored six veins, pinned the leaf down, and covered it with a plastic dome. Six weeks later, five out of six cuts had tiny plantlets. By fall, I had five baby Escargot begonias, each with that same distinctive spiral beginning to form in their tiny leaves.
I kept two for myself and gave the other three to my mom, my neighbor, and my daughter’s preschool teacher. My mom put hers on the windowsill next to a jade plant that has been in our family for about twenty years. She sent me a photo last week and the little begonia is thriving.
That is the beauty of propagation. One accidental leaf snap turned into five plants and three happy people. Not a bad deal.
Next Steps
If you have a rex begonia, pick your healthiest leaf and give this a try. The pin method is the easiest place to start. And if you do not have a rex begonia yet, check out our rex begonia care guide to learn what these plants need to thrive before you bring one home.
Once you get comfortable with leaf propagation, try it on other begonia species too. Many rhizomatous begonias respond to the same technique, and it opens up a whole world of sharing and trading with other plant people.
Happy propagating. May your veins root and your leaves not rot.