The Silent Killer in Your Pot
Here is something nobody tells you when you start collecting houseplants: overwatering is not about how much water you give at once. It is about how often you water and whether the soil actually dries out between sessions. And when things go wrong - when water sits too long and the roots start drowning - you get root rot.
Root rot is the number one killer of indoor plants, and I say that as someone who has personally sent more than a few plants to the compost bin because of it. The tricky part? By the time you notice something is off above the soil line, the damage below has usually been going on for weeks.
But here is the good news. If you catch it early enough, you can absolutely save your plant. And once you understand what causes root rot in the first place, preventing it becomes second nature.
What Exactly Is Root Rot?
Root rot is a condition where the roots of your plant decay and die, usually because they have been sitting in waterlogged soil for too long. When soil stays constantly wet, the air pockets that roots need to breathe collapse. Without oxygen, root cells start dying. And once that happens, opportunistic fungi like Pythium, Phytophthora, Fusarium, and Rhizoctonia move in and accelerate the decay.
Think of it like this - your plant’s roots need to breathe just like you do. Imagine trying to breathe with a wet towel over your face. That is essentially what waterlogged soil does to a root system.
The fungi are already present in most soil mixes in small amounts. They are not a problem when conditions are healthy. But the moment you create a warm, wet, oxygen-depleted environment? They throw a party. And your plant is not invited.
How to Spot Root Rot Before It Is Too Late
The frustrating thing about root rot is that the early symptoms look a lot like underwatering. That is why so many plant parents make it worse by adding more water when they see their plant struggling.
Here are the signs to watch for, starting with what you can see above the soil:
Above-Ground Warning Signs
Yellowing leaves that feel soft. If your lower leaves are turning yellow and feel mushy rather than dry and crispy, that is a red flag. Underwatered plants get dry, papery yellow leaves. Overwatered plants get soft, almost translucent yellow ones.
Wilting even when the soil is wet. This is the biggest clue. If your plant is drooping and the soil is moist, the roots are not doing their job anymore. Healthy roots absorb water. Rotting roots cannot.
Stunted or stopped growth. A plant that was growing fine and suddenly stalls - especially during the growing season - may have compromised roots.
A musty or sour smell. Get your nose close to the soil. If it smells swampy, sour, or like something is decomposing, that is a strong indicator of rot happening below.
Leaves dropping for no apparent reason. The plant is shedding foliage because damaged roots cannot support the existing leaf load.
Below-Ground Confirmation
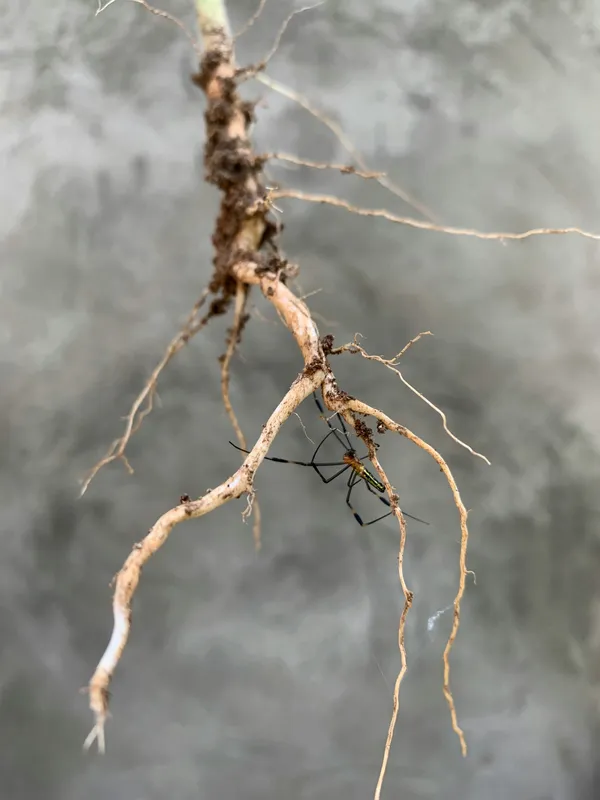
When you suspect root rot, you need to check the roots. Gently slide the plant out of its pot and examine the root ball.
Healthy roots are firm, white or tan, and slightly springy to the touch. Rotting roots are brown or black, mushy, and may have a slimy texture. Sometimes the outer layer of the root slides right off when you touch it, leaving behind a thin, thread-like core. The smell will be unmistakable - a distinct odor of decay.
If only a small portion of the root system is affected, you are in good shape. If most of the roots are dark and mushy, you have a harder fight ahead, but it is still worth trying.
How to Save a Plant with Root Rot
Alright, you have confirmed root rot. Do not panic. Here is what to do, step by step.
Step 1 - Remove the Plant and Assess the Damage
Take the plant out of its pot and gently shake or rinse off the old soil. You want a clear view of the entire root system. Do not be rough - the healthy roots are fragile right now.
Step 2 - Trim the Dead Roots
Using clean, sharp scissors or pruning shears (sterilize them with rubbing alcohol first), cut away all the brown, mushy, slimy roots. Cut back to where you see firm, white tissue. Do not be shy about this. It is better to remove too much dead material than to leave rot behind.
Between cuts on heavily infected plants, wipe your shears with rubbing alcohol again. The fungi can spread through contaminated tools.
Step 3 - Trim the Foliage
This step is one people skip, but it matters. Your plant now has a smaller root system, which means it cannot support as many leaves. Prune back about a third of the foliage, prioritizing any leaves that are already yellowing or damaged. This reduces the demand on the remaining healthy roots.
Step 4 - Treat the Remaining Roots
If you have hydrogen peroxide (the regular 3% kind from the drugstore), you can dip the remaining healthy roots in a solution of one part peroxide to two parts water. This helps kill any lingering fungal spores. Some folks use a diluted fungicide - either works.
Let the roots air dry for a few hours. I usually set the plant on a paper towel on the kitchen counter. My kids have learned not to ask questions when they see a naked plant drying on the counter. It is just a Tuesday around here.
Step 5 - Repot in Fresh Soil
Throw away the old soil. Do not reuse it, even for other plants. The fungal spores are in there and will just cause problems again.
If you are reusing the same pot, wash it thoroughly with a diluted bleach solution (one part bleach to nine parts water) and let it dry completely. Better yet, use a clean pot with drainage holes.
Repot using fresh, well-draining potting mix. For most houseplants, I like to add extra perlite - about a 70/30 mix of potting soil to perlite. This creates the air pockets that prevent waterlogging.
Step 6 - Water Carefully Going Forward
After repotting, give the plant a light watering to settle the soil around the roots. Then leave it alone. Do not water again until the top inch or two of soil is dry. The recovering root system needs time to heal, and excess moisture right now is the last thing it needs.
Put the plant in bright, indirect light (not direct sun, which could stress it further) and give it a few weeks to recover. Do not fertilize during recovery - the roots cannot handle it yet.
How to Prevent Root Rot in the First Place
Prevention is always easier than treatment. Here is what I do to keep root rot out of my plant collection.
Pick the Right Pot
Always use pots with drainage holes. I know those gorgeous ceramic pots without drainage look amazing on Instagram, but they are root rot factories. If you absolutely must use a decorative pot without drainage, put your plant in a nursery pot inside it and take it out to water.
And please, do not put rocks or gravel at the bottom of pots “for drainage.” This is one of those myths that will not die. It actually raises the water table inside the pot and makes root rot more likely, not less.
Use Well-Draining Soil
Different plants need different soil mixes, but the universal principle is that water should flow through and not sit. Standard potting soil straight from the bag is often too dense for most houseplants. Amend it with perlite, pumice, or orchid bark to improve aeration.
For especially rot-prone plants like succulents, string of pearls, or alocasias, I use a very chunky mix - sometimes up to 50% perlite or pumice.
Water on the Plant’s Schedule, Not Yours
This is the big one. Do not water on a fixed schedule. Instead, check the soil before watering every time. For most tropical houseplants, wait until the top inch or two of soil is dry. For succulents and cacti, wait until the soil is bone dry all the way through.
I know it is tempting to make “Water Wednesday” a thing (my wife has tried), but plants do not care about your calendar. Their water needs change with the seasons, the temperature in your home, the humidity level, and a dozen other factors.
Mind the Seasons
Plants drink less water in fall and winter when growth slows down. This is when root rot strikes most often, because people keep watering at their summer frequency without realizing the plant’s needs have dropped. Cut your watering way back from November through February.
Improve Air Circulation
Good airflow around your plants helps soil dry out at a healthy rate. If your plants are packed tightly on a shelf with no air movement, consider spreading them out or adding a small fan nearby. This is especially helpful in bathrooms and other humid rooms.
Check on Repotted Plants
After repotting, plants sometimes sit in soil that is too wet because you watered right away and the roots have not grown into the new soil yet. Be extra cautious with watering for the first few weeks after repotting.
Plants That Are Most Susceptible to Root Rot
Some plants are more forgiving of wet feet than others. Here are the ones that need you to be extra careful:
Succulents and cacti store water in their leaves and stems, so their roots are adapted to dry conditions. They rot fast in wet soil.
String of pearls, hearts, and turtles - all the “string of” varieties are extremely sensitive to overwatering. Their thin root systems rot quickly.
Fiddle leaf figs are dramatic about everything, and root rot is no exception. Their thick roots are susceptible and they will drop leaves at the first sign of trouble.
Alocasias have tuberous roots that can rot if conditions are too wet. I have lost more alocasias to root rot than I care to admit.
ZZ plants have large rhizomes that store water. Despite being marketed as “impossible to kill,” they will absolutely rot if overwatered.
On the flip side, plants like pothos, philodendrons, and peace lilies are more tolerant of moisture and less likely to develop root rot (though it is still possible if you really overdo it).
When It Is Too Late
Sometimes, despite your best efforts, the plant cannot be saved. If nearly all the roots are gone, or the stem itself has turned mushy and dark at the base, it may be time to say goodbye.
But before you compost the whole thing, check if there are any healthy sections that could be propagated. A single healthy stem cutting from a pothos or philodendron can root in water and give you a fresh start. Even with alocasias, sometimes the corms (small bulb-like structures near the base) are still viable and can be sprouted.
I have a golden pothos on my desk right now that started as a single cutting salvaged from a root-rot casualty three years ago. It is now six feet long. Plants are resilient like that.
The Takeaway
Root rot sounds scary, and it can certainly be heartbreaking when you lose a plant you have been nurturing for months. But it is also entirely preventable with good habits - proper drainage, well-draining soil, and watering based on what the plant needs rather than what the calendar says.
And if root rot does strike, early detection is everything. Check your roots at the first sign of unexplained wilting or yellowing. The faster you catch it, the better your chances of saving your plant.
Now if you will excuse me, I need to go check on my Alocasia Zebrina. It has been looking a little too relaxed lately, and I do not trust it.