How to Propagate Snake Plants: 3 Methods (Plus the Variegation Warning Nobody Tells You)
Snake plants are my kind of plant. They forgive neglect. They grow in low light. They survive the kind of conditions that would kill most other houseplants. And when you want more of them, they are surprisingly easy to multiply.
I have been propagating snake plants for a few years now, and I will be honest with you: the first time I tried, I did everything right and still ended up with plain green plants instead of the beautiful yellow-edged Laurentii I was trying to clone. Nobody warned me about the variegation thing. I am going to warn you.
But first - the good news. If you have a solid green snake plant, or if you do not mind plain green babies, snake plant propagation is one of the most beginner-friendly projects in houseplants. You can use just water and a jar. Results take a few weeks, not months. And one healthy plant can become ten.
Here is how to do it three different ways.
The Short Version: Which Method Should You Use?
Before we dive in, here is the quick decision guide:
- Division - Best for variegated plants (Laurentii, Moonshine, Gold Hahnii). Also the fastest method. Go with this if your plant has pups or multiple crowns growing.
- Leaf cuttings in water - Best for beginners. Easy to monitor, fun to watch roots develop. Works for solid green varieties.
- Leaf cuttings in soil - Good if you want to skip the transition step. Less visual feedback, but perfectly fine once you get the hang of it.
Keep reading for step-by-step details on each.
What You Need
For any of these methods, you will want:
- A healthy snake plant (obviously)
- Clean, sharp scissors or a knife - this matters more than you think. Dull, dirty blades crush and introduce bacteria. Wipe your blade with rubbing alcohol before cutting.
- A jar or glass of water (for the water method)
- Well-draining potting mix - cactus/succulent mix works great, or regular potting soil with extra perlite added
- Small pots, 4 to 6 inches works well for new plants
Method 1: Division (For Variegated Plants and Fastest Results)
If your snake plant has been growing for a while, there is a good chance it has developed multiple crowns or visible pups at the base. Division means separating these into individual plants. This is the only method that guarantees the new plants look exactly like the parent.
Step 1: Remove the plant from its pot. Tip it gently and work the root ball loose. If it is root-bound (tight and dense), you may need to run a knife around the inside of the pot first.
Step 2: Brush off excess soil. You want to see the roots and rhizomes clearly. Shake out what you can, and gently untangle the rest.
Step 3: Find the natural divisions. Look for where individual crowns or pups connect to the main root system. They will have their own cluster of roots. Sometimes they practically fall apart on their own; other times you need to cut through the rhizome.
Step 4: Cut if necessary. Use your clean, sharp tool to cut through any rhizome connecting a pup to the main plant. Each division needs to have at least a few roots attached to survive.
Step 5: Pot up each division. Plant them in fresh, well-draining mix at the same depth they were growing before. Water lightly and let them settle in.
Divided plants bounce back quickly. Within a few weeks they are usually pushing out new growth.
Method 2: Leaf Cuttings in Water
This is the method I reach for when I am in no hurry and want something to watch. There is genuine satisfaction in checking the jar every week and seeing white nubs appear where there used to be nothing.
Step 1: Choose a healthy leaf. Pick one that is firm, undamaged, and at least a foot long if possible. Longer leaves can give you more cuttings.
Step 2: Cut the leaf into sections. Each section should be 3 to 4 inches long. You can do this across the entire leaf - just make sure you keep track of which end is up. This is critical. If you put a section in water upside-down, it will not root. I like to cut a small notch or angle on the bottom edge so I always know which way goes down.
Step 3: Let the cuts callus. Set the sections aside for a few hours or up to a day. This gives the cut ends time to dry slightly, which helps prevent rot.
Step 4: Place in water, bottom end down. The jar should cover the bottom inch or so of each cutting. You do not need to submerge more than that. A clear glass is nice so you can see root development.
Step 5: Maintain the water. Change the water every week or so. If the cuttings get slimy (they sometimes do), rinse them gently under running water and rub the slime off with your fingers. Keep the jar somewhere with bright indirect light and temperatures above 60 degrees F.
Step 6: Wait and watch. Roots usually appear in 3 to 5 weeks. After the roots are at least half an inch long, you can pot the cuttings into soil. Do not wait too long - water roots and soil roots are slightly different, and transitioning while the roots are still young goes more smoothly.
Step 7: Pot into well-draining mix. Plant each rooted cutting with the roots buried and the cutting supported upright. Water lightly and keep in bright indirect light. Baby snake plants that came from cuttings are a little more tender than adult plants at first, so ease them into normal care.
Pups will emerge from the soil at the base of the cutting over the next several months. This is the exciting part - the moment you realize your little leaf section is now a whole new plant.
Method 3: Leaf Cuttings in Soil
Skip the water jar entirely if you prefer. The process is similar, but you plant directly into slightly moist soil instead.
Step 1: Cut the leaf into 3 to 4 inch sections, same as above. Mark which end is up.
Step 2: Let the cut ends dry and callus for a day or two. This is even more important for soil propagation, because moisture in soil can cause rot if the cut is fresh.
Step 3: Insert the bottom end of each section about an inch into a well-draining mix. Cactus or succulent soil is ideal. Pack the soil lightly around the base so the cutting stands up.
Step 4: Place in bright indirect light. Water very sparingly - just enough to keep the mix from bone-dry. Overwatering is the most common failure here. Let the top inch of soil dry out completely between waterings.
Step 5: Roots develop underground, so you will not see progress the way you can with water propagation. After 4 to 6 weeks, give the cutting a gentle tug. Resistance means roots have formed. When pups appear at the soil surface, you know propagation succeeded.
THE Variegation Warning
Okay, this is the thing I wish someone had told me before I spent two months waiting for cuttings from my Laurentii.
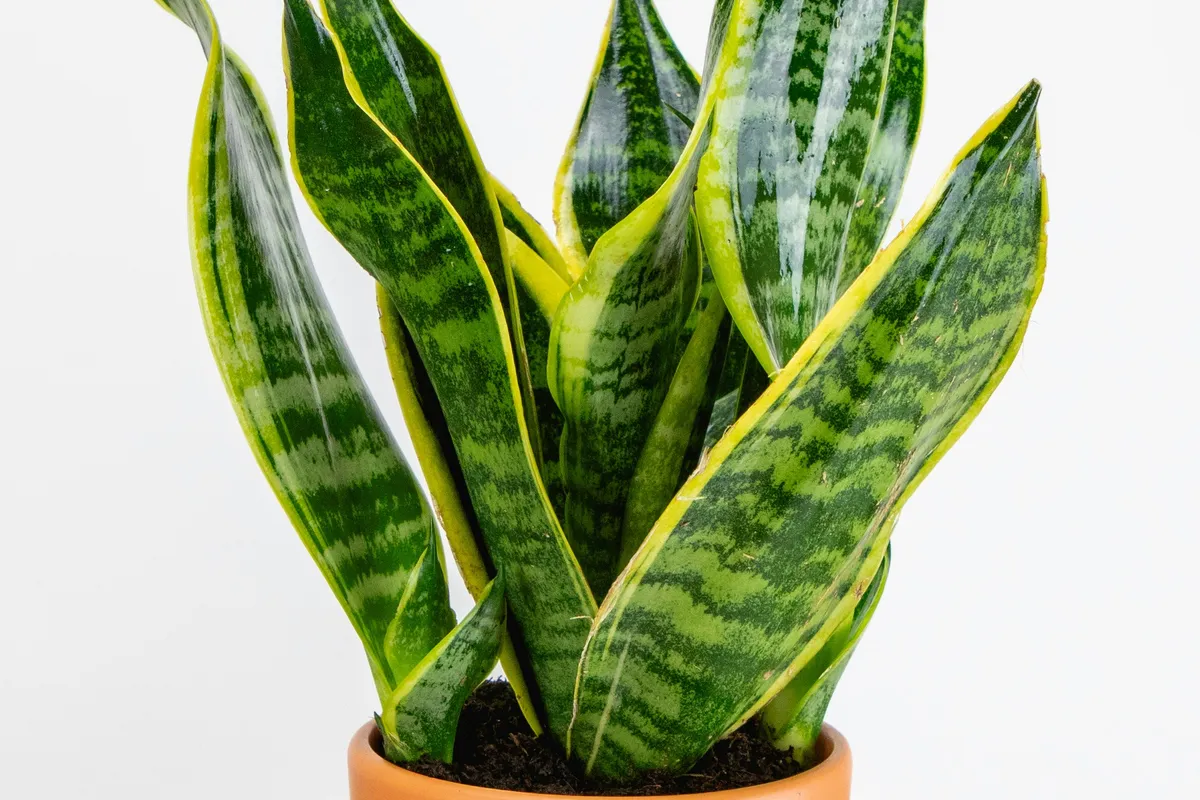
Snake plants with yellow or white leaf margins - the classic Laurentii, the Futura Superba, Golden Hahnii, Bantel’s Sensation - have what is called chimeric variegation. The color does not come from the whole leaf cell. It comes from specialized tissue at the plant’s growing points (the meristem). When you take a leaf cutting, you are not including that meristem tissue. The new plant that grows from your cutting will revert to plain green.
This is not a flaw in your technique. It is just biology. The leaf cells do not carry the variegation gene the way the growth points do.
If you want to keep the stripes, use division only. Separate the plant at the root level, making sure each division includes its own growing point and roots. Those divisions will grow up looking exactly like the parent.
If you do not mind green plants, leaf cuttings from a Laurentii will give you perfectly healthy solid green snake plants. Sometimes that is fine - free plants are free plants. But now you know what to expect.
Common Problems and How to Fix Them
The cuttings are rotting. This usually means the cuts were not dried before water/soil exposure, or the water method had stagnant water sitting too long. Change the water more frequently, or let cuttings callus longer before planting in soil.
No roots after 6 weeks. Patience, usually. But check that the cutting is right-side up (it matters!) and that temperatures are warm enough - below 60 degrees F, snake plants basically go dormant and root development stalls.
The new pups are tiny and growing slowly. This is normal. Snake plant pups grow slowly at first. Give them 3 to 6 months before expecting a full-sized plant.
The leaf cutting rotted before any roots formed. This happens sometimes, especially in warm, humid conditions. Make sure there is some airflow around your water jar, and change the water religiously. In soil, make sure you are not overwatering.
Roots are forming but the cutting looks shriveled. Happens in dry environments. A shriveled cutting can still produce pups - the leaf is sacrificing itself to feed the new growth below. As long as the pup is emerging and looks healthy, you are fine.
A Few Notes on Timing
Snake plants propagate best in spring and summer when they are in active growth. That does not mean you cannot do it in winter - I have started cuttings in January that rooted just fine - but it will be slower. Winter propagation means lower temperatures, less light, and a plant that would rather rest than grow. If you are patient, it still works.
For division, spring is the best time because you can repot at the same time. The plant bounces back faster when it is actively growing.
What Happens After Propagation
If you ended up with six new snake plants from one leaf (which is very possible if you sliced a long leaf into sections), you are now facing a common plant person problem: too many plants, not enough room.
Snake plants are great for giving away. They are genuinely one of the best beginner houseplants out there - they tolerate neglect, low light, inconsistent watering, and apartment conditions. Giving a small propagated snake plant to a friend who says “I kill everything” is a good move. They will probably keep it alive, and they will feel proud of themselves.
That is really the thing I like most about propagation. It turns one plant into many, and many plants into gifts, and gifts into the reason a friend texts you three months later to say “wait, I think it is growing.”
Grow something. Share it when you can.
Quick Reference
- Division: Spring preferred, keep variegation, fastest to mature
- Water cuttings: 3-5 weeks to root, easy for beginners, requires soil transition later
- Soil cuttings: 4-6 weeks to root, no transition needed, less visual feedback
- Keep cuttings right-side up: This is the most common mistake. Always mark which end is down.
- Variegated varieties: Division only if you want to preserve the markings