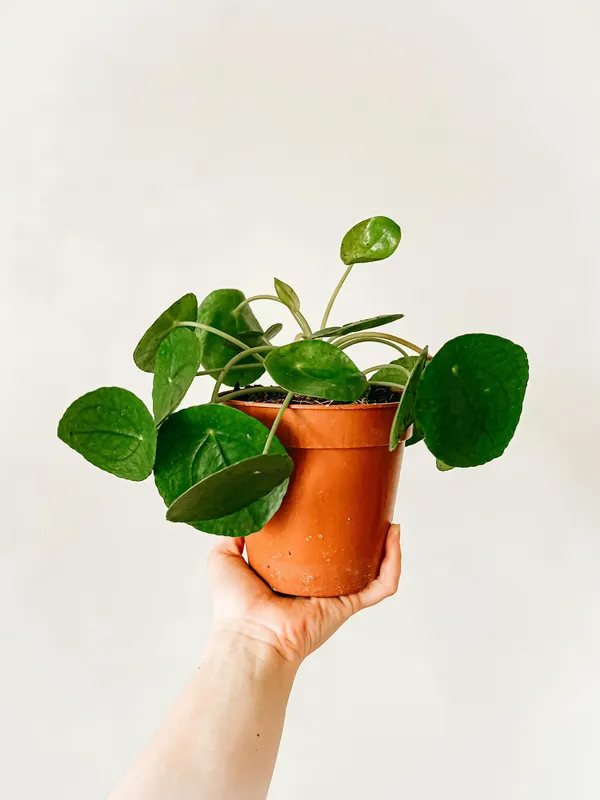
Propagating Pilea Peperomioides: Share the Friendship Plant
There is a reason people call Pilea peperomioides the friendship plant. Once it is happy, it starts pumping out baby plants like it is trying to populate your entire apartment. Little green pups pop up around the base, sometimes climbing right up the main stem, and before you know it you have got more Pileas than windowsill space.
That is a good problem to have. Because Pilea propagation is one of the easiest, most satisfying things you can do as a plant parent. You separate a baby, pot it up, and hand it to a friend. Or a neighbor. Or your kid’s teacher. Or honestly just keep them all because who are we kidding.
My mom has a Pilea on her kitchen windowsill that has produced probably 30 babies over the last few years. She gives them away in little red cups to anyone who visits. Very on brand for a Chinese mom - you are not leaving this house without food and a plant.
Understanding Pilea Pups
Before you start separating anything, it helps to know what you are looking at. Pilea peperomioides produces two types of baby plants, and they need slightly different handling.
Soil Pups (Rhizome Babies)
These are the most common type. They pop up through the soil around the base of the mother plant, connected underground by a rhizome (basically a horizontal root stem). They look like tiny standalone Pileas growing next to the big one. If you gently brush away the top layer of soil, you can usually see where they connect.
Stem Pups (Offsets)
These grow directly out of the mother plant’s main trunk. You will see a little baby sprouting from the stem itself, usually lower down. They tend to be smaller and may not have their own root system yet.
Both types are totally viable for propagation. Soil pups are slightly easier because they often already have their own roots.
When to Propagate
Spring and early summer are ideal - the plant is actively growing and will recover faster from having babies separated. That said, I have done it in every season and it works fine as long as you give the babies decent light and warmth afterward.
The key question is not really about timing. It is about size. Wait until the baby has at least 2-3 leaves of its own and is roughly a third the size of the mother plant. Tiny one-leaf pups can survive separation, but their odds are much better if you let them grow a bit more.
I know it is tempting to separate them early. Resist. A bigger pup means a stronger start.
What You Need
Nothing fancy. Gather these before you start:
- A clean, sharp knife or pruning shears (sterilize with rubbing alcohol)
- Small pots, 3-4 inches across (with drainage holes - this is non-negotiable)
- Well-draining potting mix (regular houseplant mix with some perlite works great)
- A small glass or jar of water (if you are water-rooting)
- Optional: a chopstick for loosening soil
The chopstick trick is one my dad uses for everything in the garden. Works way better than your fingers for gently working around roots without damaging them.
How to Separate Soil Pups
This is the most common scenario and the easiest one.
Step 1: Assess the situation. Look at the base of your mother plant. Identify which pups are big enough to separate (remember - at least 2-3 leaves). Leave the tiny ones alone for now.
Step 2: Unpot the mother plant. Gently remove the whole plant from its pot. Shake off loose soil so you can see the root system and where the pups connect.
Step 3: Find the connection point. Trace the pup’s stem down into the soil to where it connects to the mother plant via the rhizome. You are looking for the underground runner that links them.
Step 4: Make a clean cut. Using your sterilized knife or shears, cut the rhizome cleanly. Try to keep as many of the pup’s roots intact as possible. If the pup already has a decent root ball, great. If it has sparse roots, that is okay too - we will deal with that.
Step 5: Pot it up (if it has roots). If your pup came away with a healthy cluster of roots, plant it directly into a small pot with well-draining soil. Water it lightly and place it in bright, indirect light.
Step 6: Water-root first (if roots are sparse). If the pup has few or no roots, stick the cut end in a glass of water. Keep it in bright, indirect light and change the water every few days. Within 2-3 weeks, you should see white roots developing. Once roots are an inch or two long, pot it up in soil.
Step 7: Repot the mother. Put your mother plant back in her pot with fresh soil if needed. She will be just fine. She has done this before.
How to Separate Stem Pups
Stem pups require a bit more care because they are literally growing out of the main trunk.
Step 1: Let it grow. Wait until the stem pup has 2-3 leaves and a visible little stem of its own. Patience pays off here.
Step 2: Cut cleanly. Using a sterilized blade, cut the pup off as close to the mother plant’s main stem as you can. You want a clean, single cut - no sawing back and forth.
Step 3: Water-root. Stem pups almost never have roots, so water-rooting is the move. Place the cut end in a small glass of water, making sure only the stem is submerged (not the leaves). Bright, indirect light. Change the water every 3-4 days.
Step 4: Wait for roots. This takes 2-4 weeks typically. You want at least an inch of root growth before potting up. I like to wait until there are multiple roots branching out - gives the plant a better foundation.
Step 5: Pot and baby it. Plant in a small pot with well-draining mix, water gently, and keep in a warm spot with bright indirect light. For the first week or two, keep the soil slightly more moist than you would for an established Pilea - the baby is getting used to soil life.
Aftercare for Baby Pileas
Newly separated pups are basically newborns. They need a little extra attention for the first few weeks.
Light: Bright, indirect light is essential. A north or east-facing windowsill is perfect. Avoid direct afternoon sun - it can scorch the delicate new leaves.
Water: Keep the soil lightly moist but not soggy. Pilea babies are more sensitive to overwatering than established plants. If in doubt, wait another day. Stick your finger in the soil - if the top inch is dry, water it.
Temperature: Keep them in a warm spot, ideally 65-80 degrees F. Avoid cold drafts, radiators, or heat vents. Room temperature is great.
Fertilizer: Hold off for the first month. The baby needs to establish its roots before dealing with fertilizer. After that, a half-strength balanced liquid fertilizer once a month during growing season is plenty.
Humidity: Pilea is not super fussy about humidity, but babies appreciate a bit more moisture in the air. If your home is really dry, grouping plants together or placing the pot on a pebble tray helps.
Common Problems (and How to Fix Them)
Baby is drooping after separation. Totally normal. Transplant shock is real. Keep it in bright indirect light, water appropriately, and give it a week. It should perk back up.
Leaves are curling inward. Usually too much direct light or underwatering. Move it slightly away from the window and check the soil moisture.
No roots developing in water. Make sure the water is clean (change it every 3-4 days) and the glass is in bright light. Some pups just take longer - give it 4-6 weeks before worrying.
Pup is turning yellow. If just the lowest leaf yellows, that is normal - the plant sometimes sacrifices its oldest leaf while establishing. If multiple leaves yellow, check for overwatering or poor drainage.
Mother plant looks sad after separation. She is fine. Repot with fresh soil, water normally, and she will bounce right back. She has literally evolved to do this.
The Sharing Economy
Here is the thing about Pilea propagation that makes it special. Once you get the hang of it, you end up with way more plants than you need. And that is kind of the point.
In Chinese culture, the money plant symbolizes good fortune and prosperity. Sharing it with others is supposed to spread that good luck around. My mom takes this very seriously - she has given Pilea babies to our neighbors, my kids’ friends’ parents, her book club, and at least three people at the grocery store.
There is something nice about handing someone a little plant you grew. It is a living thing that came from your living thing. It costs nothing but means something. And it teaches kids a great lesson about generosity - my daughter now insists on giving plant babies to her friends at school.
Start propagating your Pilea and you will quickly understand why it is called the friendship plant. You literally cannot stop sharing.
Quick Reference
- Best time: Spring or early summer, but year-round works
- Pup size: Wait for 2-3 leaves minimum
- Soil pups: Can often go straight to soil if roots are good
- Stem pups: Water-root first, then pot up
- Root time in water: 2-4 weeks
- Post-separation care: Bright indirect light, lightly moist soil, no fertilizer for a month
- Difficulty: Beginner-friendly - one of the easiest plants to propagate