How to Propagate Peperomia: Three Methods for Endless Free Plants
I bought my first peperomia at a grocery store for three dollars. It was a Peperomia obtusifolia - the baby rubber plant - sitting in a sad little pot between the wilting bouquets and the organic bananas. That was four years ago. I now have eleven peperomia plants spread across three rooms, and I have spent a grand total of six dollars on them.
The secret? Peperomia are absurdly easy to propagate. They root from stems, from leaves, and even from half a leaf. Once you learn how, you will never look at a peperomia the same way again. Every leaf becomes a potential new plant. It is both exciting and slightly unhinged.
Here is everything I have learned about propagating these compact, cheerful little plants - including the mistakes I made so you do not have to.
Why Peperomia Are Perfect for Propagation
Peperomia are semi-succulent, meaning they store water and nutrients in their thick, fleshy leaves and stems. That stored energy is exactly what a cutting needs to survive while it grows new roots. Unlike more delicate tropicals that wilt and sulk the moment you snip them, peperomia cuttings stay plump and patient.
There are over 1,500 species of peperomia, and most of the popular houseplant varieties propagate well. Whether you have a watermelon peperomia (Peperomia argyreia) with those gorgeous striped leaves, a trailing peperomia hope, or the classic baby rubber plant, the basic techniques are the same.
The three main methods are stem cuttings, leaf cuttings, and division. Which one you choose depends on the type of peperomia you have and how many new plants you want.
Method 1: Stem Cuttings (The Reliable Workhorse)
Stem cuttings are my go-to method. They work for almost every peperomia variety, they root quickly, and the success rate is high even for beginners.
What you need
- A healthy parent plant with at least a few stems to spare
- Clean, sharp scissors or pruning shears
- A small pot with drainage holes
- A mix of half perlite and half peat moss (or coconut coir)
- Optional: rooting hormone powder
- A clear plastic bag or plastic wrap
Step by step
Start by picking a healthy stem on the parent plant. You want a piece that is about three to four inches long with at least two or three leaves. Avoid stems that look leggy, damaged, or discolored.
Cut the stem just below a leaf node - that is the small bump where a leaf attaches to the stem. This is where the new roots will grow from. Use clean scissors. I wipe mine with rubbing alcohol before propagating because bacterial infections are the fastest way to lose a cutting.
Remove the bottom leaf or two so you have about an inch of bare stem at the base. If you are using rooting hormone, dip the cut end in it now. It is not required, but it speeds things up.
Fill your pot with the perlite and peat moss mix, dampen it thoroughly, and poke a small hole with a pencil or your finger. Insert the cutting about an inch deep and gently press the soil around it.
Cover the pot with a clear plastic bag or plastic wrap to create a humidity dome. Peperomia cuttings root faster in humid conditions. Set it somewhere with bright, indirect light - not direct sun, which will cook the cutting inside its little greenhouse.
What to expect
Check the soil every few days and mist it if it feels dry. In two to four weeks, you should feel resistance when you very gently tug the cutting. That means roots are forming. Once the cutting has a solid root system - usually after four to six weeks - you can remove the humidity dome and start treating it like a regular peperomia.
I propagated a Peperomia obtusifolia this way last spring, and it rooted in about three weeks. My Peperomia hope took a bit longer, closer to five weeks. Every variety is a little different, so be patient.
Method 2: Leaf Cuttings (The Magic Trick)
This is the method that makes non-plant people think you are some kind of wizard. You take a single leaf, stick it in soil, and a completely new plant grows from it. It takes longer than stem cuttings, but it is wildly satisfying.
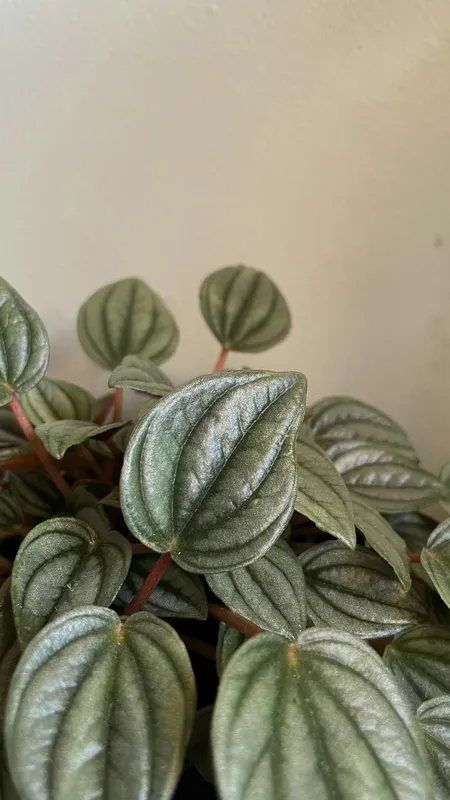
Leaf cuttings work best for peperomia varieties with thick, fleshy leaves - the baby rubber plant, watermelon peperomia, and Peperomia caperata (the ripple peperomia) are all great candidates.
What you need
- A healthy leaf with its petiole (the little stem that attaches the leaf to the main stem)
- The same perlite and peat moss mix
- A small pot with drainage holes
- Plastic wrap or a clear bag
- Patience. More patience than you think.
Step by step
Choose a mature, healthy leaf. Not the newest baby leaves at the top, and not the oldest ones at the bottom that might be on their way out. Pick one in the prime of its life.
Cut the leaf off the plant, keeping the petiole attached - about half an inch to an inch of it. This is where the roots will develop.
Here is where it gets interesting. For larger-leafed varieties like watermelon peperomia, you can actually cut the leaf in half horizontally. This sounds violent, but it works. Each half can produce a new plant, and cutting the leaf in half actually redirects the plant’s energy toward root production instead of sustaining a big leaf.
Insert the petiole (or the cut edge of the half-leaf) about half an inch into your damp soil mix. If you are doing half-leaves, make sure the cut side goes into the soil, not the outer edge.
Cover with plastic wrap and place in bright, indirect light. Then wait.
What to expect
Leaf cuttings are slower. You are looking at four to eight weeks before you see roots, and it can take two to three months before tiny plantlets emerge at the base of the leaf. The original leaf will eventually wither as the new baby plant takes over. Do not panic when this happens - it is normal and healthy.
The first time I tried this with a watermelon peperomia leaf, I was convinced it had failed after six weeks of absolutely nothing happening. I almost tossed it. Then one morning I noticed the tiniest green bump at the soil line. That bump is now a full-sized plant sitting on my daughter’s desk.
A note on variegated varieties
If you have a variegated peperomia, stick to stem cuttings. Leaf cuttings from variegated plants often revert to solid green because the new growth does not always carry the variegation pattern. Stem cuttings preserve the variegation much more reliably.
Method 3: Division (The Quick Win)
If you want an instant new plant and your peperomia has multiple stems coming from the soil, division is the fastest path. You are not growing a new plant from scratch - you are splitting an existing plant into two (or more) independent ones.
What you need
- A peperomia with at least two or three distinct stems or rosettes
- Two pots with drainage holes
- Fresh potting mix (standard houseplant mix with added perlite works great)
- A workspace you do not mind getting dirty
Step by step
Water the plant the day before you plan to divide it. Moist soil makes the roots easier to separate without damage.
Gently remove the entire plant from its pot. Shake or brush away loose soil so you can see the root structure. Most peperomia have shallow, relatively small root systems, so do not worry if the root ball looks modest.
Identify natural divisions - clusters of stems that have their own root sections. Gently pull these apart with your fingers. If roots are tangled, use a clean knife to separate them. Do not worry about losing a few roots in the process. Peperomia are tough.
Pot each division in its own container with fresh potting mix. Water lightly and place in bright, indirect light. Skip the humidity dome for divisions since they already have established root systems.
What to expect
Divisions usually bounce back within a week or two. You might see some minor drooping for the first few days as the plant adjusts, but it should perk up quickly. This is the only method that gives you a “finished-looking” plant immediately, which is why I use it when I want to give a friend a plant that does not look like a science experiment.
The Best Soil Mix for Propagation
For stem and leaf cuttings, skip regular potting soil. It holds too much moisture and can rot cuttings before they root. The ideal propagation mix is light, airy, and fast-draining.
My recipe: equal parts perlite and peat moss (or coconut coir if you prefer a more sustainable option). That is it. Mix them together, dampen until the mix is moist but not dripping, and you are good to go.
For divisions that already have roots, you can use standard houseplant potting mix with a handful of extra perlite mixed in for drainage.
When to Propagate
Spring and summer are the best times to propagate peperomia. The plant is actively growing during these months, so cuttings root faster and divisions recover more quickly. I usually do my propagation in April or May when the days are getting longer and my plants are pushing out new growth.
Can you propagate in fall or winter? Yes, but expect everything to take longer. I have rooted peperomia cuttings in January, but they took nearly twice as long as spring cuttings. If you have grow lights, that helps offset the slower winter growth.
Common Mistakes (I Have Made All of Them)
Overwatering cuttings. The number one killer. Cuttings need moisture, but they do not have roots yet, so they cannot absorb water the way an established plant can. Soggy soil leads to rot. Keep the soil damp, not wet. If you squeeze a handful of the soil mix and water drips out, it is too wet.
Using dull or dirty tools. A ragged cut invites infection. Use clean, sharp scissors. It takes ten seconds to wipe them down.
Direct sunlight. Cuttings under a humidity dome in direct sun will literally cook. Bright, indirect light is the sweet spot. A north-facing window or a spot a few feet back from a south-facing window works well.
Checking too often. I know, I know. You want to peek. But pulling cuttings out of the soil to check for roots every two days damages whatever fragile roots are forming. Give it at least three weeks before you do the gentle tug test.
Giving up too early. Leaf cuttings especially test your patience. Some of mine have taken three months to show new growth. If the cutting is not mushy or moldy, it is probably still working on roots below the surface. Leave it alone.
Which Method Should You Use?
Here is a quick guide:
- Trailing varieties (Peperomia hope, Peperomia prostrata): Stem cuttings are easiest. Snip a trailing stem and root it.
- Rosette types (watermelon peperomia, ripple peperomia): Leaf cuttings work beautifully. You can also try stem cuttings if the plant has visible stems.
- Bushy types (baby rubber plant, Peperomia polybotrya): Any method works. Division is great if the plant is large enough.
- Variegated varieties: Stem cuttings only to preserve variegation.
What to Do with All Your New Plants
Once you start propagating peperomia, you will quickly run out of windowsill space. Trust me on this. My wife has started calling it my “peperomia problem,” which I think is unfair because it is clearly a peperomia blessing.
Here is what I do with the extras: I give them to friends and neighbors. Peperomia are compact, low-light tolerant, and very hard to kill, which makes them perfect gifts for people who claim they cannot keep plants alive. I keep a few rooted cuttings on hand at all times for birthdays, housewarming gifts, or just because someone mentioned they wanted a plant.
My daughter has started “selling” them at her lemonade stand for fifty cents each. She has made about four dollars total. I have not told her that her profit margin on free plants is technically infinite.
Next Steps
If you are new to peperomia, start with a baby rubber plant or Peperomia hope - both are cheap, widely available, and propagate like champions. Try one stem cutting first to get the hang of it, then experiment with leaf cuttings once you feel confident.
Already have a peperomia you love? Take a few cuttings this weekend. Spring is the perfect time. The worst that happens is a cutting does not take, and you try again. The best that happens is you end up with a windowsill full of tiny plants that you grew yourself. And honestly, that feeling never gets old.