How to Propagate Calathea by Division: More Prayer Plants for Free
I have a confession. I have killed more calatheas than I care to admit. Overwatered a medallion into mush. Let a rattlesnake calathea crisp up in my bedroom because I forgot the humidifier for two weeks. Watched a white fusion slowly lose every single leaf like it was personally offended by my tap water.
But here is the thing - the calatheas that survived? They got big. Really big. My calathea orbifolia outgrew its pot twice in one year and started looking like it was trying to escape. My prayer plant (technically a maranta, but we are all family here) was spilling over the edges of its shelf like a green waterfall.
That is when I learned the beautiful truth about calathea propagation: you cannot take cuttings like you would with a pothos or philodendron. But you can divide them. And division is honestly even better, because you end up with fully formed plants from day one - no waiting around for roots to grow in a glass of water on the kitchen counter.
Here is everything I have learned about dividing calatheas, prayer plants, and their relatives in the Marantaceae family.
Why Division Is the Only Way
If you have ever tried to root a calathea leaf cutting in water, I have bad news: it does not work. Calatheas are not stem plants. They grow from rhizomes - thick, fleshy underground stems that look kind of like ginger root. The rhizomes are the engine of the whole operation. They store energy, produce new shoots, and send out the thin feeder roots that absorb water and nutrients.
A calathea leaf without a piece of rhizome attached is like a car without an engine. It might look fine sitting on your shelf in a glass of water for a week or two, but it is never going to grow roots. Eventually it will just slowly fade.
Division works because you are separating the rhizome itself into two or more pieces, each with its own roots, stems, and leaves. You are not asking the plant to grow something new - you are just giving an existing growth point its own pot and space to keep doing what it was already doing.
When to Divide Your Calathea
Timing matters more with calatheas than with most houseplants. These are not the tough, forgiving types that will shrug off being uprooted in the middle of January.
Best time: Early spring, just as the plant is waking up from its winter slowdown and starting to push new growth. You will usually see fresh, tightly rolled leaves emerging from the center of the plant. That is your signal.
Acceptable time: Late spring through early summer. The plant is actively growing and has the energy to recover.
Risky time: Late summer through winter. The plant is slowing down or dormant. Division during this period means a much longer recovery and a higher chance of losing the divisions entirely.
I once divided a calathea medallion in November because I was impatient. Both halves dropped most of their leaves and looked terrible for three months. They eventually recovered, but it was a stressful winter for everyone involved - the plants and me.
What You Need
Gather everything before you start. Once the roots are exposed, you want to work quickly.
- A healthy, mature calathea with multiple growth points (look for clusters of stems emerging from different spots in the pot)
- Fresh potting mix: two parts peat or coco coir, one part perlite, one part orchid bark works well
- Clean pots sized appropriately for each division (do not go too big - more on this below)
- Clean, sharp scissors or a knife (sterilize with rubbing alcohol)
- A spray bottle with water
- Plastic bags or a clear humidity dome
- A watering can with room-temperature filtered water (calatheas are water snobs, I am sorry)
Step-by-Step Division Process
1. Water the Day Before
Give your calathea a good drink the day before you plan to divide. This does two things: it makes the soil easier to work with, and it ensures the plant is fully hydrated going into what is essentially surgery. A stressed, thirsty plant will have a much harder time recovering.
2. Gently Remove from the Pot
Turn the pot on its side and ease the plant out. If it is stuck, squeeze the sides of the pot a few times to loosen the root ball. Do not yank it out by the stems - calathea stems are surprisingly fragile and will snap.
3. Shake and Rinse the Roots
Gently shake off as much old soil as you can, then rinse the root ball under lukewarm water. This lets you see the rhizome structure clearly. You are looking for natural separation points - places where distinct clumps of stems are connected by thinner sections of rhizome.
This is usually the moment where I say “oh, that is way more tangled than I expected.” Take your time. Calathea roots can be a dense, woven mess.
4. Find the Natural Divisions
Look for clusters of stems that each have their own section of rhizome and a decent amount of roots. A good division should have at least two to three stems with leaves, a chunk of rhizome, and a healthy handful of roots.
Can you divide into single-stem sections? Technically yes, but single stems with small rhizome pieces are much more fragile and have a higher failure rate. I would only recommend this if you are experienced and willing to provide intensive aftercare.
5. Separate Gently
Try to pull the divisions apart with your hands first, working your fingers into the natural gaps between root clusters. If the rhizome sections are tightly connected, use your sterilized knife to cut through the connecting piece. Make a clean cut - do not saw back and forth.
If you accidentally break some of the thin feeder roots, do not panic. That is normal and unavoidable. The rhizome will grow new ones. What you want to protect is the rhizome itself and the main root mass attached to each division.
6. Pot Up Each Division
Here is where people make a critical mistake: they put a small division in a big pot, thinking they are giving it room to grow. What actually happens is the excess soil stays wet for too long and the stressed roots rot.
Size your pot to your division. A division with three to four stems should go in a pot maybe four to five inches across. It should feel snug, not swimming. You can always pot up later once it is established and growing.
Fill the pot partway with your fresh potting mix, set the division in so the rhizome sits at the same depth it was before (do not bury it deeper), and fill around the roots. Gently press the soil to eliminate air pockets, but do not pack it down hard.
7. Water and Create Humidity
Water each division thoroughly until water runs out the drainage holes. Use filtered or distilled water if possible - freshly divided calatheas are extra sensitive to the chlorine and minerals in tap water.
Now comes the secret weapon: humidity. Freshly divided calatheas lose moisture through their leaves faster than their reduced root system can replace it. The solution is to create a mini greenhouse. Loosely drape a clear plastic bag over each pot, or place them under a humidity dome. This keeps humidity around 70 to 80 percent while the roots recover.
Vent the bag or dome once a day for about 15 minutes to prevent mold. I usually do this in the morning when I am making my kids’ breakfast - just pull the bag open while I am in the kitchen anyway.
Aftercare: The Critical First Month
The first four weeks after division are when your calatheas are most vulnerable. Here is how to get through it.
Light: Bright indirect light only. No direct sun, which will stress the plant further. A north-facing window or a spot a few feet back from an east-facing window is perfect.
Water: Keep the soil consistently moist but not soggy. Check every two to three days by sticking your finger about an inch into the soil. If it feels dry, water. If it feels damp, leave it alone. Overwatering at this stage is the number one killer.
Humidity: Keep the plastic bag or dome on for at least two weeks. After that, you can start removing it for longer periods each day to gradually acclimate the plant to normal room humidity. If you see leaves curling or browning at the edges, put the dome back on for a few more days.
Fertilizer: Do not fertilize for at least six weeks after division. The roots need to recover, and fertilizer salts can burn damaged root tissue. Once you see active new growth - a fresh leaf unfurling from the center - you can start with a diluted balanced fertilizer at half strength.
Temperature: Keep divisions away from drafts, AC vents, and cold windows. Calatheas like it warm - 65 to 80 degrees Fahrenheit is the sweet range. Below 60 and you are asking for trouble.
Common Mistakes (and How I Know)
Dividing too aggressively. I once split a calathea ornata into five tiny pieces because I wanted to give plants to all my neighbors. Three of them died. Two barely survived. If the original plant only has six or eight stems total, just split it in half. Do not get greedy.
Skipping the humidity dome. My first calathea division, I just potted them up and set them on the shelf. Within three days every leaf was curling and going crispy at the edges. The humidity dome is not optional - it is the difference between success and a sad pile of brown leaves.
Using tap water right after dividing. I know, I know. Filtering water is annoying. But freshly divided calatheas are already stressed, and the chlorine and fluoride in tap water can push them over the edge. At minimum, leave your tap water out overnight so the chlorine evaporates. Better yet, use filtered or distilled.
Potting in too-large containers. I mentioned this above but it is worth repeating because it is the most common mistake I see. A small root system in a big pot means wet soil for too long, which means root rot, which means dead plant. Snug pot. Always.
Dividing in winter. Just do not. I have tried. The recovery takes forever and your success rate drops significantly. Wait for spring. Your future self will thank you.
Which Calatheas Divide Best?
Not all species in the Marantaceae family are equally easy to divide. Here is a quick rundown based on my experience:
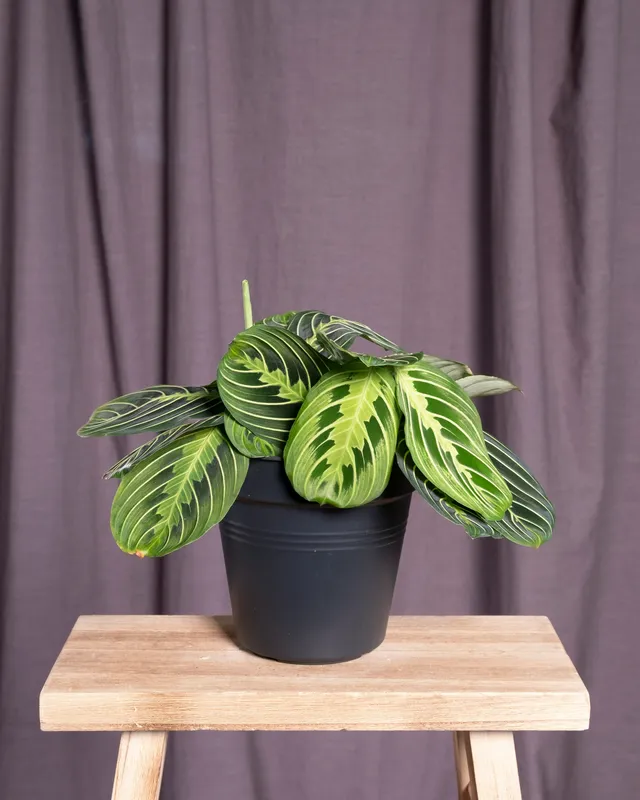
Easiest: Maranta leuconeura (the classic prayer plant) divides like a champ. It grows so prolifically that it practically divides itself. Calathea lancifolia (rattlesnake plant) and calathea rufibarba are also forgiving.
Moderate: Calathea orbifolia, calathea medallion, calathea ornata, and stromanthe triostar. These all divide well but are a bit more sensitive during recovery. The humidity dome is essential.
Harder: Calathea white fusion and calathea musaica. These are drama queens under the best circumstances, and the stress of division can send them into a tailspin. I would only divide these if the plant is clearly overcrowded and you are prepared for some leaf loss during recovery.
A Note on the Name Game
If you have been keeping up with plant taxonomy (and honestly, who can), you might know that many plants we call calathea have been reclassified as Goeppertia. The rattlesnake plant, for example, is technically Goeppertia insignis now, not Calathea lancifolia.
I am going to keep calling them calatheas because that is what every nursery label, plant shop tag, and fellow plant parent calls them. The propagation method is the same regardless of what the taxonomists decide, and at the end of the day, what matters is whether the plant is alive and happy in your home.
When to Divide Again
Once your divisions are established and growing well - usually after about six months to a year - you can treat them like any other calathea. Water when the top inch of soil is dry, maintain humidity above 50 percent, and feed during the growing season.
And eventually, they will get big enough to divide again. That is the beautiful cycle. My original calathea orbifolia has been divided three times now, and there are orbifolia descendants in four different households in my neighborhood. My daughter calls it “the plant that keeps giving,” which is a pretty good description.
The best part about division is that every new plant is already a mature, leaf-bearing specimen from day one. No tiny cuttings, no months of waiting for roots in a jar. You go from one big plant to two (or three) medium plants in an afternoon, and within a few months, they all look like they have been there forever.
So the next time your calathea is bursting out of its pot and you are thinking about sizing up the container - consider splitting it instead. Your friends, your neighbors, and your shelf space will all thank you.