How to Propagate Anthurium: Three Methods That Actually Work
I will be upfront with you. The first time I tried to propagate an anthurium, I hacked a perfectly healthy plant into three sad little chunks, potted them in whatever soil I had lying around, and then wondered why two of them turned to mush within a week.
Turns out, there is a right way and a wrong way to do this. And the right way is not even hard - it just requires knowing a few things before you start cutting.
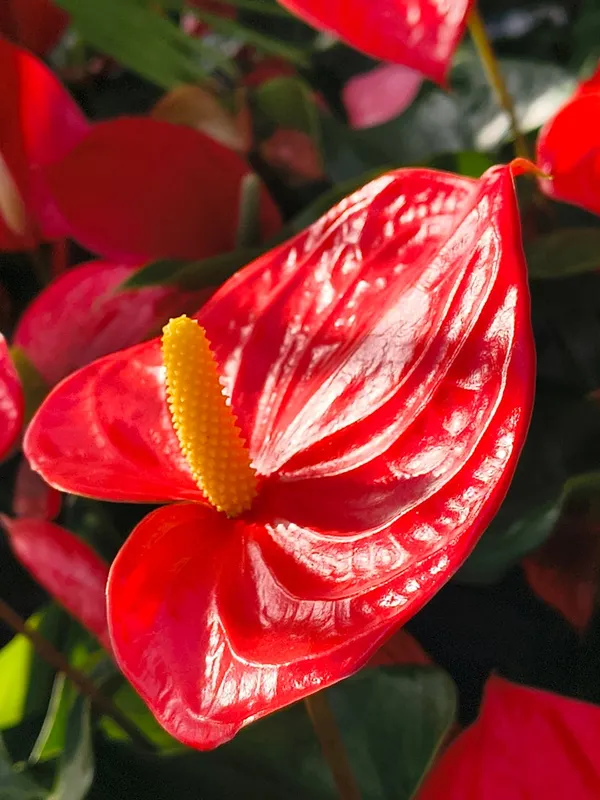
Anthuriums (Anthurium andraeanum and its many hybrids) are some of the most rewarding houseplants you can grow. Those glossy, waxy spathes come in reds, pinks, whites, and even deep purples. They bloom for weeks, they tolerate average indoor conditions, and once they get big enough, they practically beg to be divided.
So whether you have a massive anthurium that is outgrowing its pot, a leggy one that needs reshaping, or you just want more of a good thing, here are three methods that work.
Method 1: Division (The Easiest and Most Reliable)
Division is the gold standard for anthurium propagation, and it is where I recommend most people start. If your plant has multiple stems or crowns growing from the base, you are in business.
When to Divide
Spring or early summer is ideal. The plant is coming out of its winter rest and gearing up for active growth, so it will bounce back faster. That said, I have divided anthuriums in late summer with no problems. Just avoid doing it in the dead of winter if you can.
The other signal? If your anthurium looks crowded - stems packed tight, roots circling the bottom of the pot, or baby shoots popping up around the edges - it is telling you it is time.
How to Do It
First, water your plant a day before you plan to divide. This makes the roots more flexible and the soil easier to work with.
Then follow these steps:
- Gently slide the plant out of its pot. If it is stuck, squeeze the sides of the pot or run a butter knife around the edge. Do not yank it out by the stems.
- Shake or rinse off excess soil so you can see the root system clearly. I usually do this over the kitchen sink, which my wife loves.
- Look for natural separation points. Most anthuriums will have distinct clusters of stems, each with their own root system. These are your divisions.
- Using clean, sharp scissors or a sterilized knife, separate the clusters. Each division should have at least two to three leaves and a healthy portion of roots.
- If the roots are tangled (and they will be), be patient. Gently tease them apart with your fingers. Some root breakage is inevitable and totally fine.
- Pot each division into a well-draining aroid mix. I use a blend of regular potting soil, perlite, and orchid bark in roughly equal parts. The key is good drainage - anthuriums hate sitting in wet soil.
- Water lightly and place in bright, indirect light.
Aftercare
Newly divided anthuriums can look a little droopy for a week or two. This is normal. They are adjusting. Keep the soil lightly moist (not soggy) and avoid fertilizing for at least a month. High humidity helps too - a pebble tray or grouping plants together can make a difference.
I will be honest: I lost one division once because I put it in direct afternoon sun right after dividing. The stress was too much. Give your new plants a few weeks in a gentler spot before moving them to their permanent home.
Method 2: Stem Cuttings
If your anthurium has gotten leggy - maybe the lower leaves dropped and you are left with a long bare stem topped by a cluster of leaves - stem cuttings are the way to go. This method also works if your plant does not have obvious clusters for division.
What You Need
- A healthy stem at least six inches long with at least one node (the bumpy ring where leaves attach)
- Clean, sharp pruning shears or scissors
- A jar of water or a small pot with moist sphagnum moss
- Rooting hormone (optional but helpful)
Taking the Cutting
Find a stem section with at least one node and one or two healthy leaves. Cut at a 45-degree angle just below the node. This angled cut gives more surface area for roots to develop.
If there are aerial roots already growing from the node - those thick, brownish roots that grow out into the air - even better. You have a head start.
Remove any lower leaves that would sit in water or soil. You want one or two leaves at the top for photosynthesis, but nothing submerged where it can rot.
Rooting in Water
Place the cutting in a clear glass jar with the node submerged. Use room-temperature water and change it every three to four days. A clear container lets you monitor root development without disturbing the cutting.
Place the jar in bright, indirect light. A north or east-facing window works well. Direct sun will cook the cutting and encourage algae growth in the water.
You should see new roots within four to eight weeks. Once the roots are two to three inches long, transplant to soil. Do not wait too long - water roots are more fragile than soil roots, and the longer you wait, the harder the transition.
Rooting in Sphagnum Moss
My preferred method. Dampen a handful of sphagnum moss, squeeze out the excess water, and nestle the cutting’s node into it. Place the moss and cutting in a small pot or even a clear plastic container.
Keep the moss consistently moist but not waterlogged. The advantage here is that the roots that develop are already adapted to a solid medium, making the transition to soil much smoother.
I have had better success rates with sphagnum moss than water for anthuriums. Maybe seventy-five percent success with moss versus fifty percent with water. Your mileage may vary.
Method 3: Using Aerial Roots
This is the method nobody talks about enough. If your anthurium has aerial roots - those thick, sometimes woody roots that grow out from the stem into the air - you can use them to your advantage.
Anthuriums are naturally epiphytic in the wild. They grow on trees in tropical rainforests, clinging with aerial roots that absorb moisture from humid air. Those aerial roots on your houseplant are not a sign of distress. They are the plant doing what it has done for millions of years.
How to Use Them
Find a stem section that has at least one aerial root and one or two healthy leaves. Cut below the aerial root, making sure you include at least one node.
Place the cutting in a jar of water with the aerial root submerged, or tuck it into moist sphagnum moss. The aerial root will often start producing finer feeder roots within a couple of weeks - much faster than starting from scratch.
I have had cuttings with good aerial roots establish in as little as two weeks. Without aerial roots, the same process takes four to eight weeks.
A Pro Tip
If you have an anthurium with lots of aerial roots but you are not ready to cut it up, you can train those roots downward into the pot. Gently bend them and tuck them into the soil surface. Mist them regularly. Over time, they will anchor into the soil and help the plant absorb more nutrients. This makes the plant stronger and bushier, which gives you even more material for future propagation.
Common Mistakes (I Have Made Most of These)
Using heavy, moisture-retentive soil. Anthuriums need chunky, well-draining mix. Regular potting soil holds too much water and leads to root rot. Add perlite, orchid bark, or charcoal to lighten things up.
Cutting without sterilizing your tools. Bacteria and fungal spores can infect fresh cuts instantly. A quick wipe with rubbing alcohol takes ten seconds and can save your cutting.
Propagating a stressed or unhealthy plant. If your anthurium already has yellow leaves, root rot, or pest issues, fix those problems first. A sick plant does not have the energy to grow new roots from a cutting.
Not enough humidity. Anthuriums are tropical plants. If your home is dry (hello, winter in New York), the cuttings will struggle. A humidity tray, a clear plastic bag over the pot, or a spot near other plants can help.
Being impatient. This is my biggest weakness. Anthuriums are not the fastest rooters. Give them time. Resist the urge to pull cuttings out of the soil to check for roots every three days. Ask me how I know.
When Will I See New Growth?
After successful propagation, here is a rough timeline:
- Division: New leaves in two to four weeks. The plant already has an established root system, so recovery is fast.
- Stem cuttings in moss: Roots in three to six weeks, new leaves in six to ten weeks.
- Stem cuttings in water: Roots in four to eight weeks, then add transplant recovery time.
- Aerial root cuttings: Roots in two to four weeks, new leaves in four to eight weeks.
New spathes (the colorful “flowers”) usually take several months to appear on propagated plants. The plant wants to establish its root system and put out a few leaves before it invests energy in blooming. Be patient. It will happen.
What About Seeds?
You might be wondering about growing anthuriums from seed. It is technically possible, but honestly, I do not recommend it for most people. Anthurium flowers need to be hand-pollinated because the male and female parts mature at different times. Even if you get viable seeds, they can take four years to produce their first bloom.
Four years. My oldest kid will be in middle school by then. I will stick with division, thanks.
My Favorite Anthurium Propagation Hack
Here is something I stumbled onto by accident. When I repot my anthuriums each spring, I check for any offsets - small plantlets growing at the base of the mother plant. Sometimes these are so small they are easy to miss, just a tiny leaf or two with barely any roots.
Instead of potting these directly into soil where they might struggle, I pop them into a small container of damp sphagnum moss and put the whole thing inside a clear plastic takeout container. The lid creates a mini greenhouse with high humidity, and the moss keeps things moist without being soggy.
I have rescued offsets smaller than my thumb this way. Within a month, they are rooted and ready for their own pot. It is basically a plant ICU, and it works incredibly well.
What to Do Next
If you are new to anthuriums, make sure your mother plant is healthy before attempting propagation. Check out our anthurium care guide for the basics on light, water, and feeding.
Already have anthurium cuttings rooting on your windowsill? Try propagating some of your other tropical plants too. Philodendrons, hoyas, and monsteras are all great candidates and use similar techniques.
And if your propagation attempts do not work out the first time, do not sweat it. Every plant parent has a compost pile of lessons learned. The important thing is you tried, and next time you will nail it.