Peace Lily Care: The Complete Guide to Growing Spathiphyllum Indoors
If I had to pick one plant that has been in every apartment, office, and family home I have ever visited, it would be the peace lily. My mom kept one on the kitchen counter in our place in Flushing for as long as I can remember. It survived being knocked over by my brother, underwatered for weeks during summer vacations, and somehow still pushed out those elegant white blooms every spring. That plant was basically a family member.
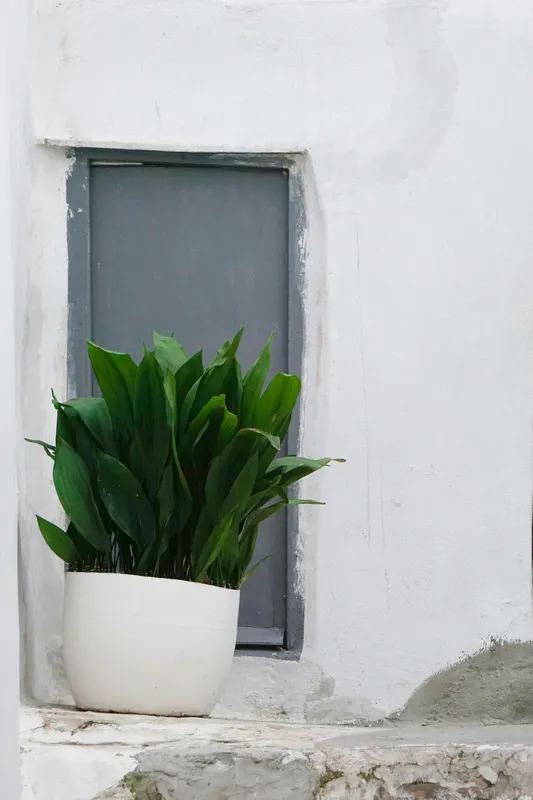
The peace lily (Spathiphyllum) has earned its reputation as one of the most forgiving houseplants around. It tolerates low light, tells you when it is thirsty by dramatically drooping (then bouncing back within hours of a good drink), and rewards even the most absentminded plant parent with beautiful white spathes. If you are new to plants or just want something reliable, this is your plant.
Here is everything I have learned about keeping peace lilies happy - from personal experience and plenty of trial and error.
Light: Low-Light Champion, But Not a Cave Dweller
Peace lilies are famous for tolerating low light, and that reputation is well-earned. They will survive in a north-facing window or a dimly lit corner where most other plants would sulk and die. But “survive” and “thrive” are two different things.
For the best growth and blooming, give your peace lily bright, indirect light. An east-facing window is ideal - gentle morning sun without the harsh afternoon rays. A few feet back from a south or west-facing window also works great, especially if you have a sheer curtain to filter the light.
Here is the key tradeoff: in low light, your peace lily will grow slowly and may not bloom much (or at all). It will stay alive and look fine, but you will miss out on those gorgeous white flowers. If blooming matters to you, give it more light.
One thing to avoid is direct afternoon sunlight. Peace lily leaves are thin and burn easily. If you see yellow or brown scorched patches, move the plant back from the window a few inches.
Watering: The Drama Queen Approach
Watering a peace lily is probably the easiest watering routine in the houseplant world, and here is why: it tells you when it is thirsty. When a peace lily needs water, the leaves droop dramatically. The whole plant looks like it is giving up on life. The first time you see this, you will panic. Don’t.
Give it a thorough drink - water until it runs out the drainage holes - and within a few hours, every leaf will be standing upright again like nothing happened. It is honestly impressive how fast they bounce back.
That said, do not make a habit of waiting for the dramatic droop every time. Chronic underwatering stresses the plant and can lead to brown leaf tips over time. The better approach is to check the soil regularly. Stick your finger about an inch into the soil. If it feels dry, water it. If it still feels moist, wait a day or two.
A few watering tips that have saved me a lot of headaches:
- Water thoroughly. Do not just splash a little on top. Water until it flows from the drainage holes, then let it drain completely. Peace lilies hate sitting in water.
- Use room temperature water. Cold water can shock the roots, especially in winter.
- Watch for mineral buildup. Peace lilies are sensitive to fluoride and chlorine in tap water. If you notice brown leaf tips despite good watering habits, try using filtered water or leave your tap water out overnight before using it. This is a common issue that people overlook.
- Reduce watering in winter. Growth slows down in colder months, so the soil stays moist longer. Overwatering in winter is the number one way to get root rot.
Soil and Potting
Peace lilies are not picky about soil, but they do need good drainage. A standard indoor potting mix works fine. If you want to level it up, mix in some perlite or orchid bark to improve aeration and drainage. Something like two parts potting mix to one part perlite is a solid ratio.
The pot matters just as much as the soil. Always use a pot with drainage holes. I cannot stress this enough. A peace lily sitting in waterlogged soil is a peace lily headed for root rot. If you want to use a decorative pot without holes, keep the plant in a nursery pot inside the decorative one and dump out any standing water after you water.
Repot your peace lily every one to two years, or when you see roots growing out of the drainage holes. Go up one pot size (about one to two inches larger in diameter). Spring is the best time to repot because the plant is gearing up for its active growing season.
Humidity: The More, the Better
Peace lilies are tropical plants from the forest floors of Central and South America, so they naturally love humidity. In most homes, especially with air conditioning or forced-air heating, the air tends to be drier than peace lilies prefer.
Ideally, aim for 50% humidity or higher. Here are some practical ways to boost humidity without buying an expensive humidifier:
- Group your plants together. They create a little microclimate of shared humidity.
- Place the pot on a tray of pebbles with water in it. The water evaporates around the plant without the roots sitting in water.
- Keep the plant in a naturally humid room like a bathroom or kitchen.
- Mist the leaves occasionally. This is controversial in the plant world - some people swear by it, others say it does nothing. In my experience, it helps a little, but grouping plants together or using a pebble tray is more effective.
If you notice brown, crispy leaf edges (not tips, but edges), low humidity is usually the culprit.
Temperature: Keep It Comfortable
Peace lilies like the same temperatures you do. Aim for 65 to 80 degrees Fahrenheit (18 to 27 degrees Celsius). They can handle slightly cooler temps, but anything below 55 degrees Fahrenheit will cause damage.
The biggest temperature threat to peace lilies is cold drafts. Keep them away from drafty windows in winter, exterior doors, and air conditioning vents that blow directly on the leaves. Similarly, do not place them right next to heating vents or radiators. Consistent warmth is the goal.
Fertilizing: Easy Does It
Peace lilies are light feeders. During the growing season (spring through early fall), feed with a balanced liquid fertilizer diluted to half strength every six to eight weeks. That is all they need.
Over-fertilizing is worse than under-fertilizing with this plant. Too much fertilizer causes salt buildup in the soil, which leads to brown leaf tips and can damage the roots. If you notice white crusty buildup on the soil surface, flush the soil by running water through the pot for a few minutes to wash out excess salts.
In winter, stop fertilizing entirely. The plant is not actively growing, so it does not need the extra nutrients.
Getting Your Peace Lily to Bloom
Those iconic white “flowers” are actually modified leaves called spathes that surround a central spike (spadix) covered in tiny flowers. Getting a peace lily to bloom comes down to two main factors:
Light is the biggest one. A peace lily in a dark corner will almost never bloom. Move it to brighter indirect light and you will see a big difference. I moved mine from a hallway shelf to a spot near our east-facing living room window, and it went from zero blooms to three spathes in one season.
Maturity matters too. Young peace lilies may not bloom regardless of conditions. Most need to be at least a year old (often two to three years) before they start flowering. Patience is part of the deal.
A slight temperature drop in winter (down to around 60 degrees Fahrenheit for a few weeks) can trigger blooming in spring. This mimics the natural seasonal shift the plant would experience in its native habitat.
Once the white spathe fades and turns green, you can snip it off at the base. This redirects energy back to the plant for new growth and future blooms.
Common Problems and How to Fix Them
Brown Leaf Tips
This is the single most common peace lily complaint, and the usual suspect is water quality. Fluoride and chlorine in tap water cause brown tips over time. Switch to filtered water or let tap water sit out overnight. Low humidity can also contribute.
Yellow Leaves
Occasional yellow lower leaves are normal - the plant sheds old leaves as it grows. But if many leaves are yellowing at once, check your watering. Both overwatering and underwatering can cause yellowing, though they look slightly different. Overwatered yellowing is soft and mushy; underwatered yellowing is dry and crispy.
No Blooms
Almost always a light issue. Move the plant to a brighter spot (still indirect) and give it time. Immature plants also will not bloom, so if yours is young, just wait.
Droopy Leaves
Usually thirst. Water it and check back in a few hours. If the leaves do not perk up after watering, the problem might be root rot from overwatering. Unpot the plant, check the roots, and trim any black or mushy ones before repotting in fresh soil.
Brown Spots on Leaves
This can be sunburn (from direct light), a bacterial or fungal issue, or cold damage. Check the plant’s environment and adjust accordingly. Remove affected leaves to prevent any infection from spreading.
Toxicity: A Word of Caution
Peace lilies contain calcium oxalate crystals, which are toxic to cats, dogs, and small children if ingested. The crystals cause irritation and swelling of the mouth, tongue, and throat. It is not usually life-threatening, but it is painful and unpleasant.
If you have curious pets or toddlers (and I have both), keep your peace lily on a high shelf or in a room they cannot access. I learned this the hard way when my cat decided to taste-test a leaf. Everyone was fine, but I moved the plant to the top of the bookshelf that same day.
Popular Peace Lily Varieties
The classic peace lily you find at most garden centers is Spathiphyllum wallisii, which stays compact at around 12 to 15 inches tall. But there are some great varieties worth seeking out:
- Sensation is the giant of the peace lily world. It can grow over three feet tall with huge, ribbed leaves. If you want a statement plant, this is it.
- Domino has beautiful white-streaked variegation on its leaves, adding visual interest even when the plant is not blooming.
- Silver Cupido features silvery-green leaves that catch light beautifully. It is a bit harder to find but worth the hunt.
- Piccolino stays compact and small, perfect for desks or small shelves where space is tight.
Why Every Home Should Have a Peace Lily
I am biased, obviously. But there is a reason peace lilies are everywhere. They are beautiful, low-maintenance, adaptable, and genuinely hard to kill if you give them even the most basic care. They clean the air (NASA’s famous clean air study included Spathiphyllum on its list), and they bloom reliably once they are mature and getting enough light.
My mom’s peace lily from our Flushing apartment is still alive, by the way. She divided it years ago and gave me a section when I moved out. It sits on our bookshelf now, away from the cat, pushing out a new leaf every few weeks. Some plants just stick with you.
If you are new to houseplants, start here. If you have been growing plants for years and somehow do not have a peace lily yet, fix that. You will not regret it.
Quick Reference
- Light: Bright indirect is best; tolerates low light but blooms less
- Water: When top inch of soil is dry; thorough watering with drainage
- Humidity: 50% or higher preferred; tolerates average household levels
- Temperature: 65-80 degrees Fahrenheit (18-27 degrees Celsius)
- Soil: Well-draining potting mix with perlite
- Fertilizer: Half-strength balanced liquid fertilizer every 6-8 weeks in growing season
- Toxicity: Toxic to cats, dogs, and children if ingested
- Difficulty: Beginner-friendly