Norfolk Island Pine Care: The Living Christmas Tree That Stays All Year
Every December, garden centers and big-box stores fill their shelves with tiny potted evergreens decorated with miniature ornaments. They look adorable. They look festive. And most of them end up in the trash by February because nobody told you they were actually tropical houseplants.
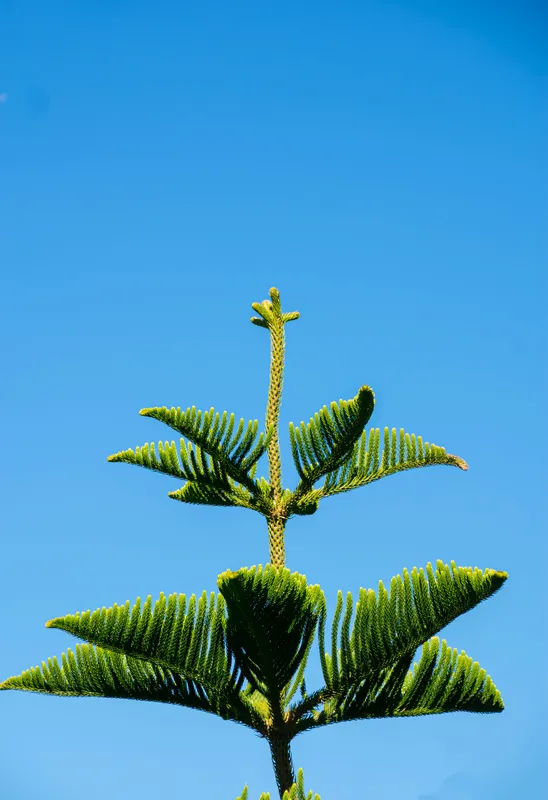
The Norfolk Island Pine (Araucaria heterophylla) is not a true pine at all. It is a tropical tree native to Norfolk Island, a tiny speck of land in the South Pacific between Australia and New Zealand. In its natural habitat, it grows over 200 feet tall with a perfectly symmetrical shape that looks like something out of a Dr. Seuss illustration.
Indoors, it stays much more manageable - usually topping out around 5 to 8 feet over many years. But here is the thing: if you give it what it needs, this plant will be with you for decades. My wife’s grandmother had one that touched the ceiling of her apartment in Flushing. She had been growing it since the 1980s.
So if you picked one up last holiday season and want to keep it alive (or you are thinking about getting one), here is everything I have learned about keeping these beautiful trees happy indoors.
Light: Bright and Consistent
Norfolk Island Pines want bright, indirect light. Think a spot near an east-facing window, or a few feet back from a south or west-facing window where it gets plenty of ambient light without scorching afternoon sun.
This is non-negotiable. If you put a Norfolk Pine in a dark corner, you will notice the lower branches start dropping needles within weeks. And here is the frustrating part - once those needles fall, they do not grow back. The branches will stay bare, and the tree loses that beautiful symmetrical shape that made you buy it in the first place.
A few things that help with light:
- Rotate the pot a quarter turn every week so it grows evenly. Without rotation, it will lean toward the light source and start looking lopsided.
- If your apartment does not get great natural light, a grow light works wonders. Even a basic full-spectrum LED bulb in a desk lamp, positioned a couple feet away, can make the difference.
- Watch for pale, yellowish needles - that means too much direct sun. Dark green, evenly spaced branches mean you have found the sweet spot.
Watering: Moist but Never Soggy
Water your Norfolk Pine when the top inch of soil feels dry. Stick your finger in - if it is dry to the first knuckle, water it thoroughly until liquid drains out the bottom. Let the excess drain completely and never let it sit in a saucer of standing water.
This tree does not like extremes. Bone-dry soil will cause needle drop. Soggy soil will cause root rot. You are aiming for that Goldilocks zone of consistently moist but well-drained.
In practice, this usually means watering about once a week in spring and summer, and every 10 to 14 days in winter when growth slows down. But always check the soil first rather than watering on a fixed schedule. Your apartment is different from mine, and factors like pot size, humidity, and temperature all affect how quickly the soil dries out.
One thing I have noticed: Norfolk Pines in terracotta pots need more frequent watering than those in ceramic or plastic, because terracotta is porous and wicks moisture away from the soil faster.
Humidity: The Secret to Happy Needles
This is where most people fail with Norfolk Pines, especially in apartments with forced-air heating. These trees are from a subtropical island in the Pacific Ocean. They want humidity. A lot of it.
Ideal humidity is 50% or higher. The average heated apartment in winter? Maybe 20 to 30%. That is why so many Norfolk Pines bought in December look sad and crispy by March.
Here is what actually works:
- Run a humidifier nearby. This is the single best thing you can do. A small cool-mist humidifier running near the tree makes an enormous difference. I run one in my plant room from November through March and it keeps everything happier.
- Group your plants together. Plants release moisture through transpiration, so clustering them creates a little microclimate with higher humidity. Put your Norfolk Pine near your ferns, calatheas, or other humidity lovers.
- Mist the needles. This is the least effective option, but it helps a little. Use room-temperature water and mist in the morning so the foliage dries before evening.
- Pebble tray. Fill a shallow tray with pebbles, add water to just below the top of the pebbles, and set the pot on top. As the water evaporates, it raises the humidity right around the plant.
Skip placing it near heating vents or radiators. The hot, dry air will devastate those needles faster than anything else.
Temperature: Cool and Steady
Norfolk Pines prefer daytime temperatures between 60 and 70 degrees Fahrenheit, with slightly cooler nights around 50 to 60 degrees. They actually appreciate a cooler winter rest period, which works out well since most of us keep our homes a little cooler to save on heating anyway.
Avoid temperature extremes. Do not put it next to a drafty window in January, and keep it away from heat sources like radiators and forced-air vents. Sudden temperature swings cause stress, and stressed Norfolk Pines drop needles.
If you want to move it outside for summer (which it will love), wait until nighttime temperatures are consistently above 50 degrees. Give it a shaded spot at first and gradually introduce more light over a couple weeks. Just remember to bring it back inside well before the first frost - this is a tropical tree, not an actual pine.
Soil and Repotting: Slow and Steady
Norfolk Pines are slow growers, so you will not need to repot often. Every 3 to 4 years is typical, and only when you can see roots circling the top of the soil or poking out the drainage holes.
When you do repot, go up only one pot size (about 2 inches larger in diameter). These trees do not like being disturbed, and a pot that is too big holds excess moisture that can lead to root rot.
Use a well-draining potting mix. A standard houseplant mix works fine, or you can make your own by combining:
- 2 parts peat-based potting soil
- 1 part perlite
- 1 part coarse sand
The perlite and sand ensure good drainage while the peat retains enough moisture to keep the roots happy between waterings.
One important note: Norfolk Pines have a relatively small root system compared to their above-ground size. As they get taller, they can become top-heavy. Consider using a heavier ceramic or stone pot for stability, or place a lighter pot inside a decorative cache pot weighted with stones at the bottom.
Fertilizing: Less Is More
Feed your Norfolk Pine every two weeks during the growing season (spring through early fall) with a balanced liquid fertilizer diluted to half the recommended strength. Something like a 10-10-10 or 20-20-20 works well.
Stop fertilizing entirely in winter. The tree enters a natural rest period when days get shorter, and pushing growth during this time produces weak, leggy branches.
If you notice salt buildup on the soil surface (white crusty deposits), flush the soil by running water through the pot for several minutes. This washes out accumulated fertilizer salts that can burn the roots.
Common Problems and How to Fix Them
Dropping lower branches: This is the most common complaint and usually means insufficient light or humidity. Move the tree closer to a bright window and increase humidity. Unfortunately, bare lower branches will not regrow, but you can prevent further loss.
Brown, crispy needle tips: Almost always a humidity issue. Increase ambient humidity with a humidifier or pebble tray. Also check that the soil is not drying out too much between waterings.
Yellowing needles: Could be too much direct sun (move it back from the window) or overwatering (check soil moisture and drainage). Occasionally, yellowing lower needles is just the natural aging process, which is normal in small amounts.
Leaning or lopsided growth: The tree is reaching for light. Rotate the pot regularly and consider whether it needs a brighter location. If it has been leaning for a while, you can gently stake the trunk to help it straighten as new growth comes in.
Sticky residue on needles: Check for scale insects or mealybugs. Norfolk Pines are somewhat prone to these pests. Wipe affected areas with a cotton swab dipped in rubbing alcohol, or treat with neem oil spray. Check the undersides of branches carefully - that is where these pests like to hide.
Root rot: If the lower trunk feels soft or mushy and the tree is wilting despite moist soil, you likely have root rot from overwatering. Unpot the tree, trim any dark, mushy roots, let it air dry for a few hours, and repot in fresh, well-draining soil. Water less frequently going forward.
The Holiday Decoration Question
Yes, you can decorate your Norfolk Pine for the holidays. Lightweight ornaments, tiny LED string lights, and small bows are all fine. Just keep a few things in mind:
- Avoid heavy ornaments that bend the branches. Norfolk Pine branches are softer and more flexible than true pine branches, and heavy decorations can permanently deform them.
- LED lights stay cool, which is good. Old-fashioned incandescent lights get hot and can dry out or scorch the needles.
- Remove decorations after the holiday season. Leaving lights wrapped around growing branches for months will constrict growth.
Why I Love This Plant
There is something about having a living tree in your apartment that makes a space feel grounded. My Norfolk Pine sits in the corner of our living room near a big east-facing window, and every morning when the light hits those symmetrical tiers of branches, it genuinely makes me happy.
My daughter calls it “our tree” and has claimed decorating it every December as her personal tradition. Last year she made tiny origami cranes to hang from the branches. It was objectively the best-decorated tree in Queens.
Norfolk Pines ask for patience. They grow slowly - maybe 3 to 6 inches a year indoors. But that slowness is part of the appeal. You are not just buying a plant. You are starting something that could be around for your kid’s graduation, their wedding, maybe longer. There are Norfolk Pines in botanical collections that are over 100 years old.
Take care of it, and it will take care of your home for a very long time.
Quick Care Summary
- Light: Bright, indirect. Rotate weekly.
- Water: When top inch of soil is dry. Drain thoroughly.
- Humidity: 50% or higher. Use a humidifier in winter.
- Temperature: 60-70F days, 50-60F nights. No drafts or heat vents.
- Soil: Well-draining. Peat, perlite, and sand mix.
- Fertilizer: Half-strength balanced fertilizer every 2 weeks, spring through fall.
- Repotting: Every 3-4 years, one size up.
- Watch for: Needle drop (humidity/light), scale insects, root rot from overwatering.