Growing Water Chestnuts at Home: Fresh Ma Ti Is Nothing Like the Can
If you grew up eating dim sum, you know water chestnuts. They are the crisp, slightly sweet little cubes tucked inside shu mai, swimming in hot and sour soup, or layered into a slice of ma ti gao - that dense, chewy water chestnut cake that shows up at every Chinese New Year spread. They are a background player in Chinese cooking, never the star, but somehow everything tastes a little worse without them.
Here is what I did not understand until I was in my thirties: the water chestnuts I had been eating my whole life, the canned ones in every grocery store’s international aisle, taste almost nothing like the real thing.
I figured this out at a street market in Flushing, Queens, where a vendor was selling fresh water chestnuts out of a crate. They were caked in mud, knobby, and dark brown with little shoots coming off them. I bought a bag, peeled one on the spot, and bit into it. The texture was like a crisp apple. The flavor was sweet and clean and faintly nutty. I stood there on the sidewalk genuinely annoyed that I had gone three decades eating the inferior canned version when this existed.
That was the moment I decided I was going to figure out how to grow them at home.
What Are Water Chestnuts, Exactly?
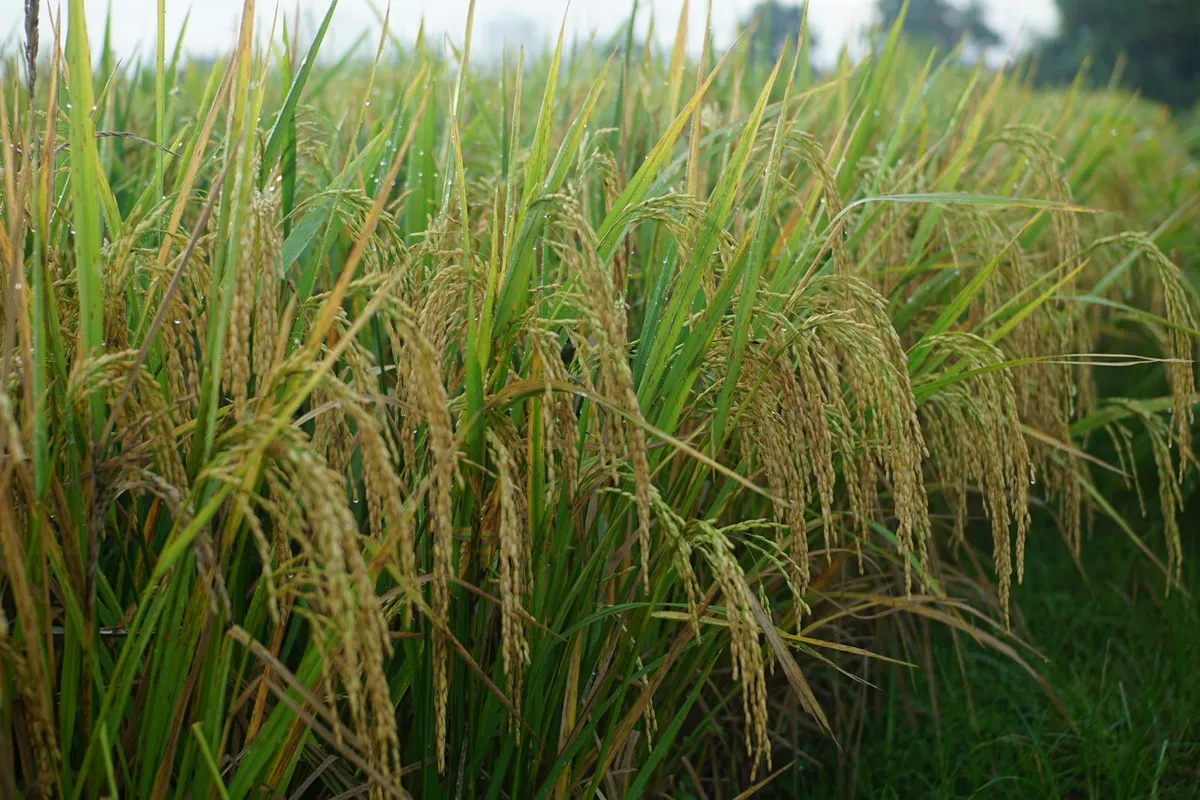
Despite the name, water chestnuts are not chestnuts at all. They are the edible corms of a plant called Eleocharis dulcis, an aquatic grass native to Asia and Australia. The plant looks like a clump of tall, round green stems - hollow inside, like little tubes - and it grows partially submerged in shallow water or very wet soil.
The part you eat is the underground corm, a small brown disk that grows at the base of the stems. The Chinese name, ma ti, means “horse hoof,” which is exactly what a fresh water chestnut looks like - a small, dark, flat oval with a little notch at the top. Once you peel the thin brown skin off, the flesh inside is white and crunchy.
They are genuinely aquatic plants. You cannot just stick them in a pot of regular soil and water them regularly. They want to grow in standing water, the way rice does. This makes them unusual among edible plants you might grow at home, but it also makes them surprisingly easy to manage. Instead of worrying about overwatering, you are just maintaining a miniature water garden.
Why Bother Growing Them?
Fair question. Water chestnuts take several months to mature, require a specific growing setup, and the yield from a container is not going to supply a restaurant. So is it worth it?
For me, yes, for a few reasons.
Fresh water chestnuts are genuinely hard to find. Even in New York City, with the best Chinatown in the country, I can only find them a few months of the year at specialty markets. Growing your own means you have a reliable supply at harvest time. And since they store reasonably well in the refrigerator once harvested, you can extend that window.
There is also the novelty factor. If you have kids, or you enjoy explaining plants to neighbors who stare at your patio buckets with visible confusion, a water chestnut setup generates conversations. “You are growing what in a bucket? In water? And you eat the roots?” Yes. Yes we do.
And honestly, the connection to Chinese food culture matters to me. My grandmother and great-grandmother grew food that connected them to home. The more I can do that same thing - even for niche ingredients, even in a small urban space - the better.
What You Will Need
The equipment list is simple. Nothing fancy.
A container: A large plastic bucket, tub, or storage bin works perfectly. You want something at least 12 inches deep and as wide as you can manage - 18 to 24 inches across is ideal. The container does not need drainage holes. That is correct - you want it to hold water, not drain it.
Growing medium: A mix of garden soil or loam with a bit of compost worked in. Not regular potting mix - that tends to float. You want something dense enough to stay put in water.
Water chestnuts to plant: Fresh water chestnuts from an Asian grocery store work well if they still have their little green shoot tips visible. You can also buy corms from specialty seed suppliers. Avoid anything that smells off or feels soft.
Sunlight: Water chestnuts are full-sun plants. They need at least six hours of direct sun per day to produce a good crop. A sunny patio, rooftop, or balcony is ideal. A shaded indoor space will not work for this one.
Water: Tap water is fine. You will be topping up the container as evaporation happens.
How to Plant
Start in spring, once nighttime temperatures are consistently above 60 degrees Fahrenheit. Water chestnuts are tropical plants and cold soil will stall or kill them.
Fill your container about halfway with your soil mix. If you are using a corm with a green shoot tip already sprouting, plant it with the shoot pointing up, just barely below the soil surface. Space multiple corms about six to eight inches apart if your container is wide enough for more than one.
Now fill the container with water until the soil is submerged by about two inches. That is your target water level - roughly two inches above the soil surface.
Set it in the sunniest spot you have and wait.
Within a week or two, you should see green shoots pushing up through the water. They will start as thin blades and gradually thicken and grow taller as the season progresses. A healthy water chestnut plant will reach one to two feet tall, looking like a clump of slender green reeds.
Maintenance Through Summer
Water chestnuts do not ask for much once established. The main job is keeping the water level consistent.
Check every few days in summer, especially during hot weather. Top off with fresh water whenever the level drops below about an inch above the soil surface. If the soil dries out completely, the plant stalls and you lose growing time.
No fertilizer is strictly necessary, but a light application of balanced slow-release fertilizer when you plant can help if your soil is lean. After that, the plants are largely self-sufficient.
The one thing to watch for is algae, which will happily colonize your water container. Some algae is harmless, but if it gets out of control, it can compete with your plants and make a mess. You can control it by keeping the container out of full shade (ironically, algae loves shade more than the chestnuts do) and by not over-fertilizing.
If you have a tub wide enough, a few water snails can help manage algae naturally. I started my water chestnut container as a small experimental water garden and added a couple of mystery snails. They do their job quietly and add their own weird charm to the setup.
Harvest
This is the best part.
Water chestnuts are ready to harvest in fall, after the green tops die back. When you see the stems turning yellow and then brown, that is your cue. The plant is pulling its energy back into the underground corms, which means those corms are fully mature and at peak flavor.
Stop adding water. Let the container dry out a bit so the soil is damp but not submerged anymore. Then pull out the whole root mass and dig through it by hand. You will find clusters of corms - dark brown discs covered in mud, exactly like the ones at the market.
The yield varies. From a single large bucket, you might pull out thirty to fifty corms. Not a huge harvest, but more than enough to make a proper batch of ma ti gao or to add fresh to a stir fry.
What to Do with Fresh Water Chestnuts
First: eat one raw, right after peeling. This is non-negotiable. Rinse off the mud, cut off the little root stub and shoots, and peel the thin brown skin with a paring knife. The flesh underneath is pearly white. Bite in. You will understand why I was annoyed on that Flushing sidewalk.
For cooking, fresh water chestnuts stay crunchier under heat than canned ones. They hold their texture in stir fries, soups, and dumplings. The sweetness intensifies slightly when cooked.
Ma ti gao - water chestnut cake - is the dish I look forward to most. It is essentially a steamed cake made from water chestnut flour and fresh water chestnut pieces, served pan-fried until the outside is golden. It is one of those dim sum dishes that seems simple and is actually kind of transcendent if you get the texture right. There are good recipes all over the internet, but the short version is: grate or finely chop your fresh chestnuts, mix with water chestnut starch and water, steam until set, then pan-fry to order. It is worth making just once to understand what fresh chestnuts actually bring to the dish.
Storing Your Harvest
Freshly harvested water chestnuts store well in the refrigerator. Keep them unwashed, in a paper bag or breathable container, for up to two weeks. Once washed and peeled, use them within a day or two.
You can also store unpeeled corms in a cool, dark, slightly humid spot - like a root cellar if you are lucky enough to have one - for several weeks. And if you want to plant again next spring, just save a handful of your healthiest corms in a paper bag in the refrigerator over winter. They will stay dormant until you are ready to plant.
A Few Common Mistakes
Planting too late: Water chestnuts need a full growing season - roughly five to six months - to produce mature corms. If you start in August in a climate like New York, you will run out of warm weather before they are ready. Start in April or May.
Not enough sun: This is an outdoor crop. Do not try to grow water chestnuts on a dark indoor windowsill. They need real sun.
Letting the water dry out completely mid-season: A single week of dry conditions during active growth can set the plants back significantly. Keep that water level topped up.
Harvesting too early: If you dig before the tops die back, the corms will be small and starchy rather than sweet and crisp. Be patient. Wait for the full die-back signal.
Connecting to Something Larger
I started growing water chestnuts because I wanted the fresh ones. Simple as that.
But as with most of the Chinese vegetables I grow, it has turned into something more. My daughter knows what ma ti are now. She knows that the brown hockey-puck things growing in the muddy bucket on our patio turn into the crispy bits in her dumplings. She helped me harvest them last fall, pulling clumps of muddy roots out of the soil with both hands and declaring it disgusting and excellent.
That moment of disgusting and excellent is basically the whole point of growing your own food. It demystifies where things come from. It creates a story around an ingredient that would otherwise just be a label on a can.
And maybe someday she will grow her own water chestnuts, in her own weird muddy bucket somewhere, and think about the time we dug them up together. That is the most a plant can really do for you.
Getting Started
Get fresh water chestnuts from an Asian grocery store in spring - look for ones with visible green sprouts forming on the top. Plant them in a large container with loam soil and two inches of standing water. Put them somewhere with full sun. Top up the water through the summer. Harvest in fall when the tops die back.
It is genuinely one of the more unusual food plants you can grow at home, and the payoff - that first bite of a freshly peeled, raw, just-harvested water chestnut - is worth every muddy handful.