Growing Turmeric at Home: Golden Roots From Your Own Kitchen
If you have ever cracked open a fresh turmeric rhizome and seen that electric orange inside, you know. It is a completely different experience from the dusty yellow powder sitting in your spice cabinet. The flavor is brighter, almost peppery, with a warmth that lingers on your tongue. And the staining power? Legendary. My cutting board still has not recovered.
My mom used to grate fresh turmeric into congee when someone was sick. It was her version of chicken soup - warm rice porridge with turmeric, ginger, and a soft-boiled egg. I did not appreciate it as a kid, but now that I am making it for my own children, I get it. There is something grounding about using ingredients you grew yourself to take care of the people you love.
The good news is that turmeric (Curcuma longa) is surprisingly easy to grow at home, even in containers. It is a tropical plant that plays well in pots, does not need a ton of fussing, and rewards you with gorgeous foliage while the rhizomes do their thing underground. If you have grown ginger before, the process is very similar.
Where to Find Turmeric Rhizomes to Plant
You do not need to visit a fancy nursery. Head to your nearest Asian grocery store and look for fresh turmeric in the produce section. You want rhizomes that are firm, plump, and have visible bumps or nubs on them - those are the growth buds that will sprout into new plants.
Avoid any that feel soft, mushy, or look shriveled. A few small nubs are fine - you are not looking for perfection. One rhizome from the grocery store, broken into a few pieces, can start several plants.
A quick tip: if you can find organic turmeric, go with that. Conventionally grown rhizomes are sometimes treated with growth inhibitors to prevent sprouting on store shelves. Organic ones tend to sprout faster and more reliably.
Choosing the Right Container
Turmeric rhizomes spread horizontally underground, so you want a container that is wide rather than tall. Aim for at least 12 inches in diameter and 12 inches deep. A standard 5-gallon nursery pot or fabric grow bag works great.
Drainage holes are non-negotiable. Turmeric likes moisture but absolutely cannot sit in standing water. A pot with no drainage is a one-way ticket to rhizome rot.
If you are growing multiple rhizomes in one container, space them about 4 to 6 inches apart. A wide rectangular planter can work well for this - think of it like a little turmeric farm on your patio.
Soil Mix That Actually Works
Turmeric wants soil that holds moisture but drains well. I know - that sounds contradictory. Here is what works:
Mix equal parts potting soil, compost, and perlite or coco coir. The compost feeds the plant over time, the perlite keeps things airy, and the potting soil holds it all together. If you have worm castings, throw in a handful. Turmeric is a hungry plant and appreciates the extra nutrition.
Avoid straight garden soil in containers. It compacts too much and does not drain well enough for pot culture.
Planting Your Rhizomes
Plant each rhizome piece about 2 inches deep with the growth buds facing up. If you cannot tell which way is up, lay them on their side - the plant will figure it out. Plants are smarter than we give them credit for.
Cover lightly with your soil mix and water thoroughly until it drains from the bottom. Then set the pot in a warm spot and wait.
And here is where turmeric teaches you patience. It can take 3 to 8 weeks for the first shoots to appear, depending on temperature. Do not panic if nothing happens for a while. Keep the soil lightly moist (not soaking) and resist the urge to dig around and check. The rhizome is working on roots first, shoots second.
If you want to speed things up, you can pre-sprout your rhizomes. Place them on a damp paper towel inside a plastic bag, leave it slightly open for airflow, and keep it somewhere warm (around 75 to 80 degrees Fahrenheit). Once you see green nubs poking out, plant them.
Light Requirements
Turmeric wants bright, indirect light for most of the day - think 6 to 8 hours. In its native tropical habitat, it grows under the dappled canopy of larger trees, so it does not need blazing direct sun all day.
That said, a few hours of morning sun followed by bright shade works perfectly. If you are growing indoors, a south-facing or east-facing window is your best bet. Supplementing with a grow light during darker months helps a lot, especially if you are starting your rhizomes in late winter.
Full afternoon sun in hot climates can scorch the leaves, so provide some shade during the hottest part of the day if you are growing outdoors in summer.
Watering: The Biggest Variable
This is where most people either overdo it or forget about it. Turmeric likes consistently moist soil during its active growing season (spring through fall). Think of a wrung-out sponge - damp but not dripping.
In practice, that means checking the top inch of soil every few days. If it feels dry, water deeply until it runs out the bottom. If it still feels moist, leave it alone. In hot summer weather, you might water every 2 to 3 days. In cooler months, once a week or less.
Here is the part that surprises people: turmeric goes dormant in winter. The leaves will yellow and die back naturally around late fall. When that happens, cut way back on watering. The rhizomes are resting underground, and too much water during dormancy can cause rot. Let the soil stay barely moist - just enough that the rhizomes do not shrivel up completely.
Temperature and Humidity
Turmeric is tropical to its core. It thrives between 65 and 90 degrees Fahrenheit and is happiest around 75 to 85. Below 50 degrees, it suffers. Frost will kill it outright.
If you are in USDA zones 8 to 11, you can grow turmeric outdoors year-round. Everyone else (hello, fellow New Yorkers) needs to bring pots inside before the first frost or treat it as a seasonal crop.
Humidity is your friend here. Turmeric loves moisture in the air. If your home runs dry, especially in winter with the heat blasting, group your turmeric with other tropical plants to create a little humidity pocket. A pebble tray underneath the pot helps too. Misting is fine but does not do as much as people think.
Feeding Your Turmeric
Turmeric is a moderate to heavy feeder during its growing season. Feed every 3 to 4 weeks with a balanced liquid fertilizer diluted to half strength. Fish emulsion or seaweed extract works great if you prefer organic options.
Stop fertilizing once the leaves start yellowing in fall. The plant is heading into dormancy and does not need the extra nutrition. Resume feeding when new growth appears in spring.
One thing I have noticed: turmeric that gets consistent feeding produces noticeably bigger rhizomes at harvest. It is worth the effort.
Common Problems and How to Fix Them
Yellowing leaves during the growing season. If leaves turn yellow before fall, check your watering. Overwatering is the most common cause. Make sure your pot drains well and you are not keeping the soil soggy.
Brown leaf tips. Usually a humidity issue. Increase humidity around the plant or move it away from heating vents and drafty windows.
No sprouting after 8 weeks. The rhizome may have been treated with growth inhibitor, or temperatures are too cold. Try pre-sprouting a new piece in a warm spot. Make sure soil temperature is at least 70 degrees.
Pests. Turmeric is surprisingly pest-resistant, but spider mites can show up in dry indoor conditions. Check the undersides of leaves regularly and wipe them down with a damp cloth if you spot any tiny webs.
Leggy, floppy growth. Not enough light. Move to a brighter location or add a grow light.
Harvesting Your Turmeric
This is the payoff, and it requires patience. Turmeric takes 8 to 10 months from planting to harvest. You will know it is ready when the leaves start yellowing and dying back in fall - this is the plant telling you it has put all its energy into the rhizomes underground.
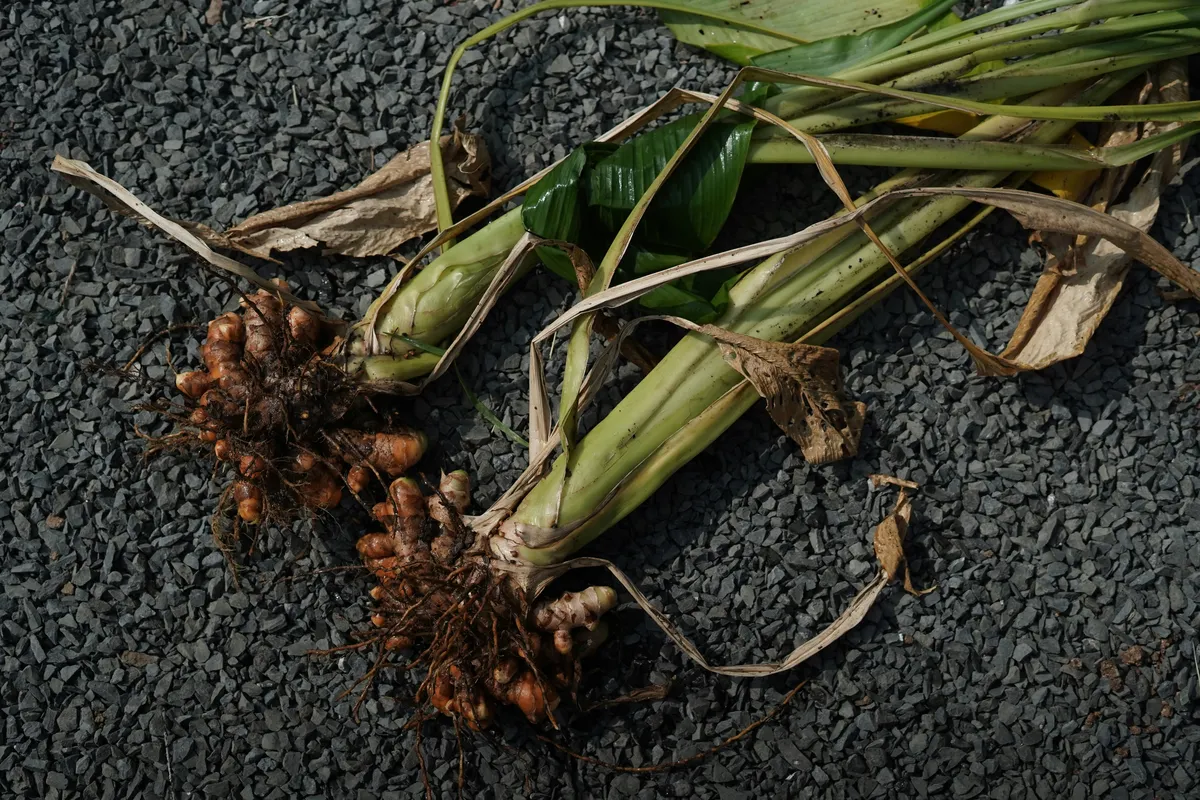
Gently tip the pot on its side and slide out the root mass. Carefully brush away the soil and you will find a cluster of golden rhizomes that look like ginger’s more colorful cousin. Break off what you need, save a few pieces with good growth buds for replanting next season, and store the rest.
Fresh turmeric keeps in the fridge for 2 to 3 weeks wrapped in a paper towel inside a bag. For longer storage, you can freeze it whole - it grates beautifully straight from the freezer. Or slice it thin and dehydrate it to make your own powder.
What to Do With Fresh Turmeric
Now for the fun part. Fresh turmeric is incredible in:
- Golden milk. Grate fresh turmeric and ginger into warm milk with a pinch of black pepper and honey. The black pepper helps your body absorb the curcumin.
- Congee. My mom’s move - grate it right into the pot while the rice is simmering.
- Curry paste. Fresh turmeric takes homemade curry paste to another level.
- Smoothies. A small piece blended into a mango or banana smoothie adds an earthy warmth.
- Pickled turmeric. Slice thin, quick-pickle in rice vinegar with sugar and salt. Amazing on rice bowls.
Fair warning: fresh turmeric stains everything. Your fingers, your cutting board, your countertop, your favorite shirt. Use gloves if you care about that sort of thing. I gave up on that battle a long time ago.
Is It Worth Growing?
A single grocery store turmeric rhizome costs a couple of dollars and can produce a pound or more of fresh turmeric after a season of growing. The math works out even if you factor in soil and a pot.
But honestly, the value is not just financial. There is something deeply satisfying about pulling golden roots out of a pot you have been tending for months. It connects you to a tradition of growing food that goes back generations in many Asian cultures. And when your kid watches you harvest turmeric and then helps you make golden milk with it, that is the kind of memory that sticks.
Give it a try this spring. Worst case, you get a beautiful tropical-looking foliage plant for a season. Best case, you never buy turmeric powder again.