There is a moment in every stir-fry when you toss in snow peas and they hit the hot wok with that satisfying sizzle. They cook in about thirty seconds, stay bright green, and add the kind of crisp sweetness that makes the whole dish sing. If you have ever eaten snow peas straight from the vine, still warm from the morning sun, you know that no grocery store bag can compete.
Growing snow peas (Pisum sativum var. saccharatum) at home is one of the easiest wins in the vegetable garden. They germinate fast, tolerate cool weather, fix their own nitrogen, and produce handfuls of flat, tender pods in about 60 days. My kids fight over who gets to pick them, and honestly, half the harvest never makes it inside because they eat them right off the vine. I am not even mad about it.
Whether you have a backyard plot, a few containers on a balcony, or even a sunny windowsill with a deep pot, snow peas will work with what you have. Let me walk you through everything from seed to stir-fry.
What Makes Snow Peas Different
If you have stood in the produce aisle confused about the difference between snow peas, sugar snap peas, and shelling peas, you are not alone. Here is the quick breakdown:
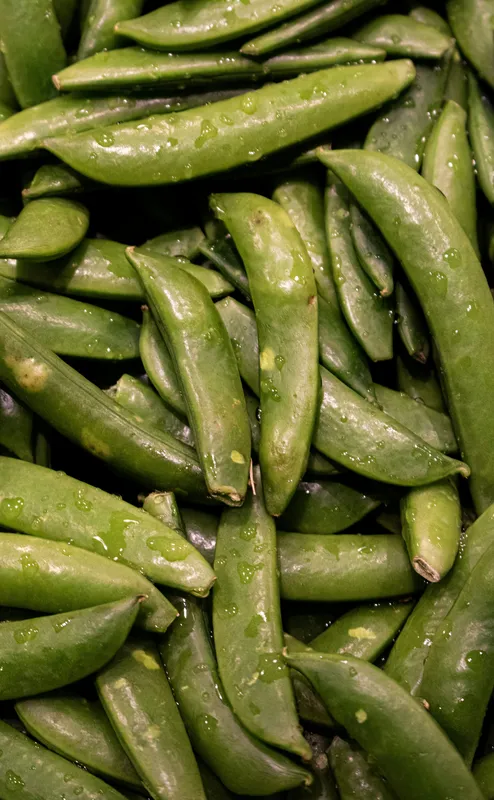
Snow peas have flat, thin pods with tiny undeveloped peas inside. You eat the entire pod, and they are best harvested young before the seeds inside get plump. In Chinese cooking, they are called xue dou (literally “snow bean”) and show up in everything from garlic stir-fries to hot pot sides.
Sugar snap peas have rounder, plumper pods and you eat the whole thing too, but they are sweeter and crunchier. Shelling peas (English peas) have tough pods you throw away - you only eat the peas inside.
For stir-frying, snow peas are king. That flat shape means maximum surface area hitting the wok, and they cook in seconds without getting mushy.
When to Plant
Snow peas are a cool-season crop, which is actually great news for impatient gardeners. While everyone else is waiting for the last frost to plant tomatoes and peppers, you can get snow peas in the ground weeks earlier.
Plant seeds directly outdoors 4 to 6 weeks before your last expected frost date. In most of the Northeast, that means late March through mid-April. You can also do a fall planting in late August or September for a second harvest before winter hits.
Snow peas grow best when daytime temperatures are between 55 and 70 degrees Fahrenheit. Once temperatures regularly climb above 80, the plants will slow down, stop flowering, and eventually call it quits. This is not a summer crop - think of it as your spring and fall superstar.
If you are in a warmer climate (zones 8 and up), plant in late fall or winter for best results.
Starting from Seed
Snow pea seeds are big, wrinkly, and easy to handle - perfect if you are planting with kids. No tiny seed anxiety here.
Soak seeds in room-temperature water for 8 to 12 hours before planting. This softens the seed coat and speeds up germination by a couple of days. My dad taught me this trick, though he soaks basically everything before planting. Seeds, beans, his feet after a long day in the garden.
Plant seeds about 1 to 1.5 inches deep and 2 to 3 inches apart. If you are doing rows, space them about 18 inches apart. Water gently after planting and keep the soil consistently moist (but not waterlogged) until sprouts appear, usually within 7 to 14 days.
One important note: do not start snow peas indoors for transplanting. Peas have delicate root systems and hate being disturbed. Direct sowing is the way to go.
Soil and Containers
Snow peas are not fussy about soil, but they do best in loose, well-draining soil with a slightly acidic to neutral pH (6.0 to 7.0). Mix in some compost before planting if your soil is heavy clay or very sandy.
Here is a nice bonus: peas are legumes, which means they have a symbiotic relationship with soil bacteria that fix nitrogen from the air. They literally feed the soil while they grow. If you inoculate your seeds with rhizobium bacteria (available at most garden centers), you will get even better results and healthier soil for whatever you plant next.
For container growing, choose a pot at least 12 inches deep and as wide as you can manage. Snow pea roots are not super deep, but they need room to spread. A long window box works well if you are growing on a balcony. Use a good quality potting mix and make sure the container has drainage holes. Waterlogged roots will kill peas faster than anything.
Support and Trellising
Snow peas are climbers. Even dwarf varieties will reach 2 to 3 feet, and standard varieties can hit 5 to 6 feet. They climb using tendrils - those curly little grabby things that wrap around whatever they can reach.
You need to provide some kind of support. Options include:
A simple trellis made from stakes and garden twine works great. Stick two stakes in the ground about 4 feet apart and run horizontal strings every 6 inches between them. The peas will figure out the rest.
Bamboo tepees are another easy option. Push three or four bamboo poles into the ground and tie them together at the top. Plant seeds in a circle around the base.
For containers, a small tomato cage or even a section of chicken wire bent into a cylinder does the job. You can also lean a piece of trellis netting against a wall.
Whatever you use, put the support in place at planting time. Trying to add a trellis after the plants are growing is a recipe for broken stems and frustration. Ask me how I know.
Watering and Feeding
Snow peas like consistent moisture, especially during flowering and pod production. Aim for about an inch of water per week, adjusting based on rainfall and temperature. The soil should feel moist a finger-length down but not soggy.
Mulch around the base of the plants with straw, shredded leaves, or grass clippings to keep the soil cool and retain moisture. This also helps suppress weeds, which is a nice bonus when you are already busy chasing kids around the yard.
Because peas fix their own nitrogen, you do not need heavy fertilizing. In fact, too much nitrogen will give you lush green foliage and very few pods - all leaf, no lunch. A light application of balanced fertilizer or compost at planting time is usually enough. If your plants look pale or weak, a side dressing of compost midseason should perk them up.
Common Problems and How to Fix Them
Snow peas are generally trouble-free, but a few issues can pop up:
Powdery mildew is the most common problem, especially in humid weather or when plants are crowded. You will see white, powdery spots on the leaves. Improve air circulation by spacing plants properly and avoid watering from overhead. If it shows up, remove affected leaves and try a spray of diluted neem oil.
Aphids love pea plants. Check the undersides of leaves and new growth regularly. A strong blast of water from the hose knocks most of them off. For serious infestations, insecticidal soap works well. Ladybugs are also your best friends here - they eat aphids like my kids eat snow peas.
Root rot happens when soil stays too wet. This is mostly a container problem. Make sure your pots drain well and do not let them sit in saucers full of water.
No flowers or pods usually means temperatures are too high or you are over-fertilizing with nitrogen. Not much you can do about the heat except plant earlier next time. For the nitrogen issue, back off the fertilizer and let those natural nitrogen-fixing bacteria do their thing.
Seeds not germinating can happen if the soil is too cold (below 40 degrees Fahrenheit) or too wet. Wait for soil to warm a bit, and make sure drainage is good.
Harvesting
This is the fun part. Snow peas are ready to harvest about 60 to 70 days after planting, and you want to pick them when the pods are flat, tender, and about 3 inches long. You should be able to see the tiny peas inside as slight bumps, but the pod should still be flat - not swollen.
Pick pods by pinching or snipping them off with scissors or garden shears. Pulling can damage the vine. Harvest every day or two once the pods start coming, because regular picking encourages the plant to produce more. If you let pods get too mature, the plant thinks its job is done and slows down.
The best time to harvest is in the morning when pods are cool and crisp. Store unwashed pods in a plastic bag in the fridge for up to a week, though honestly they taste best the same day you pick them.
In the Kitchen
Snow peas are a staple in Chinese, Thai, and Japanese cooking, and for good reason - they are incredibly versatile. Here are some ideas:
The classic garlic snow peas stir-fry is unbeatable. Hot wok, a splash of oil, sliced garlic, snow peas, a pinch of salt, and maybe a drizzle of sesame oil at the end. Thirty seconds of cooking, maximum. The peas should still be bright green and snap when you bite them.
They are also great in fried rice, lo mein, curry, and hot pot. My mom always adds them to egg drop soup near the end - they add color and crunch. Raw snow peas make excellent snack dippers, and my kids will plow through a whole bowl with some hummus or peanut sauce.
Do not forget the shoots and tendrils. Pea shoots (dou miao) are a delicacy in Chinese cooking - tender, sweet, and delicious sauteed with garlic. As your snow pea plants grow, you can pinch off some of the growing tips and tender tendrils to cook. It is like getting two crops from one plant.
Growing with Kids
Snow peas are one of the best plants for getting kids into gardening. The seeds are big enough for small hands to plant. Germination is fast enough to hold a kid’s attention span. The tendrils are fun to watch as they reach out and grab the trellis. And the harvest is something they can eat immediately, which is the ultimate payoff for a five-year-old who does not care about long-term gardening satisfaction.
My daughter planted her first snow peas when she was three. She was more interested in eating dirt than following instructions, but some of those seeds grew anyway. Now she checks on them every morning before school. That is the kind of small win that makes the whole messy, chaotic garden worth it.
What to Plant Next
After your snow pea harvest winds down in early summer, pull the spent plants and leave the roots in the soil - remember, those roots are full of nitrogen-fixing bacteria that will feed your next crop. This makes the bed perfect for nitrogen-hungry plants like tomatoes, peppers, or squash.
You can also plan a fall succession crop. Start a second round of snow pea seeds in late summer for harvest before the first frost. The shorter days and cooling temperatures in fall actually produce some of the sweetest pods of the year.
If you enjoyed growing snow peas, try sugar snap peas next - same easy growing, but with fatter, sweeter pods. And if you want to explore more Chinese vegetable gardening, pea shoots (dou miao) from the same plant family are ridiculously easy to grow indoors from seed any time of year.
Snow peas are one of those crops that remind you why growing your own food is worth the effort. Fast, forgiving, and delicious - the perfect plant for busy families who want fresh vegetables without a huge time investment. Get some seeds in the ground this spring, and in two months, you will be tossing homegrown snow peas into your wok. Trust me, your stir-fry will never be the same.