Growing Mung Bean Sprouts at Home: Crunchy, Fresh, and Ridiculously Easy
There are exactly two kinds of mung bean sprouts in the world: the ones from the grocery store that are already half-wilted by the time you open the bag, and the ones you grow yourself that are so crunchy they practically snap when you bite into them.
Once you try homegrown, you won’t go back.
Growing mung bean sprouts is one of the simplest kitchen garden projects you can do. No soil. No sunlight. No fancy equipment. You need a jar, some dried mung beans, and about 60 seconds of effort twice a day. In 3-4 days, you’ll have a pile of fat, crispy sprouts ready for stir-fries, spring rolls, pho, or just snacking straight from the jar (no judgment here).
My kids think it’s magic. Honestly, I kind of do too.
Why Grow Your Own Sprouts
If you grew up eating Asian food, bean sprouts were just always there. Piled on top of pho. Tossed into pad thai at the last second. Stir-fried with garlic and a splash of soy sauce as a quick side dish. My mom kept a steady rotation going and I remember thinking they just appeared out of thin air.
Turns out, they almost do. Mung beans sprout fast, with barely any effort, and the result is way better than store-bought. Here’s why it’s worth growing your own:
Freshness you can taste. Homegrown sprouts are plump and crispy with a clean, slightly sweet flavor. Store-bought sprouts have often been sitting in a plastic bag for days, getting soggy and developing that slightly sour smell.
Pennies per batch. A one-pound bag of dried mung beans costs about $2-3 and will produce many batches of sprouts. Each batch quadruples in volume, so a quarter cup of dry beans gives you a full jar of sprouts.
No food safety worries. Commercial sprouts are one of the most frequently recalled produce items because of bacterial contamination during large-scale production. When you grow your own in a clean jar, you control the whole process.
It takes 3-4 days. That’s it. From dry beans to dinner-ready sprouts in less time than it takes to get a package delivered.
What You Need
The supply list is almost embarrassingly short:
- Dried mung beans (whole, not split - look for the green ones with the skin on)
- A wide-mouth mason jar or any clean container
- A piece of cheesecloth, mesh screen, or even a clean kitchen towel
- A rubber band
- Water
That’s the whole list. You probably already have everything except the beans, and you can find those at any Asian grocery store, health food store, or online. Look for beans that are plump, smooth, and uniformly green. Avoid any that are shriveled, cracked, or discolored.
Step-by-Step: From Bean to Sprout
Step 1: Measure and Rinse
Start with about 1/4 cup of dried mung beans. That doesn’t look like much, but trust me - they’ll expand to fill a quart jar by the time they’re done sprouting. Give them a good rinse in a strainer under cool running water, picking out any broken beans or debris.
Step 2: Soak Overnight
Put the rinsed beans in your jar and add about three times their volume in cool water. So for 1/4 cup of beans, add 3/4 cup of water. Cover loosely and let them sit at room temperature for 8-12 hours. I usually start the soak before bed and they’re ready to drain in the morning.
By morning, they’ll have swelled up to about double their size and you might already see tiny white tails poking out. That’s the root starting to emerge.
Step 3: Drain and Set Up
Drain all the water. If you’re using a mason jar, secure your cheesecloth or mesh over the top with a rubber band, then turn the jar upside down at an angle in a bowl so excess water can keep draining. Good drainage is crucial - the beans need to be moist, not sitting in water.
Here’s the key: put the whole setup somewhere dark. A kitchen cabinet works perfectly. Mung bean sprouts grown in light will develop green leaves and a slightly bitter taste. You want plump, white, crunchy sprouts, and darkness is how you get them.
Step 4: Rinse Twice a Day
Every morning and every evening (roughly every 12 hours), rinse the sprouts with cool water and drain thoroughly. This takes about 30 seconds. The rinsing keeps them hydrated, washes away any bacteria, and gives the sprouts a fresh supply of moisture to keep growing.
Then put them back in their dark spot.
Step 5: Wait (and Watch the Magic)
Day 1: You’ll see short white tails on every bean. Not much to look at yet.
Day 2: The tails are getting longer, pushing against each other in the jar. Things are happening.
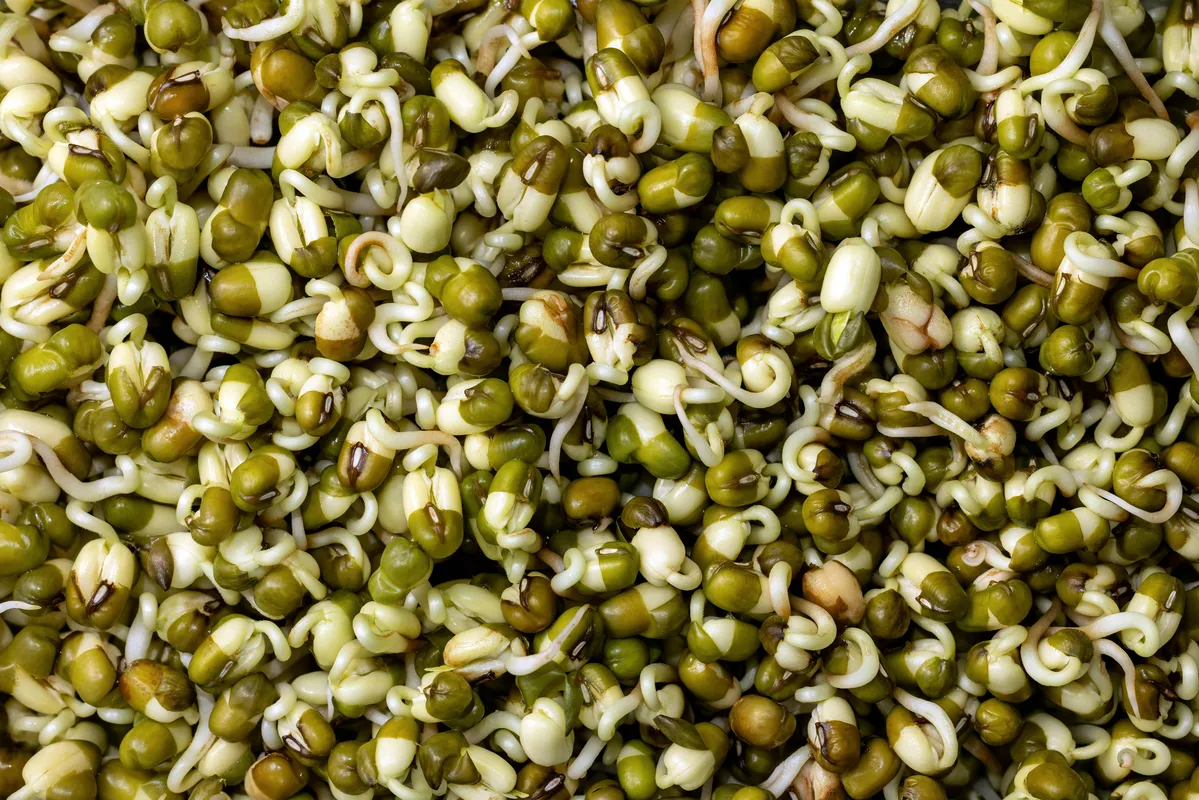
Day 3: Now we’re talking. The sprouts are 1-2 inches long, white and plump, starting to fill the jar.
Day 4: Harvest time. The sprouts should be thick, crunchy, and 1.5-2 inches long. Some might be pushing the cheesecloth off the jar.
The Secret to Fat, Crunchy Sprouts
If you’ve ever compared your homegrown sprouts to the thick, stubby ones from Asian grocery stores and wondered what you’re doing wrong, here’s the trick: weight.
Commercial sprout growers keep the beans under gentle but constant pressure as they grow. This forces the sprouts to push against resistance, which makes them shorter, thicker, and crunchier instead of long and stringy.
You can do the same thing at home. After draining, place a small plate or a zip-lock bag filled with water directly on top of the sprouts. The gentle weight mimics what commercial growers do and produces those satisfyingly thick sprouts. It’s not required - you’ll still get perfectly good sprouts without it - but if you want that restaurant-quality crunch, this is the move.
Common Mistakes (and How to Avoid Them)
Not draining well enough. This is the number one sprout killer. If beans sit in standing water, they’ll rot instead of sprout. Make sure your jar can drain completely and that you tip it at an angle between rinses.
Too much light. Light makes sprouts develop green leaves and a bitter, grassy taste. Keep them in a dark cabinet or cover the jar with a towel. The goal is plump white sprouts, not tiny green plants.
Using split mung beans. Split (hulled) mung beans, the yellow kind used for dal, won’t sprout. You need whole mung beans with the green skin intact. Double-check the package.
Forgetting to rinse. Skipping a rinse or two won’t necessarily ruin your batch, but it increases the chance of mold or sour smells. Twice a day keeps everything fresh.
Old or dead beans. If your beans haven’t sprouted at all after 24 hours of soaking and draining, they might be too old. Mung beans lose viability over time, especially if they’ve been stored in heat or humidity. Try a fresher batch.
How to Use Your Sprouts
Once harvested, give the sprouts a final rinse and toss any unsprouted beans. You can eat them right away or store them in a container lined with a paper towel in the fridge for 3-4 days.
Here are some of our family favorites:
Quick garlic stir-fry. This was my mom’s go-to side dish. Hot wok, a splash of oil, smashed garlic, bean sprouts, and a hit of soy sauce and sesame oil. Cook for literally 60 seconds - you want them still crunchy. Done. It pairs with everything.
Pho topping. Pile raw sprouts on top of a steaming bowl of pho and let them wilt just slightly in the hot broth. They add the crunch that makes every spoonful interesting.
Spring rolls. Whether you’re making Vietnamese fresh rolls or Chinese egg rolls, bean sprouts add that essential crisp texture.
Bibimbap base. Blanched bean sprouts tossed with sesame oil and a pinch of salt are a classic component of Korean bibimbap.
Pad thai. Toss them in during the last 30 seconds of cooking. They should stay crunchy.
Growing Sprouts with Kids
This is one of the best projects to do with young kids because the results are so fast. My kids were amazed the first time we did it. You check the jar in the morning, and by bedtime the sprouts have visibly grown. It’s like a science experiment that you get to eat.
A few tips for making it a kid activity:
Let them own the rinsing schedule. Twice a day is easy to remember (morning and bedtime) and gives them a sense of responsibility without being overwhelming.
Use a clear jar so they can watch the progress. Yes, sprouts prefer darkness, but peeking for 30 seconds during each rinse won’t hurt anything.
Have them measure the sprouts each day with a ruler. My daughter kept a little chart tracking growth and was genuinely excited to report the daily numbers.
And the payoff at the end - eating something they grew themselves - is always a win.
Frequently Asked Questions
Can I eat the green hulls? Yes. The green seed coats that float off during rinsing are edible. Some people remove them for aesthetics (and commercial sprouts usually have them removed), but they’re perfectly fine to eat.
Do I need to cook bean sprouts? They’re safe to eat raw if you’ve grown them in clean conditions. That said, a quick blanch or stir-fry improves the texture and is safer for young children, elderly, or anyone with a compromised immune system.
How much do they expand? Roughly 4x in volume. One quarter cup of dry beans produces about one cup of sprouts (loosely packed).
Can I use the same method for other beans? Absolutely. This method works for most sproutable seeds and beans, including lentils, adzuki beans, and chickpeas. Timing and thickness will vary, but the basic process is the same.
Why do my sprouts smell bad? A slightly musty smell is normal, but a strong sour or rotten smell means bacteria got the upper hand, usually from inadequate draining. Toss the batch, clean your jar, and try again with better drainage.
What to Grow Next
If bean sprouts hooked you on the “grow food in days, not months” thing, try growing green onions from scraps (just stick the root end in water) or start a windowsill microgreen setup. Both are fast, easy, and make your kitchen feel like a tiny urban farm.
And if you want to dive deeper into growing Asian ingredients at home, we’ve got guides on Thai basil, bok choy, gai lan, and plenty more.
Happy sprouting.