Growing Garlic Chives: Your Own Endless Supply of Jiu Cai
There are certain smells that take you right back to being a kid. For me, one of them is garlic chives sizzling in a hot pan with scrambled eggs. My mom made jiu cai chao dan (garlic chive eggs) at least twice a week, and it was the kind of dish that took five minutes but somehow felt like home in every bite.
For years I just bought garlic chives at the Chinese grocery store. They came in big, floppy bundles, and I always bought too many because they were cheap. Half the bunch would go slimy in the fridge before I got around to using it. Classic.
Then my dad - who has never met a plant he didn’t want to grow in bulk - told me to just grow my own. “It’s easier than green onions,” he said. And honestly? He was right. Garlic chives might be the most forgiving edible plant I’ve ever grown. They come back year after year, they barely need attention, and they produce way more than a family of four can reasonably eat.
Which means you’ll end up giving bags of them to your neighbors. You’ve been warned.
What Exactly Are Garlic Chives?
If you’ve cooked Chinese, Korean, or Japanese food, you’ve probably used these. Garlic chives (Allium tuberosum) are also called Chinese chives, jiu cai in Mandarin, buchu in Korean, or nira in Japanese. They look like regular chives but with flat, broad leaves instead of hollow round ones, and they taste like a gentle mashup of garlic and onion.
They’re not the same plant as the chives you see at the grocery store in those little plastic clamshells. Those are common chives (Allium schoenoprasum), which have a milder, more oniony flavor. Garlic chives are bolder, more garlicky, and way more versatile in Asian cooking.
The whole plant is edible - leaves, flower stalks, and even the buds. If you’ve ever had the yellow blanched version (jiu cai huang) at a dim sum restaurant, that’s the same plant grown without light. But we’ll keep things simple here and focus on the regular green version.
Why You Should Grow Them
They’re perennial. Plant them once and they come back every year, getting bigger and more productive each season. Mine are going on their fourth year now and they’re basically a garlic chive hedge at this point.
They’re incredibly low maintenance. Forget to water them for a week? They don’t care. Temperatures swing wildly? They handle it. They’re hardy in USDA zones 3 through 9, which covers most of the US.
They grow in containers. No yard? No problem. A pot on a balcony or a sunny windowsill works fine.
You’ll actually use them. This isn’t one of those herbs that sits pretty but never makes it into dinner. If you cook any kind of Asian food, you’ll reach for these constantly - dumplings, pancakes, stir-fries, soups, noodles, eggs.
They repel pests. Like most alliums, garlic chives deter aphids and other pests. Plant them near your other vegetables and they’ll pull double duty.
Getting Started
You have two options: seeds or division. Seeds are cheap and easy to find online or at Asian grocery stores. Division means getting a clump from someone who already grows them (and trust me, anyone growing garlic chives has plenty to share).
From Seed
Start seeds indoors about 6-8 weeks before your last frost date, or direct sow outdoors after the danger of frost has passed. Sow seeds about a quarter inch deep and keep the soil consistently moist. Be patient - garlic chive seeds are notoriously slow to germinate. You’re looking at 14 to 28 days before you see anything, and even then the little sprouts look like sad, single blades of grass.
Don’t panic. They’re fine. They’re just taking their time, like a toddler putting on shoes.
For the first year, let the plants establish themselves. You can take a few light harvests, but resist the urge to go wild with the scissors. By year two, they’ll be pumping out leaves fast enough that you can harvest every couple of weeks.
From Division
If you know someone with an established clump, ask them to dig up a section with roots attached. Replant it at the same depth and water it in well. This is by far the faster route - you’ll be harvesting within a few weeks.
My dad literally drove to my house with a Tupperware full of garlic chive divisions. No soil, no wrapping, just bare roots tossed in a container with a paper towel. They were fine. These plants are tough.
Growing Conditions
Light
Full sun is ideal - at least 6 hours of direct sunlight. They’ll tolerate partial shade, but you’ll get thinner leaves and slower growth. If you’re growing indoors, a south-facing window is your best bet. Supplemental grow lights help if your apartment is on the darker side (welcome to every apartment I lived in through my twenties).
Soil
Garlic chives aren’t picky, but they do best in well-draining soil that’s rich in organic matter. A standard potting mix with some added compost works great for containers. In the ground, amend heavy clay soil with compost to improve drainage. They prefer a slightly acidic to neutral pH, somewhere in the 6.0 to 7.0 range, but honestly they’ll grow in just about anything that isn’t waterlogged.
Water
Water regularly during the growing season - about an inch per week. Let the top inch of soil dry out between waterings. Garlic chives can handle some drought once established, but consistent moisture gives you the most tender, flavorful leaves. Overwatering is a bigger risk than underwatering. If the soil stays soggy, the roots will rot, and no amount of dad wisdom can save a rotted allium.
Temperature
These are hardy plants that can handle cold. They go dormant in winter and come back in spring, no drama. They grow best between 60 and 75 degrees Fahrenheit, but established plants survive freezing winters down to zone 3. If you’re growing in containers, you can bring them inside for the winter and keep harvesting year-round near a sunny window.
Containers
Choose a pot at least 8 inches deep and 10-12 inches wide. Garlic chives have a clumping root system that spreads over time, so give them room. Make sure there are drainage holes - this is non-negotiable. I use a standard terracotta pot and it works great. Plastic is fine too. The plant does not care about your pot’s aesthetic.
Harvesting Like a Pro
Here’s where it gets fun. Once your plants are established (usually by the second growing season from seed, or within weeks from division), you can start harvesting regularly.
When to cut: Harvest when the leaves are 6-8 inches tall. They’re most tender and flavorful at this size. If you wait too long, they get tough and fibrous.
How to cut: Use clean, sharp scissors and cut about 1-2 inches above the soil line. Don’t cut all the way down to the base - leave enough for the plant to photosynthesize and regrow.
How much to take: Never harvest more than a third of the plant at once. Take what you need and let the rest keep growing. The plant will push out new leaves within a couple of weeks.
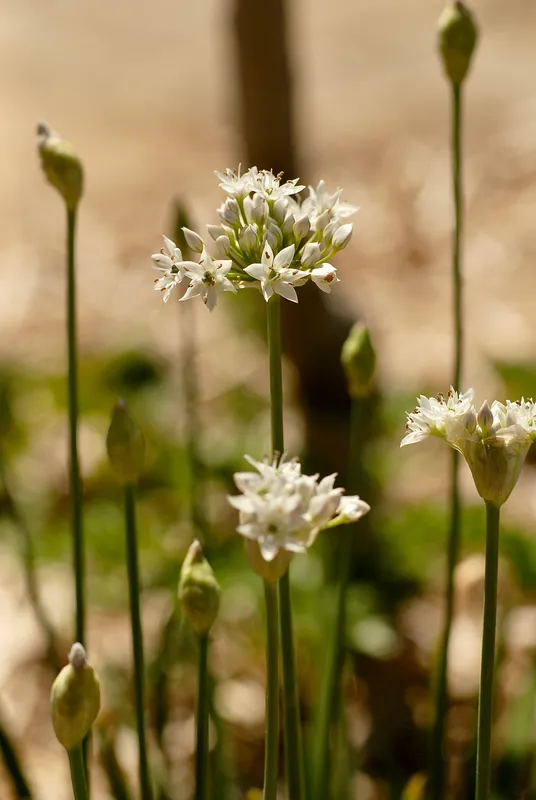
Flower stalks: In summer, your garlic chives will send up round clusters of white, star-shaped flowers. They’re actually really pretty - and edible. But if you want maximum leaf production, snip the flower stalks before they open. The plant puts a lot of energy into flowering and seed production. Your call - I usually let a few flower because they attract pollinators and my daughter thinks they’re beautiful.
Storage: Fresh-cut garlic chives keep in the fridge for about a week. Wrap them loosely in a damp paper towel inside a plastic bag. For longer storage, chop and freeze them in ice cube trays with a little water or oil.
What to Cook With Them
This is the good part. Here are my family’s regular rotation meals that use garlic chives:
Jiu cai chao dan (garlic chive eggs): Scrambled eggs with a generous handful of chopped garlic chives, a splash of soy sauce, and sesame oil. Five minutes, one pan, and my kids actually eat it without complaining. That’s the real miracle.
Jiu cai he zi (garlic chive pockets): Thin dough wrapped around a filling of garlic chives, scrambled eggs, and glass noodles, then pan-fried until crispy. These are a weekend project but absolutely worth it. My mom makes them better than I do and she never lets me forget it.
Dumplings: Add chopped garlic chives to any dumpling filling - pork, shrimp, or vegetarian. They add that savory, garlicky depth that store-bought dumplings just can’t match.
Stir-fried with tofu: Firm tofu, garlic chives, a little oyster sauce. Done in ten minutes.
Korean buchujeon (chive pancakes): Mix chopped garlic chives into a simple batter of flour, water, egg, and salt. Pan-fry until crispy. Serve with soy-vinegar dipping sauce.
Common Mistakes
Overwatering. This is the number one killer. Garlic chives like moisture but hate sitting in water. If your container doesn’t drain, you’ll lose the plant. Ask me how I know.
Harvesting too aggressively in year one. Let the plant get established before you start treating it like an all-you-can-eat buffet. Patience pays off.
Ignoring the flowers. If you let garlic chives go to seed freely, they will self-sow everywhere. And I mean everywhere. They’re borderline invasive if left unchecked. Deadhead the flowers unless you want garlic chives taking over your entire garden. (Some people consider this a feature, not a bug.)
Not dividing every few years. After 3-4 years, established clumps get crowded and production drops. Dig them up, divide the clump into sections, and replant. Each section becomes a new productive plant. It’s free garlic chives forever. The ultimate dad move.
Growing in too much shade. They’ll survive in partial shade, but you won’t get the thick, robust leaves you want for cooking. Give them the sunniest spot you have.
Year-Round Growing Indoors
If you want fresh garlic chives in January (and you do, because dumpling season is year-round in this house), bring a container inside before the first frost. Place it in your sunniest window and keep watering. Growth will slow down in winter, but you’ll still get enough for regular cooking.
A small grow light makes a big difference if your natural light is limited. Even a basic clip-on LED grow light running 12-14 hours a day will keep your garlic chives producing through the dark months.
What to Grow Next
If you’ve got the garlic chive bug, here are some natural next steps. Thai basil and shiso are great warm-season companions that love the same sunny conditions. Green onions are another nearly indestructible allium that pairs well in the kitchen. And if you’re feeling ambitious, try growing ginger - it takes longer but the payoff is incredible.
Garlic chives were one of my first real successes in the kitchen garden, and they’re still the plant I recommend most to anyone who wants to grow something they’ll actually cook with. They’re cheap, they’re tough, they come back every year, and they connect you to a whole world of cooking that just tastes better with fresh ingredients from your own pot or plot.
My dad would be proud. He’d also tell me my chives aren’t as good as his. Some things never change.