Growing Galangal at Home: The Ginger Cousin Your Kitchen Is Missing
If you have ever stood in the spice aisle of an Asian grocery store, you have probably walked right past galangal without knowing it. It looks like ginger. It sits next to ginger. But it is absolutely not ginger, and the moment you crack one open and smell that sharp, piney, almost citrusy kick, you will realize your tom kha gai has been missing something your entire cooking life.
Galangal - Alpinia galanga if you want to impress someone at a dinner party - is the backbone of Southeast Asian cuisine. It shows up in Thai curries, Vietnamese soups, Indonesian rendang, and Cambodian kroeung paste. My wife makes a tom kha gai that could bring tears to your eyes, and the first time she used fresh galangal instead of the sad dried slices from the pantry, the difference was like going from a phone speaker to a concert hall. Same song, completely different experience.
The problem is that fresh galangal is not always easy to find. Even the big Asian grocery stores near us in Queens sometimes run out. And the pre-packaged frozen stuff works in a pinch, but it is not the same. So I did what any reasonable plant dad would do - I decided to grow my own.
Why Galangal Is Worth Growing
Let me be honest: galangal is not the easiest kitchen garden project. If you are brand new to growing edibles, I would point you toward green onions or lemongrass first - those are practically foolproof. But if you have a couple of successful grows under your belt and you want to level up, galangal is a fantastic next challenge.
Here is why it is worth the effort. Fresh galangal has a flavor profile that is impossible to replicate with any substitute. People will tell you to just use ginger instead. Those people mean well, but they are wrong. Ginger is warm and spicy and biting. Galangal is sharp and bright with notes of pine, citrus, and black pepper all at once. Swapping one for the other in a recipe is like replacing lemon juice with orange juice - technically the same category, practically a different dish.
Growing your own also saves money in the long run. Fresh galangal runs two to four dollars for a small knob at the store, and you need a decent amount for most recipes. One healthy galangal plant will produce more rhizome than you can use in a year once it gets established.
Plus, it is a genuinely attractive plant. Galangal grows tall, upright stems with long, elegant leaves that look like a cross between ginger and a small banana plant. My kids think it looks like something from a dinosaur movie, which I consider a compliment.
Getting Started: Finding Rhizomes
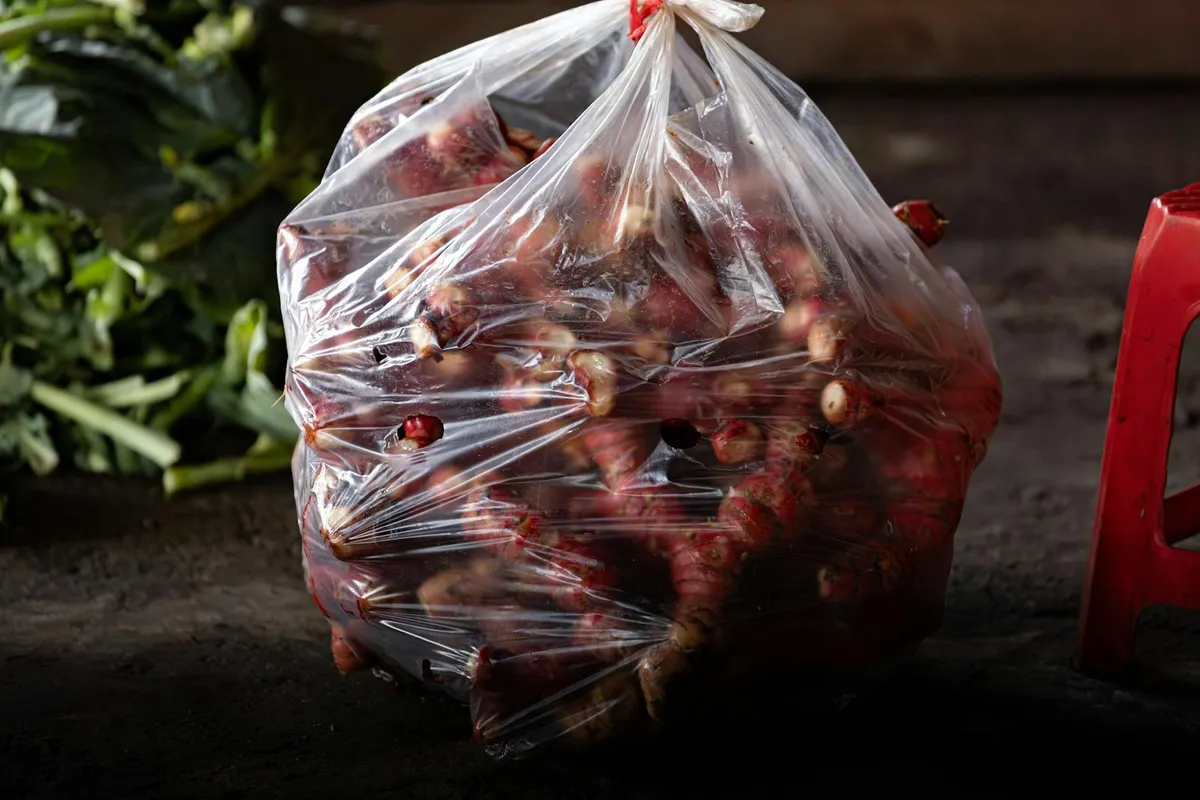
You are not going to find galangal seeds at your local garden center. The easiest way to start is with fresh rhizomes from an Asian grocery store - the same ones you would buy for cooking.
Head to H Mart, 99 Ranch, or your local Southeast Asian market. Look for rhizomes that are firm, plump, and have visible bumps or nubs on the surface. Those bumps are growth points, and they are where your new shoots will emerge. Avoid anything that looks dried out, shriveled, or mushy. Younger, pinkish-tinted pieces tend to sprout more readily than old, woody ones.
Buy more than you think you need. I started with three pieces and only two sprouted, which is pretty normal. Use the non-sprouters for cooking - nothing goes to waste.
If your local stores do not carry fresh galangal, you can order rhizomes online from tropical plant nurseries. Just make sure they are selling live planting stock, not the dried or frozen stuff meant for cooking.
Container Setup
Unless you live in USDA zones 9 through 11, you are going to want to grow galangal in containers. It is a tropical plant from Southeast Asia that has zero tolerance for frost, so for most of us in the US, containers are the way to go. That way you can move it indoors when temperatures drop.
Here is what you need:
Pot size. Go big. A five-gallon pot is the minimum, and bigger is better. Galangal rhizomes spread horizontally, and they need room to roam. A cramped pot means a tiny harvest. I use a ten-gallon fabric grow bag and it has been perfect.
Drainage. This is non-negotiable. Galangal likes moist soil but will rot in standing water faster than you can say “I just watered it yesterday.” Make sure your container has multiple drainage holes.
Soil mix. Use a rich, well-draining potting mix amended with compost. I go with about 60 percent standard potting soil, 30 percent compost, and 10 percent perlite. You want something that holds moisture without getting waterlogged. Think of a well wrung-out sponge - that is the texture you are going for.
Planting
Cut your rhizome into pieces about two to three inches long, making sure each piece has at least one or two growth points (those bumps I mentioned earlier). Let the cut ends dry for a day or two - this helps prevent rot, similar to how you would cure a cut potato before planting.
Bury each piece horizontally, about one to two inches below the soil surface, with the growth points facing up. Water thoroughly after planting and put the container somewhere warm.
Here is the hardest part: waiting. Galangal is slow to sprout. It can take anywhere from two to six weeks for shoots to appear, depending on temperature. I spent the first three weeks convinced I had just buried perfectly good cooking ingredients for no reason. Then one morning, a tiny reddish shoot poked through the soil like it had been there all along, and I may have done a small victory dance in front of my confused four-year-old.
If you have a seedling heat mat, this is a great time to use it. Keeping the soil around 75 to 85 degrees Fahrenheit dramatically speeds up germination.
Light and Temperature
Galangal wants warmth and bright light, but it is more flexible than you might expect.
Light. Give it at least six hours of bright, indirect light. A south-facing window works well indoors. Outdoors in summer, it thrives in partial shade to full sun. I keep mine on our east-facing balcony from May through September, where it gets morning sun and afternoon shade, and it seems very happy with that arrangement.
Temperature. The sweet spot is 68 to 86 degrees Fahrenheit. Galangal will not grow much below 60 degrees and anything below 50 degrees can cause real damage. In my experience, regular room temperature in a New York City apartment is fine during winter - just keep it away from drafty windows and cold exterior walls.
Watering and Humidity
Galangal comes from the tropics, so it likes things moist and humid. During the growing season - spring through fall - water whenever the top inch of soil feels dry. In practice, for me, that means every two to three days in summer and once a week in winter.
The plant goes semi-dormant in winter. The leaves stay green but growth slows way down. Reduce watering during this period and let the top inch or so of soil dry out between waterings. Overwatering a dormant galangal is the fastest way to cause root rot.
Humidity is where apartment growers sometimes struggle. Galangal prefers 50 to 70 percent relative humidity. If your home is dry - and if you have forced-air heating in winter, it probably is - you have a few options. Group it with other tropical plants to create a little humidity microclimate. Set the pot on a tray of pebbles and water. Or just run a small humidifier nearby. My galangal shares a corner with a calathea and a fern, and they all seem to benefit from the arrangement.
Feeding
Galangal is a moderate feeder. During the active growing season (spring and summer), fertilize once a month with a balanced liquid fertilizer diluted to half strength. I use a generic 10-10-10 and it does the job. You could also side-dress with compost every couple of months if you prefer the organic route.
Stop fertilizing in fall and winter when growth slows down. The plant does not need it, and excess fertilizer sitting in cool, moist soil is a recipe for root problems.
Common Problems
Slow growth. This is the number one complaint I hear, and honestly, galangal is just a slow plant. It takes eight to twelve months to produce a harvestable rhizome. If you are used to the instant gratification of growing lettuce or radishes, you will need to recalibrate your expectations. Think of it like a long-term investment.
Yellowing leaves. Usually overwatering or poor drainage. Check your soil moisture before watering and make sure excess water can drain freely. If the soil smells sour or swampy, you may already have root rot starting.
Brown leaf tips. Almost always a humidity issue. Increase humidity around the plant using the methods I described above. Brown tips will not heal, but new growth should come in healthy.
No sprouting. If your rhizome has not sprouted after six weeks, it might be a dud. Try again with fresher rhizomes and make sure the soil is consistently warm. Cold soil is the most common reason for failed sprouting.
Pests. Galangal is relatively pest-resistant, which is a nice bonus. Spider mites can occasionally show up in dry indoor conditions, but good humidity management usually prevents them. If you do spot mites, a neem oil spray takes care of them.
Harvesting
This is the payoff, and you will need patience to get here. Galangal rhizomes are typically ready for a first harvest about ten to twelve months after planting. You can wait up to eighteen months for larger, more flavorful rhizomes - the longer you wait, the more intense the flavor.
To harvest, gently dig around the edges of the container and snap off pieces of rhizome from the outer edges of the clump. Leave the center mass and at least two-thirds of the rhizome intact so the plant can keep growing. Think of it like taking interest from a savings account without touching the principal.
Fresh galangal stores well in the fridge for two to three weeks wrapped in a paper towel inside a zip-top bag. You can also slice it and freeze it for several months. I keep a stash of frozen slices ready to go for whenever tom kha night rolls around.
Cooking With Your Harvest
If you have never cooked with fresh galangal before, you are in for a treat. Here are the essentials.
Galangal is much harder and woodier than ginger. You cannot grate it the same way - it will fight you. Instead, slice it into thin coins for soups and curries (fish them out before serving, like bay leaves), or pound it in a mortar and pestle for curry pastes.
The classic introduction is tom kha gai - Thai coconut chicken soup. Simmer sliced galangal in coconut milk with lemongrass, makrut lime leaves, and chicken, and you will understand immediately why people grow this plant. It is one of those dishes where the galangal does about 40 percent of the flavor work.
Is It Worth the Wait?
I will not pretend galangal is a quick win. It takes patience, decent light, consistent warmth, and almost a year before you see any return on your investment. If you are looking for instant kitchen garden gratification, grow some green onions.
But if you cook Southeast Asian food regularly and you want to take your dishes from good to genuinely authentic, there is no substitute for fresh galangal pulled from your own pot. The first time you slice into a rhizome you grew yourself and that sharp, piney, electric aroma fills your kitchen - you will understand why I gave up precious balcony real estate for this plant.
My dad would probably say I am overthinking it. He grew everything he needed for Chinese cooking in a patch of dirt behind the garage without any fuss. No fabric grow bags, no humidity trays, no soil amendments. Just dirt, water, and stubbornness. But I like to think the overthinking is part of the fun. And at least my galangal has never had to compete with a broken lawn mower for sunlight.