Growing Daikon Radish at Home: Big Roots, Big Flavor
There are certain vegetables that just live in your memory if you grew up in a Chinese household. For me, daikon is one of them. My mom used it in everything - braised with pork belly until it was translucent and silky, grated into dipping sauces, shredded raw into salads, and simmered into soups that warmed you from the inside on cold New York winters. The Chinese name, luobo, was one of the first food words I learned.
For years I bought daikon at the Asian grocery store without thinking much about it. Then one fall I tossed some seeds into a raised bed on a whim, and eight weeks later I was pulling fat white roots out of the ground like some kind of vegetable magician. My kids thought it was hilarious. My dad said the ones from the garden tasted better than anything from the store.
He was right.
What Exactly Is Daikon?
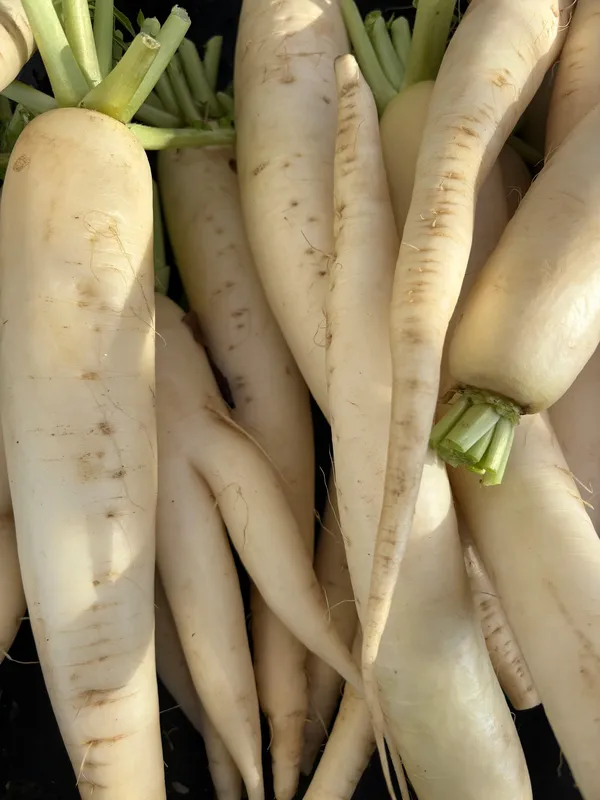
Daikon (Raphanus sativus var. longipinnatus) literally translates from Japanese as “big root,” and that name delivers. These radishes can grow anywhere from 6 inches to over 18 inches long, depending on the variety. Unlike the little red salad radishes most Americans are familiar with, daikon is mild, slightly sweet, and incredibly versatile in the kitchen.
Every Asian cuisine has its own version. In China, we call it luobo and braise it, stir-fry it, or stuff it into turnip cakes (luo bo gao) for Lunar New Year. In Korea, it shows up as kkakdugi (cubed radish kimchi) and in soups. In Japan, it is grated fresh alongside grilled fish or simmered in oden. Vietnamese cuisine pickles it with carrots for banh mi sandwiches.
The point is, if you cook any kind of Asian food at home, having fresh daikon in the garden is a game-changer.
Why Grow Your Own?
Store-bought daikon is fine, but it is often been sitting around for a while and can taste a bit flat. Freshly harvested daikon has a sweetness and crunch that you just do not get from a root that has been in cold storage for weeks.
Plus, daikon is one of the easiest vegetables to grow. It is fast (ready in 40 to 70 days), forgiving, and does not need a lot of fussing. If you have ever grown regular radishes, you already know 90% of what you need. Daikon is just bigger.
And here is a bonus your dad would appreciate - daikon greens are edible and delicious. Stir-fry them with garlic and a splash of soy sauce, or add them to miso soup. Zero waste.
When to Plant
Timing matters more than almost anything else with daikon. This is a cool-weather crop, and planting at the wrong time is the number one reason people fail with it.
Fall planting is best. Sow seeds about 8 to 10 weeks before your first expected frost. For most of the Northeast, that means late August through mid-September. The cooler temperatures help the roots develop that sweet, mild flavor instead of turning hot and pithy.
Spring planting works too, but it is trickier. You need to get seeds in the ground as soon as the soil can be worked in early spring, because daikon will bolt (send up flowers and stop growing the root) once temperatures consistently hit the 80s. If your springs are short and hot, stick with fall.
In warmer climates (zones 9-10), you can grow daikon through the winter months. Lucky you.
Choosing a Variety
Not all daikon are created equal. Here are a few good ones for home gardens:
Miyashige is the classic long white daikon you see at Asian grocery stores. It grows 16 to 18 inches long and has that mild, versatile flavor perfect for cooking. This is my go-to.
April Cross is a hybrid that is more bolt-resistant, making it a solid choice for spring planting. It tops out around 12 inches and is very uniform.
Watermelon Radish (technically a type of daikon) has a green exterior and stunning pink-red interior. It is gorgeous in salads and a fun one to grow with kids. My daughter calls them “surprise radishes.”
Korean Mu is shorter and stouter than Japanese daikon, with denser flesh that holds up beautifully in kimchi and soups. If you make a lot of Korean food, this is your variety.
Soil Prep Is Everything
Here is where I messed up my first time. I planted daikon in regular garden soil that had not been loosened deeply enough. The roots hit a hard layer about six inches down and forked into weird little legs. They tasted fine but looked like something from a science experiment.
Daikon needs deep, loose, well-drained soil. You are growing a root that wants to dive 12 to 18 inches straight down, so the soil needs to cooperate.
For in-ground beds: Loosen the soil at least 12 to 14 inches deep. Remove any rocks or debris. Mix in some compost to improve drainage and add nutrients. Aim for a slightly acidic to neutral pH (6.0 to 7.0).
For raised beds: This is actually the easiest option. Fill with a loose mix of garden soil, compost, and perlite. Make sure the bed is at least 12 inches deep - 18 inches is even better.
For containers: Yes, you can grow daikon in pots. Use a container at least 12 inches deep and 10 inches wide per plant. A fabric grow bag works great because the roots will not circle. Use a light, well-draining potting mix.
Planting
Daikon does not transplant well. Those long taproots do not like being disturbed once they start growing, so always direct sow.
Sow seeds about half an inch deep and 2 to 3 inches apart. Once seedlings have a few true leaves, thin them to 4 to 6 inches apart. I know thinning feels wasteful, but crowded daikon will not develop properly. The good news - those thinnings are edible. Toss them in a salad.
If you are planting in rows, space rows about 12 inches apart to give the leafy tops room to spread.
Watering
Consistent moisture is the key word here. Daikon needs about an inch of water per week. The soil should stay evenly moist but never waterlogged.
Inconsistent watering is what causes cracking. When daikon goes through a dry spell followed by a big drink, the root swells too fast and splits. It is still edible but does not store as well.
I water my daikon every 2 to 3 days during dry stretches, always at the base of the plants rather than overhead. A layer of mulch (straw or shredded leaves) helps keep moisture even between waterings.
Sunlight and Temperature
Full sun is ideal - 6 to 8 hours per day. In hotter climates, some afternoon shade helps prevent bolting and keeps the roots from getting too spicy.
Daikon grows best when daytime temperatures are between 50 and 65 degrees Fahrenheit. It can handle light frost, which actually sweetens the flavor as the plant converts starches to sugars to protect itself. Just do not let them sit through a hard freeze.
Fertilizing
Daikon is not a heavy feeder, but it does appreciate some help. Work a balanced organic fertilizer into the soil before planting. Avoid high-nitrogen fertilizers once the plants are growing - too much nitrogen gives you beautiful leafy tops and skinny, disappointing roots.
A side dressing of compost about three weeks after planting is usually all you need. Think of it like seasoning - a little goes a long way.
Common Problems and How to Fix Them
Forked or misshapen roots usually mean the soil was too rocky or compacted. Loosen the soil deeper next time, and remove any obstacles before planting.
Bolting (flowering before the root matures) happens when temperatures get too warm or day length increases too quickly. Stick to fall planting if this is a recurring issue.
Cracked roots come from uneven watering. Mulch and water consistently.
Flea beetles love brassicas, and daikon is no exception. You will see tiny holes in the leaves. Row covers are the easiest organic solution. Neem oil spray can help too.
Cabbage worms and loopers can shred the foliage. Check the undersides of leaves for eggs and pick off caterpillars by hand, or use Bt (Bacillus thuringiensis) spray.
Black root rot is a fungal issue that shows up in overly wet conditions. Good drainage and crop rotation are your best prevention.
Harvesting
Most daikon varieties are ready to harvest 40 to 70 days after planting, depending on the variety and growing conditions. You will see the top of the root pushing up above the soil line - that is your signal it is getting close.
Gently loosen the soil around the root with a garden fork before pulling. If you just yank it straight up, you risk snapping the root. Ask me how I know.
Do not leave daikon in the ground too long past maturity, especially in warm weather. Overmature roots get woody and hollow inside - not what you want.
Storing Your Harvest
Fresh daikon stores beautifully. Cut off the greens (they pull moisture from the root), wrap the roots in a damp paper towel, and stash them in the fridge. They will keep for 2 to 3 weeks easily.
For longer storage, you can pickle them, make lo bak go (turnip cake) and freeze it, or shred and dry them for use in soups later. My mom used to make dried daikon strips that she would rehydrate and braise - they had this amazing concentrated flavor.
What to Cook First
If you have never cooked with daikon before, start simple. Peel it, cut it into chunks, and braise it with soy sauce, a little sugar, and star anise until tender. That is basically how my mom made it, and it is comfort food in its purest form.
Once you are hooked, try grating it fresh as a condiment, adding it to your next pot of soup, or making quick pickles with rice vinegar and a pinch of sugar. The possibilities are honestly endless.
Growing daikon connects you to a vegetable that has been central to Asian cooking for centuries. And pulling a fat, perfect white root out of your own soil? That never gets old. My dad still brags about the ones from my garden, and honestly, that might be the best part.