Growing a Curry Leaf Plant at Home: Fresh Leaves Whenever You Need Them
If you have ever cooked South Indian food - a good dal, a proper rasam, or a batch of coconut chutney - you know that dried curry leaves from a jar are not the same thing. Not even close. Fresh curry leaves have this incredible fragrance that hits you the second you drop them into hot oil. It is nutty, citrusy, a little smoky. Dried curry leaves are basically decorative confetti by comparison.
The problem is that fresh curry leaves are hard to find. Your regular grocery store does not carry them. Even well-stocked Asian markets only have them sometimes, and they are often wilted by the time you get them home.
The solution? Grow your own. A single curry leaf plant (Murraya koenigii) will keep you stocked all year. And before you say “I kill everything” - this plant actually wants to live. It just has a few quirks you need to understand.
What Exactly Is a Curry Leaf Plant?
First, let’s clear up a common confusion. The curry leaf plant is not the same thing as a “curry plant” (Helichrysum italicum), which is a Mediterranean herb that smells vaguely curry-like but has no place in actual curry. Curry leaf plant is a small tropical tree native to India and Sri Lanka. In the wild, it can reach 15 to 20 feet tall, but grown in a container indoors, it stays a very manageable 2 to 4 feet.
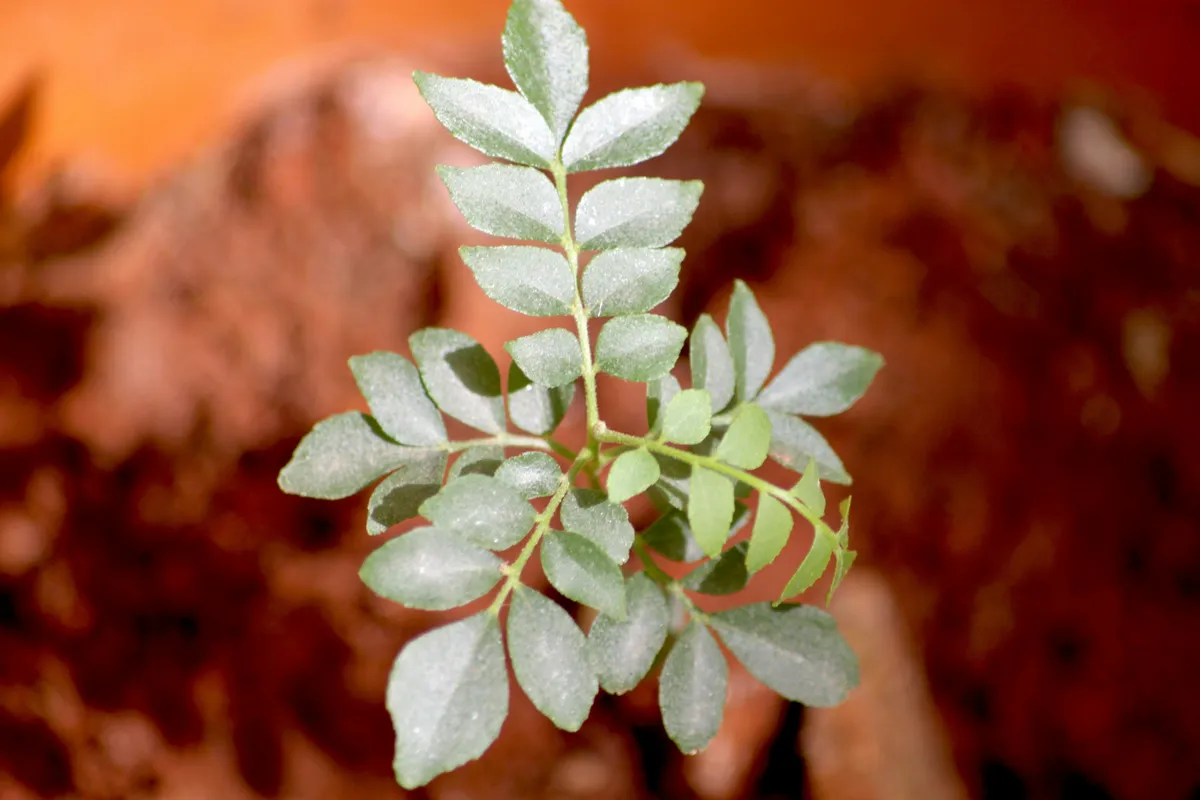
The leaves are small, pointed, and grow in pairs along a central stem - kind of like an ash tree in miniature. They are glossy and deep green when happy, and they smell amazing when you rub them between your fingers.
Botanically, it belongs to the citrus family (Rutaceae), which explains why the leaves have that subtle citrus undertone. In many South Asian languages, the plant goes by “kadi patta” in Hindi, “kariveppilai” in Tamil, or “curry patta” in Urdu. If you have eaten South Indian, Sri Lankan, or Malaysian food, you have tasted these leaves even if you did not know it.
Where to Get a Plant
This is honestly the hardest part of the whole process. You have a few options.
Buy a live plant online. Specialty nurseries like Logees ship curry leaf plants year-round. Expect to pay $15 to $30 for a small starter plant. This is the fastest route to fresh leaves.
Check Indian grocery stores. Some carry live plants, especially in spring and summer. Ask the staff - they may stock them seasonally or know someone who sells them.
Grow from seed. This works, but it takes patience. Fresh curry leaf seeds (the key word is fresh - they lose viability fast) need to be planted within a week or two of harvest. Germination takes 1 to 3 weeks, and you are looking at several months before the plant is big enough to harvest from. If someone you know has a fruiting curry leaf tree, ask for fresh berries. Remove the outer fruit and plant the seed immediately.
Ask around your community. Curry leaf plants sucker from the base, and experienced growers often have extra starts to share. Indian gardening Facebook groups and local community garden networks are gold mines for this.
My recommendation for most people: just buy a plant online. You will be harvesting leaves within a few months instead of waiting a year or more from seed.
Light: The Non-Negotiable
Curry leaf plants need a lot of light. This is not a “it does okay in medium light” situation. We are talking full sun - at least 6 hours of direct sunlight per day, and more is better.
Outdoors: If you live in USDA zones 9 through 12, you can grow curry leaf plants outside year-round. Lucky you. Everyone else will need to bring them inside for winter.
Indoors: Place your plant right against a south-facing window. Not near it - against it. If your south-facing window gets obstructed by buildings or trees, consider supplementing with a grow light. A basic LED grow light running 10 to 12 hours a day makes a huge difference.
In my apartment in New York, south-facing windows are prime real estate. The curry leaf plant gets first dibs, right ahead of my monstera. Sorry, monstera.
Soil and Potting
Curry leaf plants want well-draining soil that is slightly acidic (pH 5.5 to 6.5). Here is what works:
A simple mix: Two parts regular potting soil, one part perlite. That is it. You do not need anything exotic.
Container choice: Start with a pot that is 1 to 2 gallons with drainage holes. Do not go bigger than that right away - curry leaf plants actually grow better when slightly root-bound. When roots start circling the bottom and growth slows down, move up one pot size. A common mistake is putting a small plant into a huge pot, which leads to the soil staying wet too long.
The drainage hole thing: I cannot stress this enough. No drainage holes = dead plant. Curry leaf roots rot fast in standing water. If you love a decorative pot that has no holes, use it as a cachepot (fancy word for “outer pot”) and keep the actual plant in a plain nursery pot inside it.
Watering: The Goldilocks Zone
Watering a curry leaf plant is about finding the balance between moist and soggy.
During the growing season (spring through fall): Water when the top inch of soil feels dry. Stick your finger in. If it is dry past your first knuckle, water thoroughly until it drains from the bottom. Then do not water again until it dries out.
In winter: Cut way back. Water every 3 to 4 weeks, just enough to keep the roots from completely drying out. The plant is dormant and barely drinking.
Signs you are overwatering: Yellowing leaves starting from the bottom, mushy stems, that swampy smell from the soil. If you catch it early, let the soil dry out completely before watering again. If root rot has set in, you may need to unpot, trim rotten roots, and repot in fresh dry soil.
Signs you are underwatering: Crispy leaf edges, drooping leaves that feel dry (not limp), leaf drop. Give it a good soak and it should bounce back within a day.
One thing I have learned the hard way: curry leaf plants do not like cold water straight from the tap in winter. Room temperature water is much kinder to their tropical roots.
Feeding Your Plant
Curry leaf plants are fairly hungry, especially during the growing season.
Spring through fall: Feed every two weeks with a balanced liquid fertilizer diluted to half strength. Some growers swear by fish emulsion or seaweed extract for extra leafy growth - the plant responds well to nitrogen-rich fertilizers since you are growing it for the leaves, not the flowers.
Iron supplement: If leaves start turning yellow with green veins (interveinal chlorosis), the plant may need iron. A chelated iron supplement or iron sulfate added to the soil once a month during growing season usually fixes this.
Winter: Stop fertilizing entirely. The plant is resting and does not need it.
A trick I learned: Some experienced curry leaf growers add a small amount of buttermilk diluted in water (about a tablespoon per gallon) once a month during the growing season. The idea is that the lactic acid helps maintain soil acidity. Does it work? Honestly, I am not 100% sure of the science, but the plant seems to like it, and it costs nothing to try.
The Winter Dormancy Thing
If you live anywhere with real winters, your curry leaf plant is going to do something alarming around November: it will start dropping leaves. Maybe all of them.
Do not panic. This is normal.
Curry leaf plants go dormant when temperatures drop and daylight decreases. The leaves turn yellow, then fall off, and you are left staring at a bunch of bare sticks wondering if you killed it. You probably did not.
What to do during dormancy:
- Move the plant indoors before nighttime temperatures drop below 40 degrees Fahrenheit
- Place it near the brightest window you have
- Reduce watering to once every 3 to 4 weeks
- Stop fertilizing
- Do not repot during dormancy
- Keep it away from heating vents - the dry hot air is rough on it
What not to do:
- Do not throw it away thinking it is dead
- Do not overwater trying to “revive” it
- Do not put it in a dark closet (some light is still needed, even during dormancy)
Come spring, when temperatures warm and daylight increases, your plant will push out new growth. Those bare sticks will sprout bright green leaves and you will feel like a genius. The first spring flush of new curry leaves is one of the most satisfying things in kitchen gardening.
Pests to Watch For
Indoors, curry leaf plants can attract a few unwelcome visitors.
Spider mites: Tiny dots on the undersides of leaves, fine webbing. These love the dry indoor air of winter. Wipe leaves with a damp cloth regularly and mist the plant to discourage them.
Scale insects: Brown bumps on stems that look like they are part of the plant but are not. Scrape them off with your fingernail or a cotton swab dipped in rubbing alcohol.
Aphids: Soft-bodied green or black insects clustering on new growth. A strong spray of water knocks them off, or use insecticidal soap.
Whiteflies: Tiny white flying insects that scatter when you shake the plant. Yellow sticky traps near the plant help, and neem oil spray works for heavier infestations.
The best defense is a healthy plant with good air circulation. Check your plant weekly - catching pests early is way easier than dealing with an infestation.
Harvesting and Using Fresh Curry Leaves
Once your plant has enough foliage (usually after a few months of good growth), you can start harvesting. Pick whole sprigs rather than individual leaves - this encourages the plant to branch out and get bushier.
Fresh is best. Use the leaves the same day you pick them for maximum flavor. Drop them into hot oil or ghee at the start of cooking and let them crackle and sizzle until fragrant. This is the base of a good tadka (tempering), and it is the foundation of countless South Indian dishes.
Storing extras: Wrap fresh leaves in a damp paper towel, put them in a zip-lock bag, and refrigerate. They will stay good for about a week. You can also freeze whole sprigs in a freezer bag - they lose a little aroma but work perfectly in cooked dishes.
Beyond Indian food: Curry leaves are showing up in Southeast Asian cooking, cocktails, and even infused oils. Try frying a sprig until crispy and using it as a garnish - they shatter like tiny flavor bombs.
A full-grown plant can give you more leaves than you can use, which means you get to be the neighbor who shows up with bags of fresh curry leaves. In my experience, that makes you very popular.
Common Mistakes and How to Avoid Them
Too little light. This is the number one killer. If your plant is leggy and pale, it needs more sun. Move it to a brighter spot or add a grow light.
Overwatering in winter. A dormant plant in wet soil is a dead plant. Ease up on the watering when growth slows down.
Too big a pot too soon. Resist the urge to give your plant room to grow. Slightly root-bound is actually better for curry leaf plants.
Ignoring pests. Check weekly. It takes five minutes and saves you from losing the whole plant to spider mites you did not notice.
Giving up during dormancy. The bare-stick phase looks scary. It is not. Be patient.
What to Try Next
If you enjoy growing curry leaf, you might also want to try growing lemongrass (even easier), Thai basil (a summer favorite), or even a Meyer lemon tree for the full citrus-family experience. Between those four plants, you can flavor most of the dishes from a South and Southeast Asian kitchen without ever going to the store.
Growing your own curry leaves is one of those small things that makes a huge difference in your cooking. The first time you crack fresh leaves into hot oil and that fragrance fills your kitchen, you will wonder why you did not start growing this plant years ago.
Trust me on this one.